Description of operations by screen (Multiple sheet combination)
This section describes the detailed operations for the "Multiple sheet combination" type of of the "Create app from Excel file" function for each screen.
See Description of operations by screen (list / single sheet) for a list and single sheet types.
See Tutorial for a sample to try.
Excel Preparation
To create an application from Excel in a "Multiple sheet combination" format, you must prepare an Excel file containing the following three items.
1. "Sheet for layout" that becomes the application screen
2. "Sheet for data" that converts data from the application screen into a table format that can be stored in a database
3. "Reference setup by VLOOKUP" connecting sheets 1 and 2
See
Application Creation Guide for Multiple Sheet Combination Type for details.Create New App
All types have the same screen. For operating instructions, please refer to Description of operations by screen (list / single sheet) .
Select an import sheet
In this screen, select a sheet from the uploaded Excel file to be used as the application screen.Click the "OK" button after selected the sheet.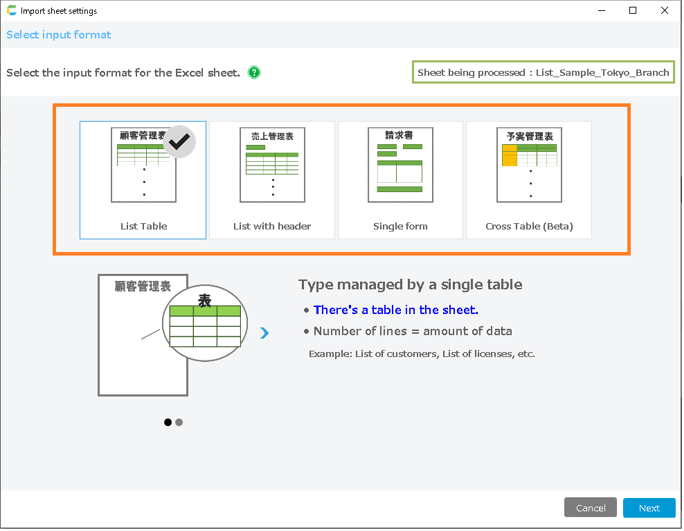
Select app type screen
In this screen, the app type is selected.The usage and screen structure of the application will change depending on the type you select here.This page describes the settings screen when "Multiple Sheet Combination" is selected.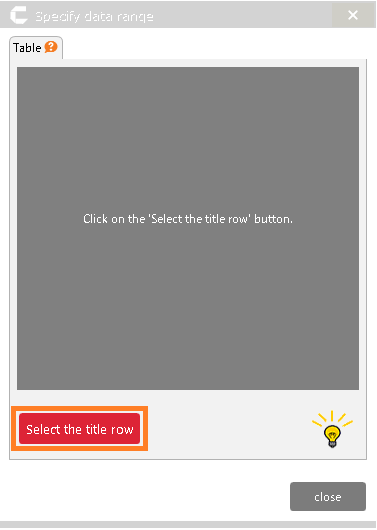
Tip
For information about app types, see Confirm application type.For information on how to use each app type, see How to use automatically created applications.
Data Access Settings
This screen is used to configure the database settings for the reference sheet.The database setting is a setting to convert a sheet that is "Referenced by VLOOKUP" from a sheet for layout into a database table.When all sheets have been "Set up", the "Next" button will appear.Click the "Next" button when you have completed setting up the sheets you want to use as a database.
- Set up the sheet
Click the "Set" button of the reference sheet you want to use as a database, and the "Sheet Import Settings" screen will open.The sheet import setup screen includes the steps of "Specify Data Range", "Specify Input Items", "Setting for table" and when all steps are completed, the sheet setup is complete.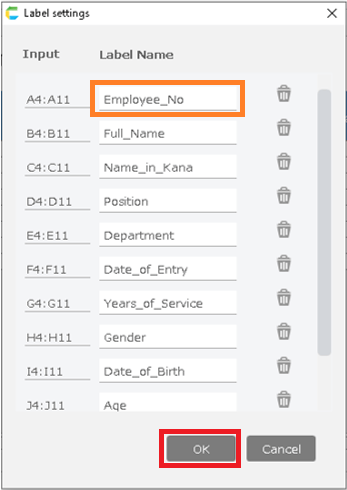
- Exclude sheet
If you see a reference sheet that you do not want in the database, you can click the "Trash" icon to exclude the setting.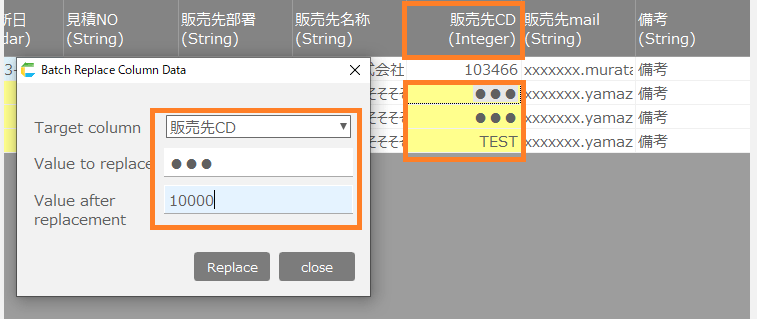
Sheet import settings screen
This screen is used to set up the sheet to be a table in the database.The setup has three steps: "Specify data range" "Specify input items" "Set table".
1. Designation of data range
This step specifies the range of the table and the cells in the header information section of the table.From the table range and cell information specified here, the application’s database is created and the database is accessed.See How to specify [List] , How to specify [List with Header] for information on specifying data ranges.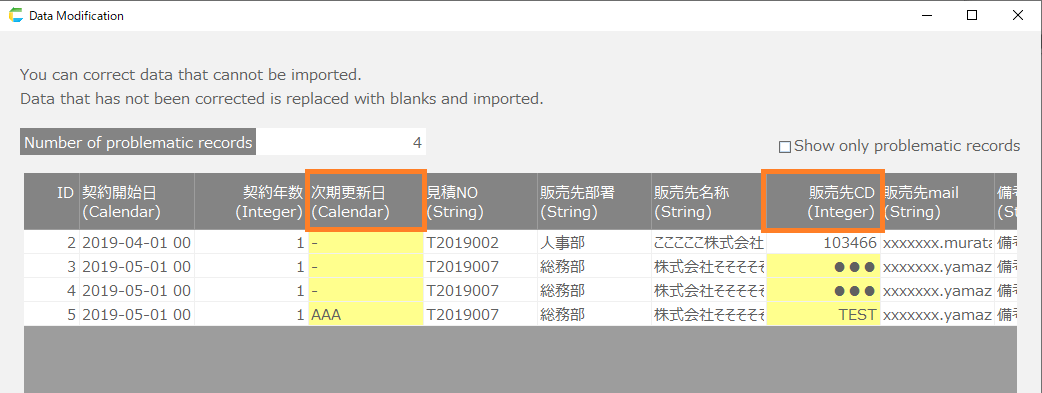
2. Specify input items
This step allows for detailed configuration of database items.In the advanced settings, you can specify input rule settings and whether or not to create a search box.
- [Header area]
Item sort button Sort the header items. The items in the application header search screen will be in the order specified here. Input cell Specify input cell of header item. Label Specify table label name of header item. Input method Specify the data input method. The method can be specified from "Cell" (cell input) or "List" (pull-down list input). Set Specify a list value for the pull-down list. This setting is available only when the input method in the previous section is set to "List". Input format Specify the input format for header items. This setting will be the data type of the table to be created. Input check Set the input check for this item. Search item You can specify this item as a search item in the header search list screen. See also
Click About specifying input checks for more information on input checking.
- [Table area]
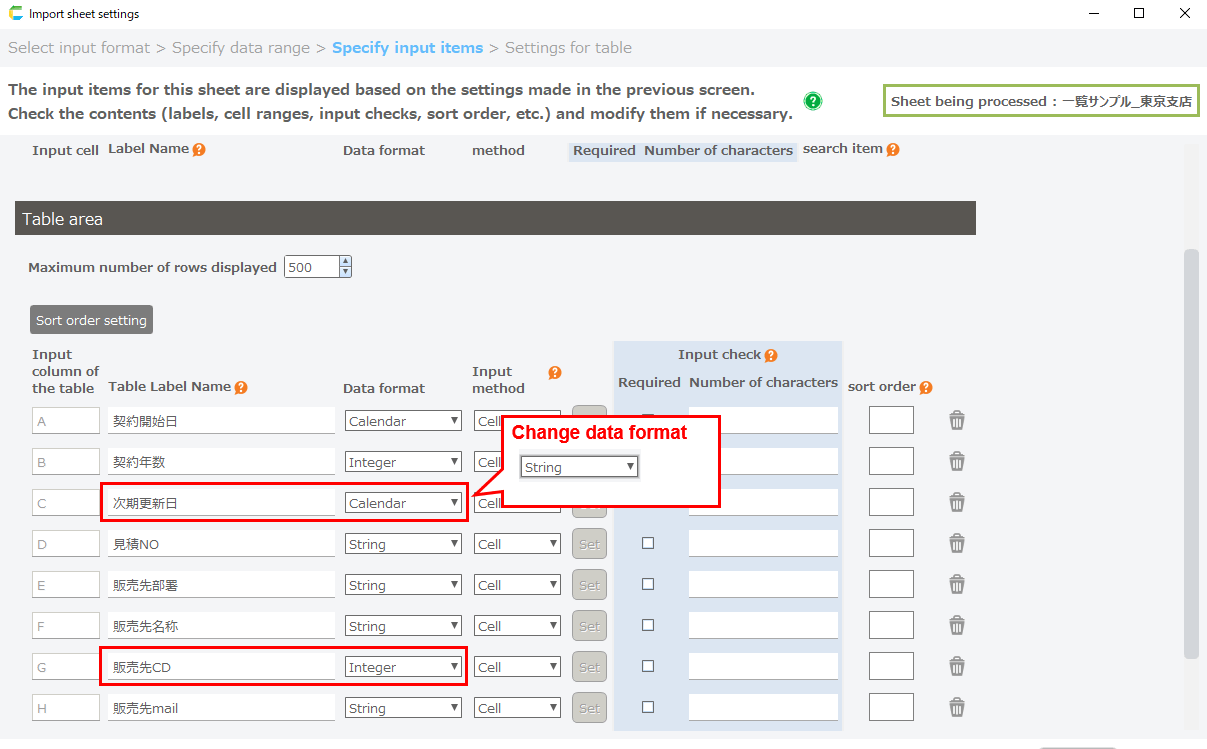
Maximum number of row Specify the maximum number of rows of data. Set this according to the number of data. Note that if it is too large, the display will be slow. Sort order setting button Set the item by which the list will be sorted.(For multi-sheet combinations, if there are multiple records matching the same criteria, the first one in this sort order is retrieved.) Input column Specify input cell. Label Specify table label name. Input format Specify the input format for table items. This setting will be the data type of the table to be created. Input method Specify the data input method. The method can be specified from "Cell" (cell input) or "List" (pull-down list input). Set Specify a list value for the pull-down list. This setting is available only when the input method in the previous section is set to "List". Input check Set the input check for this item. Sort order When the application is launched, the data will be displayed in the sort order set for this item. See also
Click About specifying input checks for more information on input checking.
Tip
When the input method is set to list, only the data in the list can be entered from the application screen.
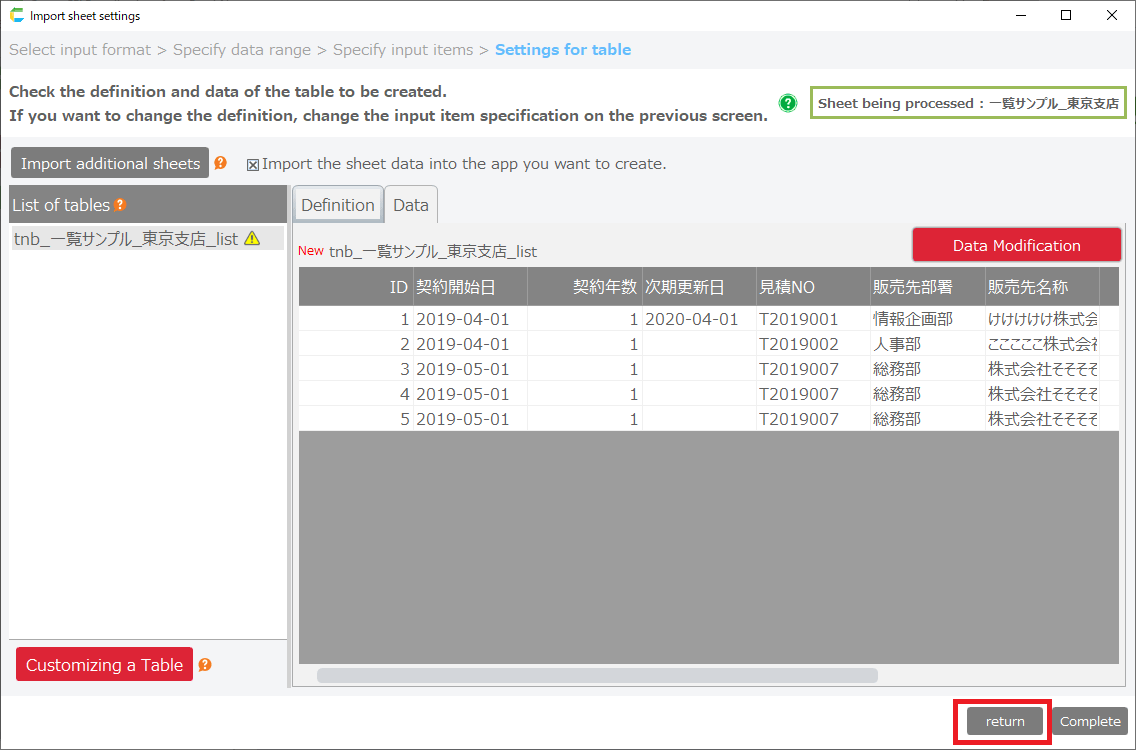
3. Table Setup
In this step, you can check and set details of the tables to be used in the application.
- [Check the tables used in the application.]
This table is used in the application.Double-click the table name to see the contents of the table that will be created.Create a new table in the CELF database with the contents of "Definition" and "Data" displayed on this screen.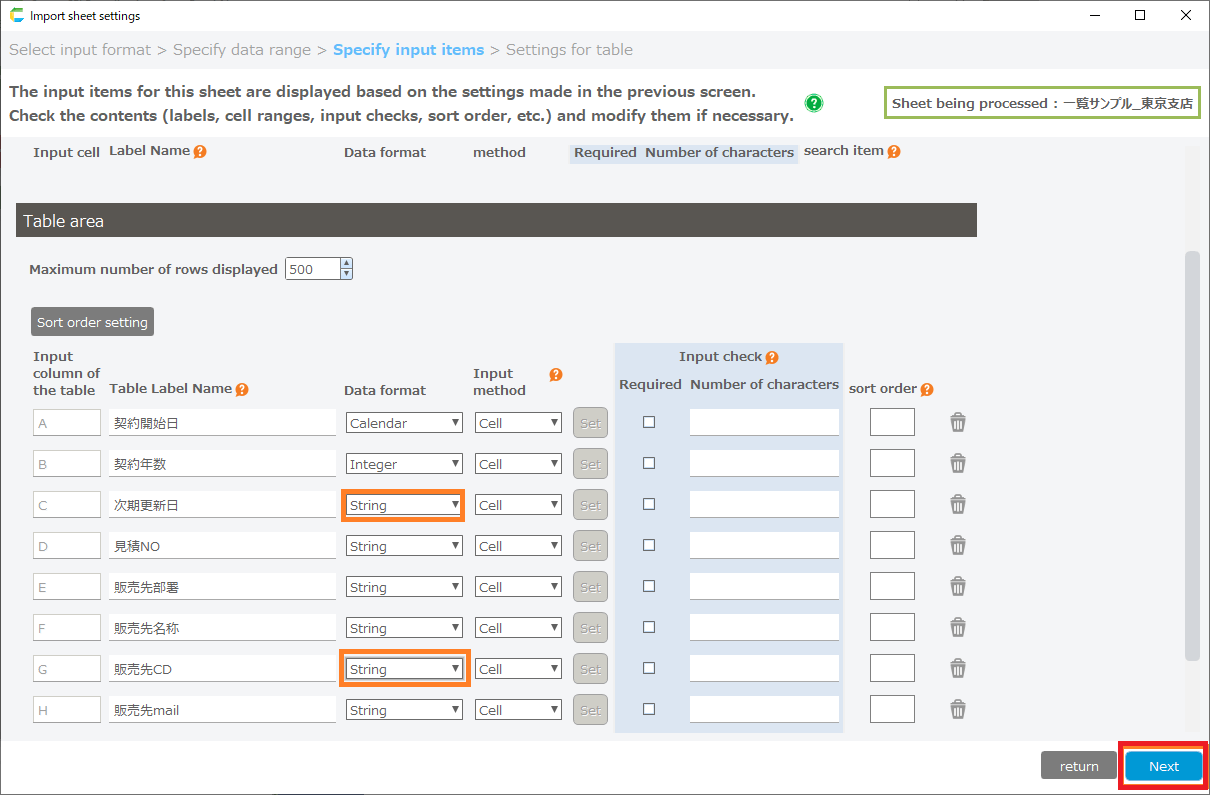
Tip
Create a new table in the CELF database with the contents of "Definition" and "Data" displayed on this screen.The table used by the application can also be switched to another table using "Switch" from "Customize Table".
- [Import additional sheet]
Click "Import additional sheet" button to open Add Sheet dialog.In the "Add Sheet"dialog, you can add data from a different Excel sheet than the one you have loaded.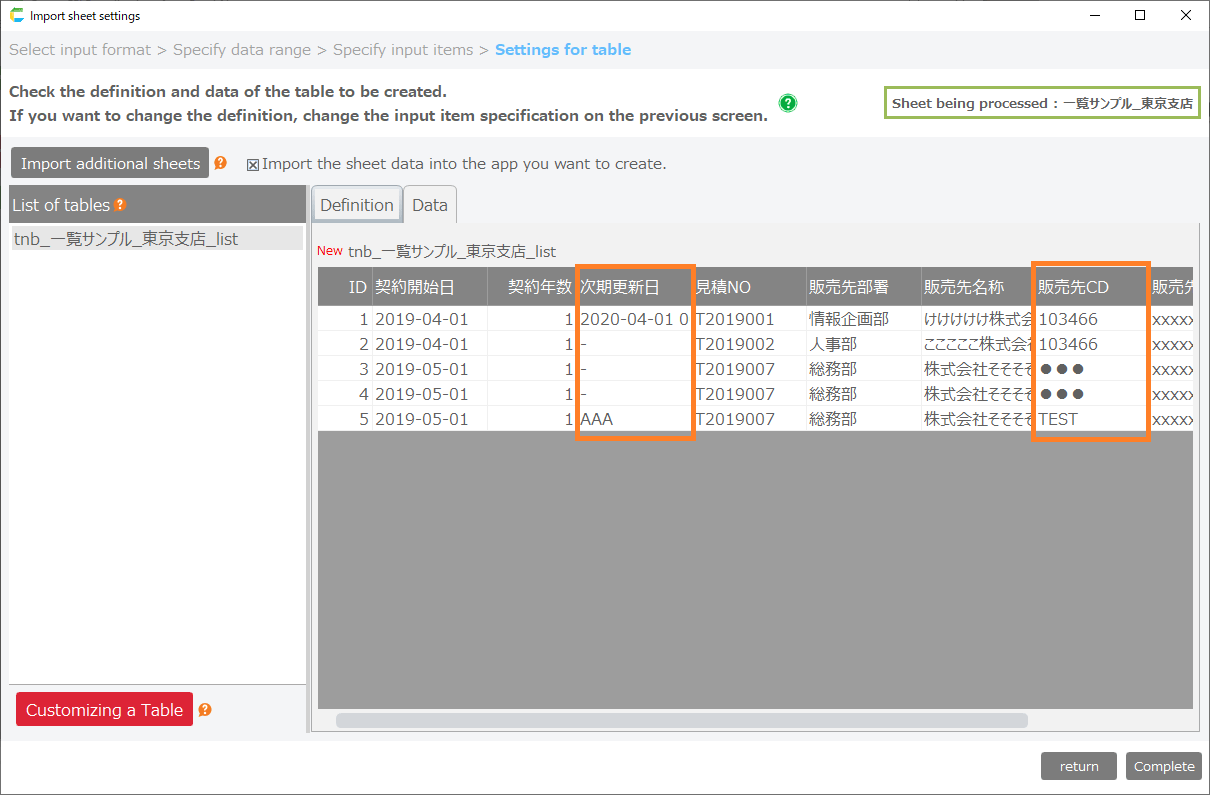 "Add Sheet" dialog
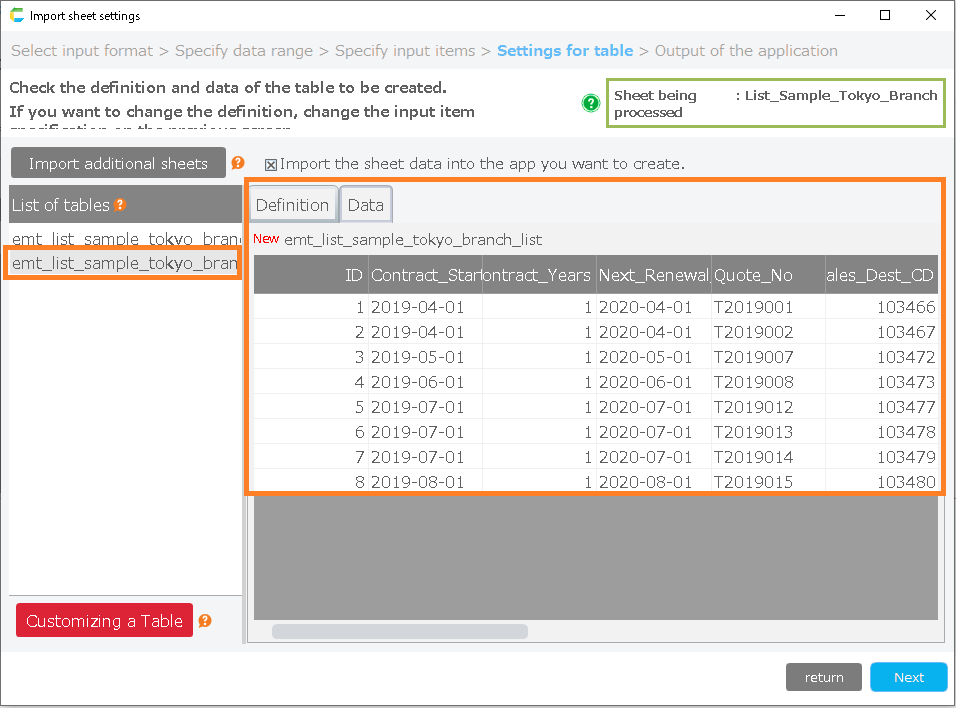
Attention
There is a limit to the number of data that can be imported.Make sure that the number of rows of data, including additional files, is less than 50,000.If the number exceeds 50,000, an error message will be displayed.
- [Set initial data to be registered in the table]
If you check the "Import the sheet data into the app you want to create" checkbox, the app will be created with the imported sheet data registered.Unchecking the checkbox creates the table with empty data.
Attention
If there is data in the loaded sheet that cannot be imported as initial data, a warning dialog box will appear.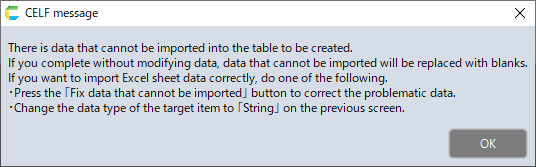 If you complete without correcting the data that cannot be imported, the data that cannot be imported will be replaced by blanks and imported.If you want to import Excel sheet data correctly, do one of the following.1)Correct problematic data on the 'Correct data that cannot be imported' screen.2)Change the data type of the target item to 'string' on the previous screen.For details on each operation, see below.
- [Fixing data that cannot be imported into tables]
If there is data in the loaded sheet that cannot be imported as initial data, a warning dialog box will appear.Clicking the button opens the 'Correct data that cannot be imported' window, where you can correct the data.For more information on the screen, see 'Screen for Modifying Data that Cannot be Imported'.
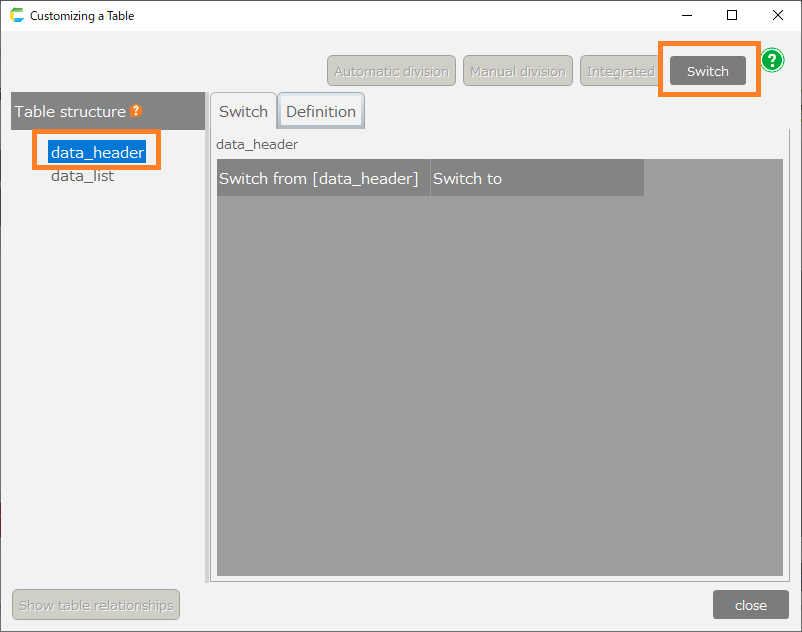
- [Switch table]
Click the "Customize Table" button to open the "Customize Table" window.This screen allows you to switch the table used by the application with the CELF table already created.To switch tables, select the table to be switched and click the "Switch" button".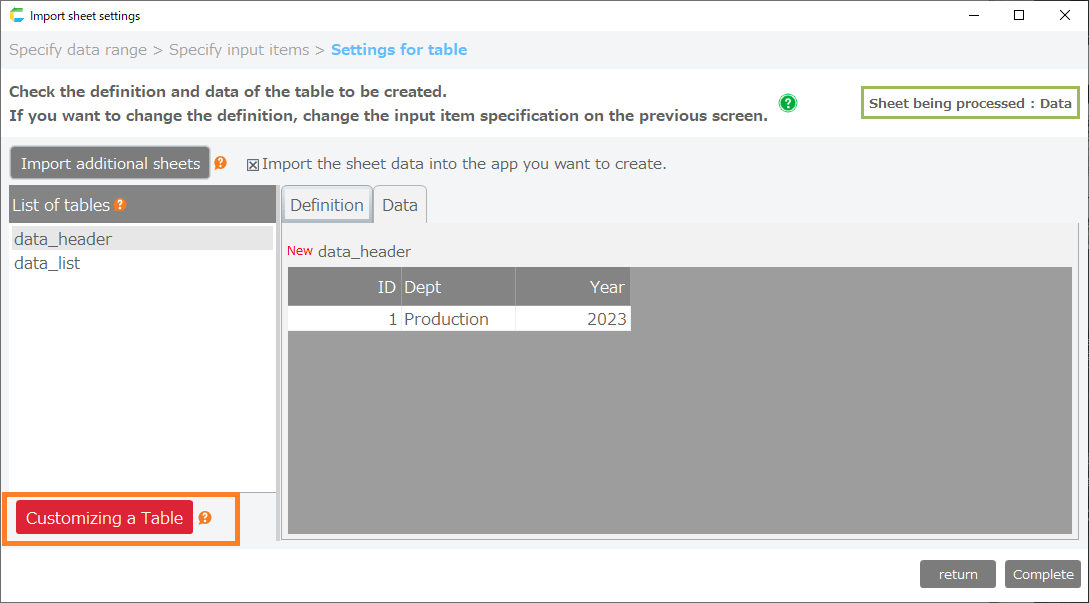
 When the table switch screen opens, check the "Switch tables when creating apps" checkbox and select the table to switch to.
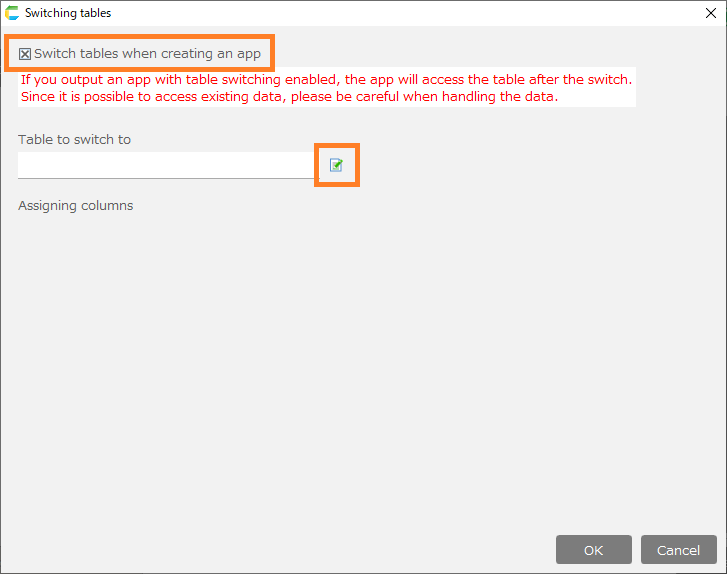 The column assignment sets which table item before the switch is assigned to which item in the destination table.It is not possible to switch without setting all items.When the settings are complete, click the "OK" button to complete the table switching.
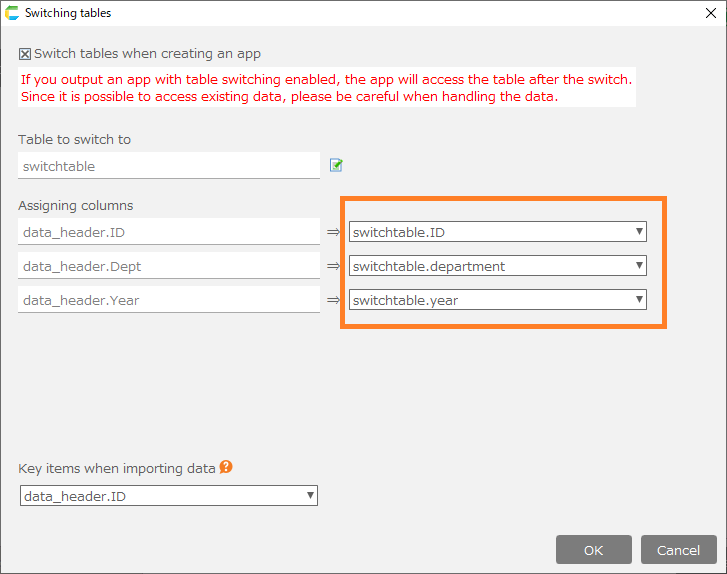
Layout settings screen
This screen is used to configure the application screen.There are four settings as follows.
- Specify data access control
- Specify placement of the save button
- Specify header information linkage
- Specify header information to be displayed on the search screen
When settings are complete, click the "Previews" button to check the application screen.If you are pleased with the settings, click the "Next" button.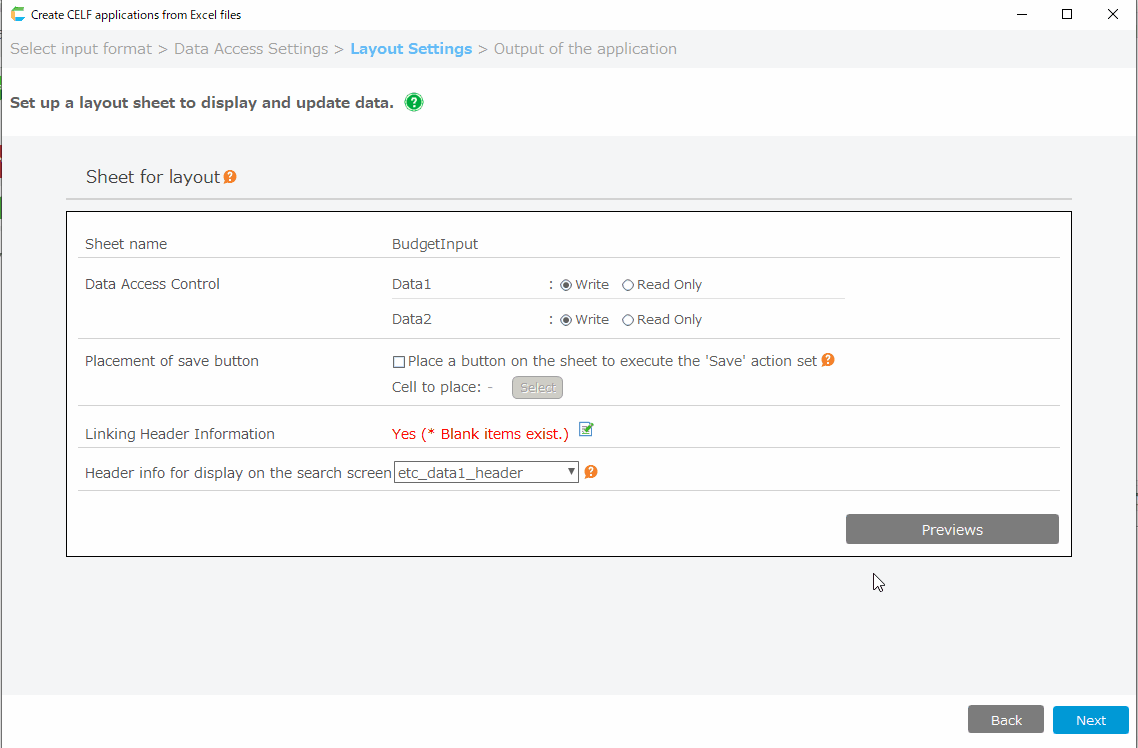
- Specify data access control
Data access control specifies whether updating is enabled or disabled from the input screen for the tables in the sheets set in "Data Access Settings".If you check the "Update Available" checkbox, you can update and register data to the sheet’s table from the application screen.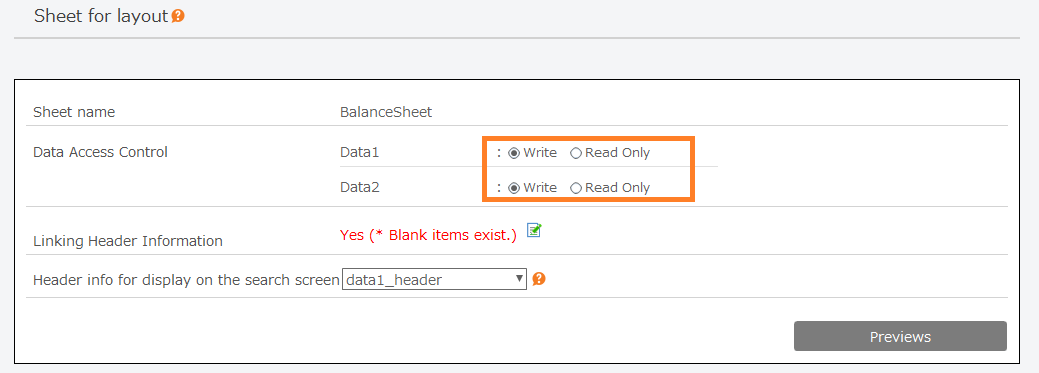
Tip
If you check the "Reference Only" checkbox, you will not be able to update or register data from the application screen.If "Reference Only" is checked, please prepare a separate screen for registering and updating data, or prepare a mechanism for importing data into the table.
- Specify placement of the save button
Places a button to run 'Save' action set in the specified cell.When a cell is specified, an app will be created by associating the automatically created 'Save' action set and button.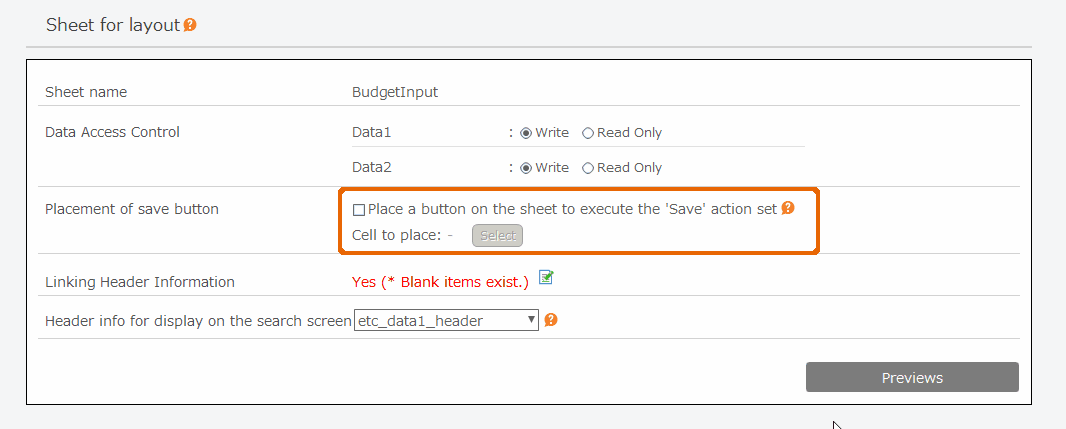
- Specify header information linkage
The linkage of header information is specified when the sheet set in "Data Access Settings" has a header section.This designation is used to search for data in tables to be displayed on the application screen.If it shows "Yes (* Blank items exist)," click the edit icon next to it and enter the cell address of the application screen.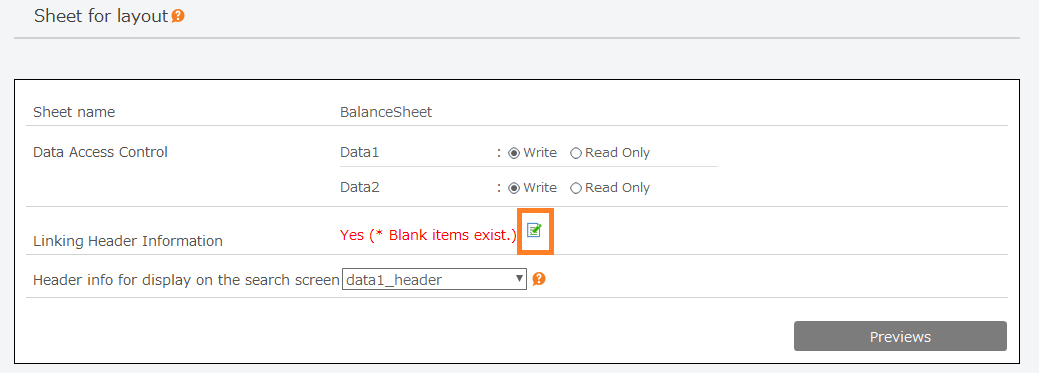

Tip
A table with a header section is an image of managing data by accumulating a table for each item in the header section.The table displayed on the application screen retrieves the data in the table using the cell values set in the "Specify header information linkage" section.
- Specify header information to be displayed on the search screen
The header information to be displayed on the search screen is specified when there are multiple sheets with header sections in the "Data Access Settings".This designation is used in the search screen that is automatically created in the application you created, and data from the specified table is displayed in the search screen.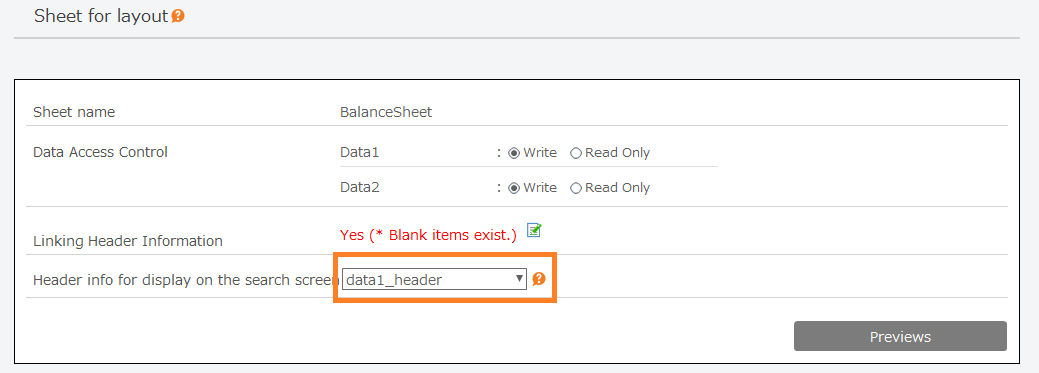
Tip
The search screen lists header information and is used to move to the layout screen.See How to use automatically created applications for more information on the search screen and the apps generated.
- Preview Data Display/Input Area
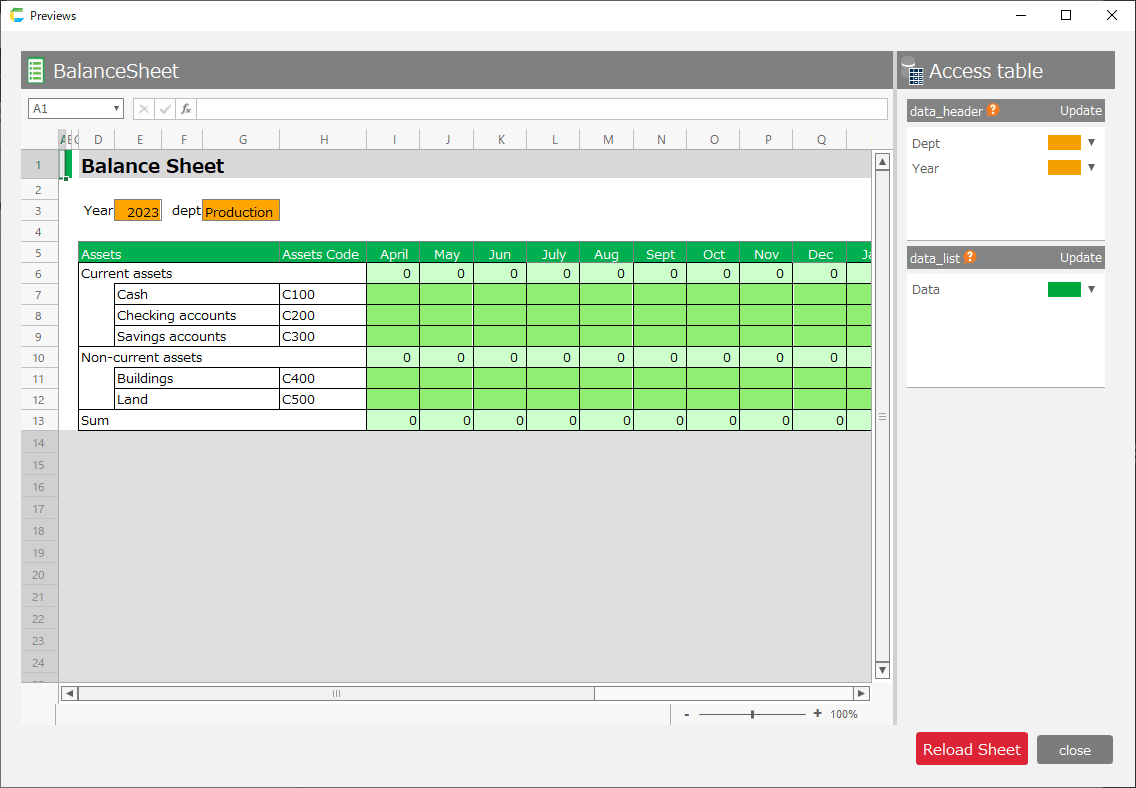
Clicking on the "Preview Data Display/Input Area" button opens a preview of the application screen.The preview allows you to see which database tables you will access from the application screen and which table items the cells on the screen will use.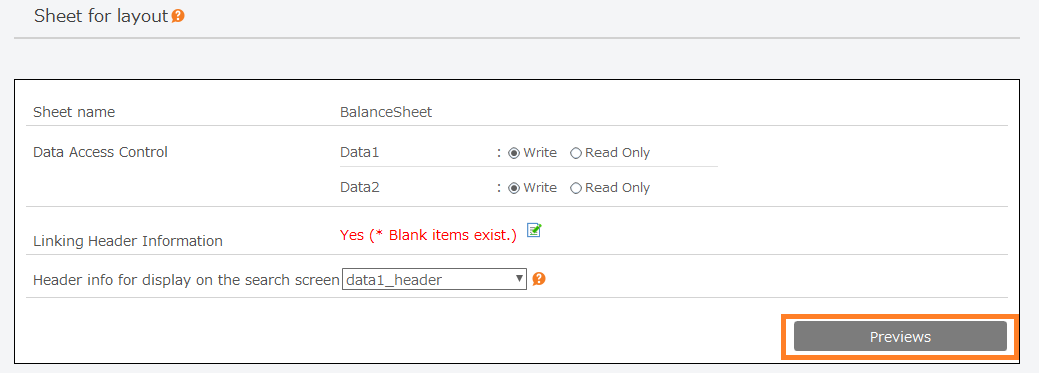
Tip
Cells where data is to be entered or referenced are automatically determined in the "Reference Settings by VLOOKUP".The determined cells are highlighted, and the cells can be highlighted in a list box next to each column in the table to be accessed.Attention
Please check that the cells where data is entered and referenced on this screen are the same as those in Excel.If the results are different from Excel, please check the notes on "Reference Settings by VLOOKUP" and upload the Excel file again.
App output screen
This screen is used to output the app.Check the screen of the app to be created and the table to be used, and if everything is okay, click "Create app".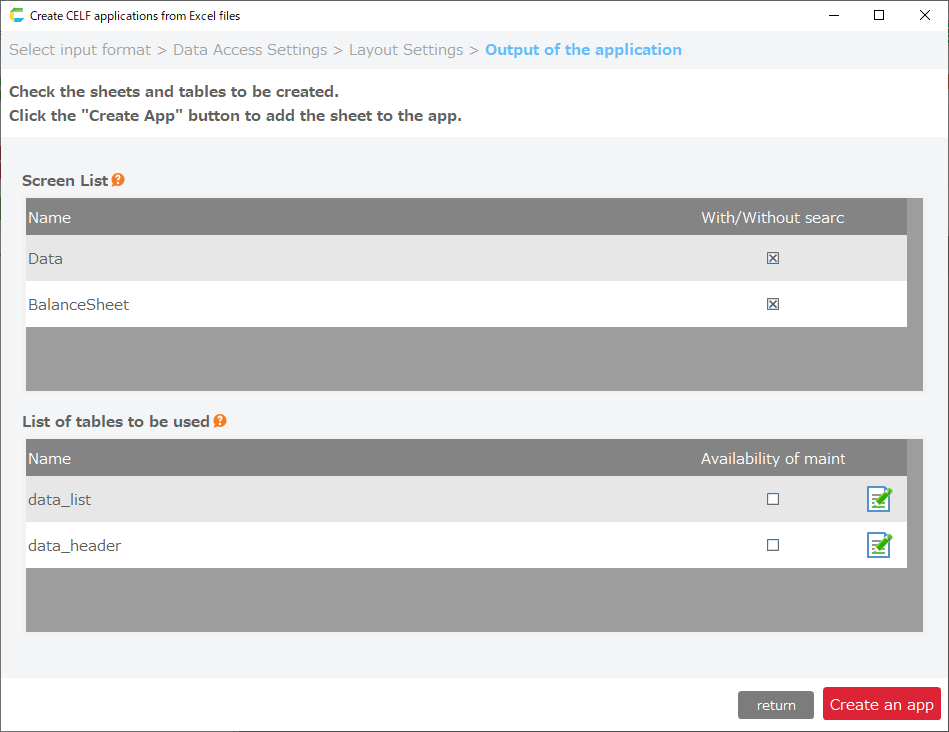
Description of cross table type operation
See here for previous cross table (beta) type operating instructions.Attention
The previous cross table (beta) type is now deprecated.If you want to create an application from Excel in cross-table format, consider the "Multiple sheet combination" type.
Related keywords
Customize