Description of operations by screen (list / single sheet)
This section describes the detailed operations of the "Create app from Excel file" function for each screen.
If you want to make a "Multiple Sheet Combination" into an app, please see Description of operations by screen (Multiple sheet combination) .
If you want to try it out with a sample, see Create app from Excel function tutorial.
Create New Application screen
This screen allows you to upload an Excel file to create an application from Excel.Select "Create from Excel file" to be able to select a file.
Tip
The features of the application created by selecting "Create from Excel file" are as follows.
- The Excel sheet layout becomes the data entry and editing screen of the application.
- A table will be created automatically to store the data of the application.
- Actions are automatically created to register, update, and delete data from the application.
- Select file
Click "Select file" to open Select File dialog.When the file selection dialog opens, select the Excel file you want to make into an app.
Attention
The only Excel file you can select is in xlsx format, and the file size is limited to 1MB.
- Put a common string as the prefix of the app name and table name
The app name and table name can be prefixed with a common string of up to 5 charactersIf you don’t want to add strings, uncheck the box.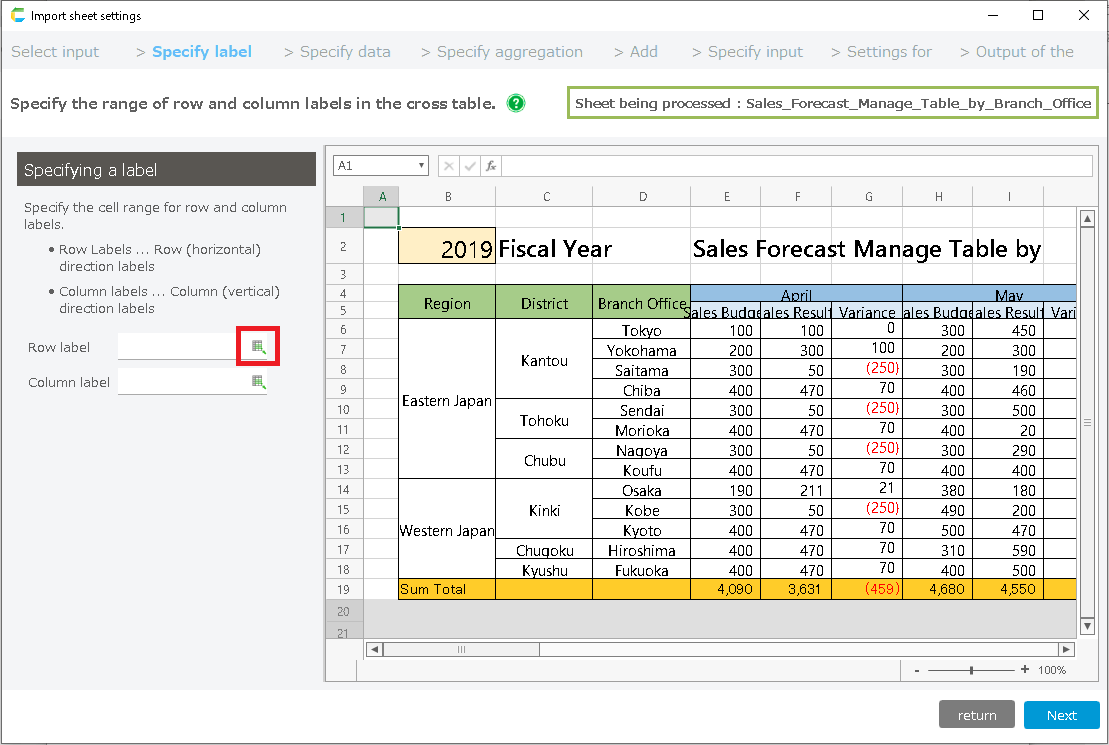
Tip
By adding a common string, it is easier to know which table is being used by which application.Initially, it will contain a random string, but you can change it to any string you like.Only half-width alphanumeric characters and the symbols "_" and "$" can be entered.
Select Input Format screen
In this screen, select the input format of the sheet.The usage and screen structure of the application will change depending on the type you select here.
See also
If you want to know more about the app types that will be created from the selected format, please see Confirm application type.
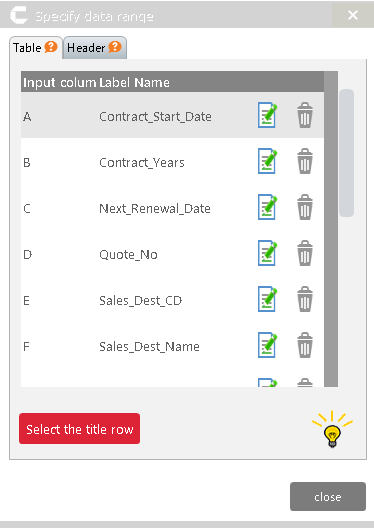
Specify Data Range screen
In this screen, specify the data range of the sheet.The cell you specify here will be the location where data will be entered in the application.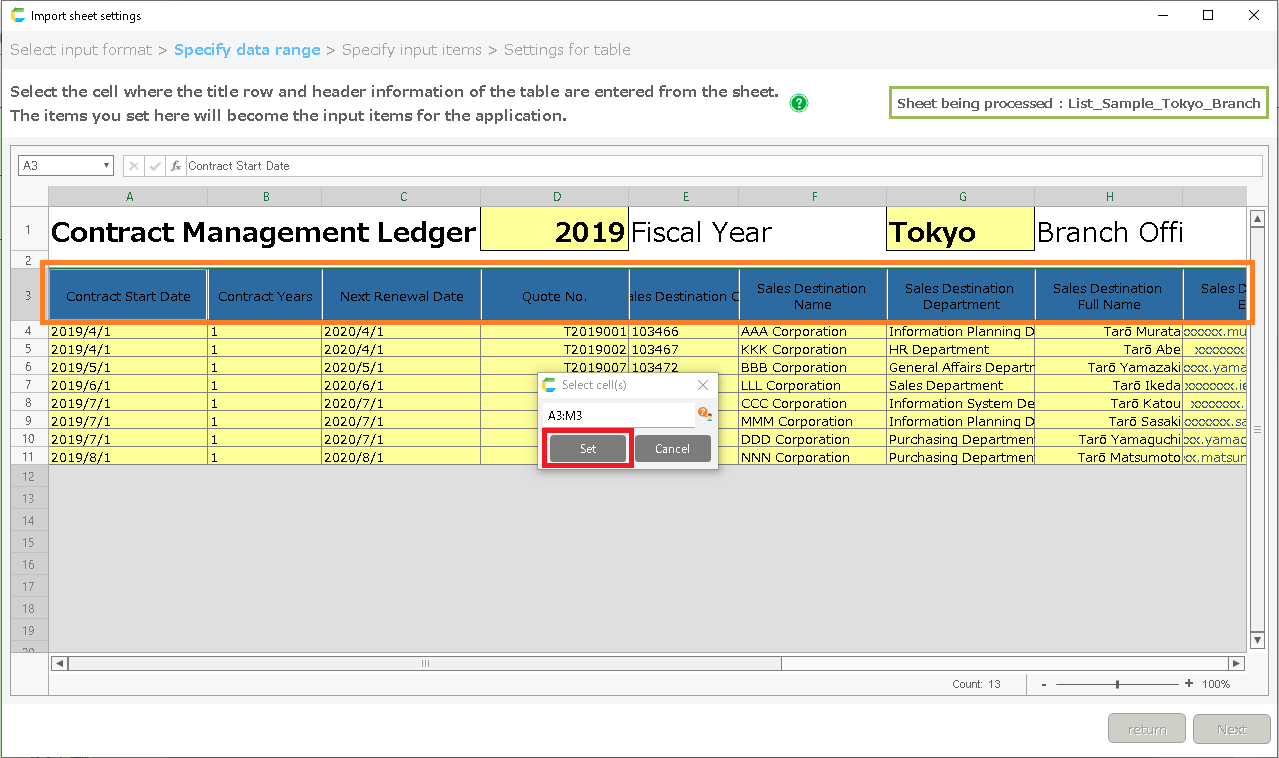 Specifying the data range depends on the type of input format you selected in the previous screenFor more information on how to specify, please refer to the page for each type you have selected.
Specify Input Item screen
In this screen, you can configure detailed settings for application input items.In the advanced settings, you can specify the input rules and whether or not to create a search box.
- [Header area]

Item sort button Sort the header items. The items in the application header search screen will be in the order specified here. Input cell Specify input cell of header item. Label Specify table label name of header item. Input method Specify the data input method. The method can be specified from "Cell" (cell input) or "List" (pull-down list input). Set Specify a list value for the pull-down list. This setting is available only when the input method in the previous section is set to "List". Data format Specify the input format for header items. When the application is created, it will be checked in the format specified here. Input check Set the input check for this item. Search item You can specify this item as a search item in the header search list screen. See also
Click About specifying input checks for more information on input checking.
- [Table area]
Start row of table (Single form type only) Specify row that displays data. Start column of table (Single form type only) Specify the start column of the table. End column of table (Single form type only) Specify the end column of the table. Maximum number of rows (List, List type with header only) The maximum number of rows in the list can be specified. Set it according to the number of data. Please note that if it is too large, the display will be slow. Sort order setting button Set the item by which the list will be sorted. Input column Specify input cell. Label Specify table label name. Data format Specify the input format for table items. The format specified here will be checked when the application is created. Input method Specify the data input method. The method can be specified from "Cell" (cell input) or "List" (pull-down list input). Set Specify a list value for the pull-down list. This setting is available only when the input method in the previous section is set to "List". Input check Set the input check for this item. Sort order When the application is launched, the data will be displayed in the sort order set for this item. See also
Click About specifying input checks for more information on input checking.
Tip
When the input method is set to the list, it can be output to the app as a list box.However, please note that if the Excel data is not in the list box value, the list box will not be created.e.g.) When the Excel data is "Watermelon", but the list box values are "Strawberry" or "Banana"-> Include "Watermelon" in the listbox value.Attention
There is a limit to the number of data that can be imported.Make sure that the number of rows of data, including additional files, is less than 50,000.If the number of entries exceeds 50,000, an error message will be displayed and you will not be able to proceed to the next screen.If an error occurs when the number of data exceeds 50,000, please take one of the following actions to adjust the number of data.・Reduce input items・Edit the original Excel sheet to reduce the number of data rows, and then import again
Table setting screen
This screen allows you to do the following 4 things.
- Check the table to be created
- Import additional sheet
- Set data to be initially registered in the table
- Fixing data not imported into tables
- Customize table definition
- [Check the table to be created]
Double-click the table name to see the contents of the table that will be created.
- [Import additional sheet]
Click "Import additional sheet" button to open Add Sheet dialog.In the "Add Sheet"dialog, you can add data from a different Excel sheet than the one you have loaded. "Add Sheet" dialog
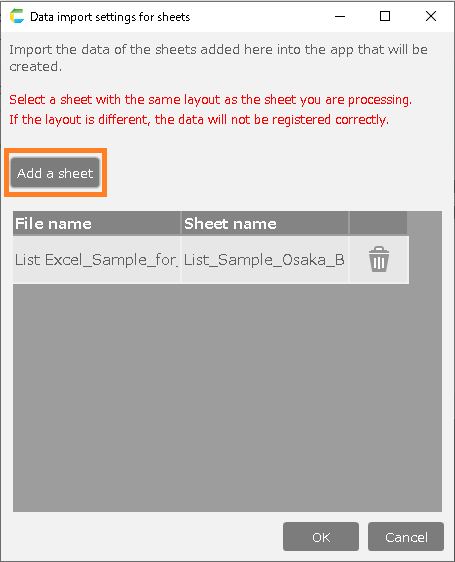
- [Set initial data to be registered in the table]
If you check the "Import the sheet data into the app you want to create" checkbox, the app will be created with the imported sheet data registered.If the check box is unchecked, only the table will be created and the application will be created .
Attention
If there is data in the loaded sheet that cannot be imported as initial data, a warning dialog box will appear.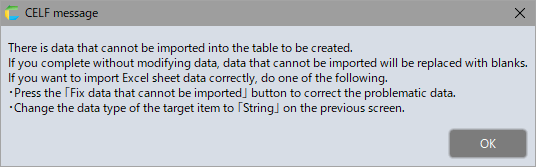 If you complete without correcting the data that cannot be imported, the data that cannot be imported will be replaced by blanks and imported.If you want to import Excel sheet data correctly, do one of the following.1)Correct problematic data on the 'Correct data that cannot be imported' screen.2)Change the data type of the target item to 'string' on the previous screen.For details on each operation, see below.
- [Fixing data that cannot be imported into tables]
If there is data in the loaded sheet that cannot be imported as initial data, a warning dialog box will appear.Clicking the button opens the 'Correct data that cannot be imported' window, where you can correct the data.For more information on the screen, see 'Screen for Modifying Data that Cannot be Imported'.
- Customize Table Defintion
Click "Customize Table Defintion" to open "Customize Table" screen.For details, see "Customize Table" screen.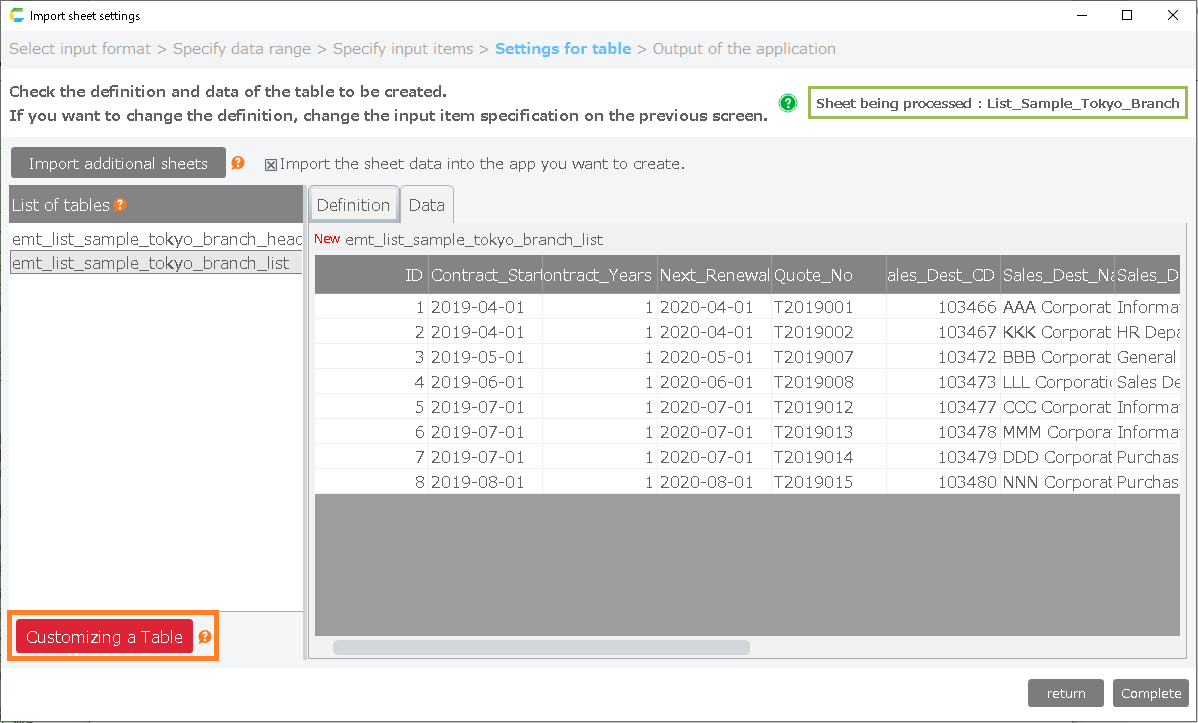
Customize Table screen
- [Automatic division]
Items for "Automatic division" are judged based on the content of the data, so they may not be split as expected.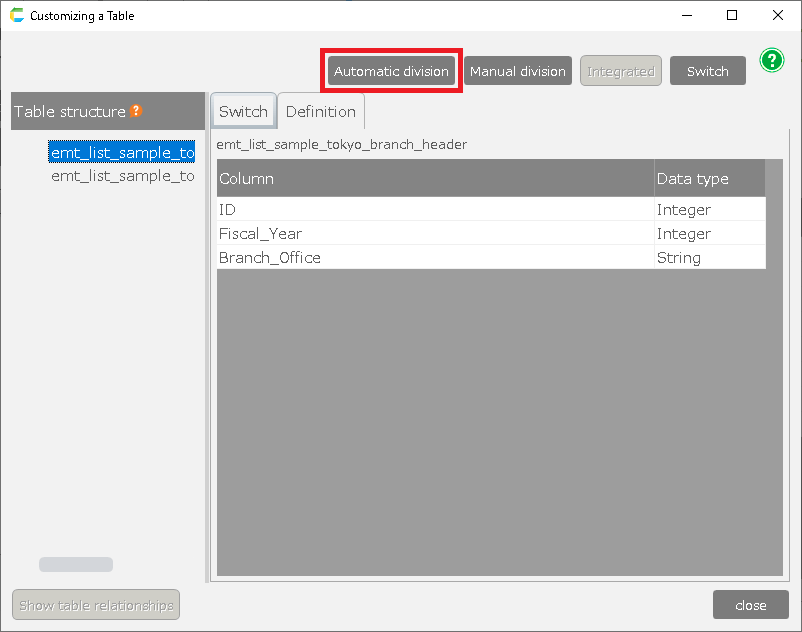
Tip
Items for automatic division are judged based on the content of the data, so they may not be split as expected.The decision criteria is based on the relationship between overlapping and duplicated data combinations.For example, in the following data example, if item 2 is determined, item 3 will also be determined, so the data will be judged to have a relation, and items 2 and 3 will be automatically split.
Item 1 Item 2 Item 3 AAA X OOO BBB X OOO CCC Y XXX
- [Manual division]
Click "Manual division" to split the table as specified.When the split table selection screen appears, select the table to be split.To create a new split table, select "(New Table)" and click on it.
- [Manual division]
Set the details to be split. Enter the table name, and use "->" and "<-" to move the items you want to move to the destination table.Select the items in the destination table whose data will not be duplicated, and click "Setting Unique Constraints".When all the settings are complete, press "Split" to split the file.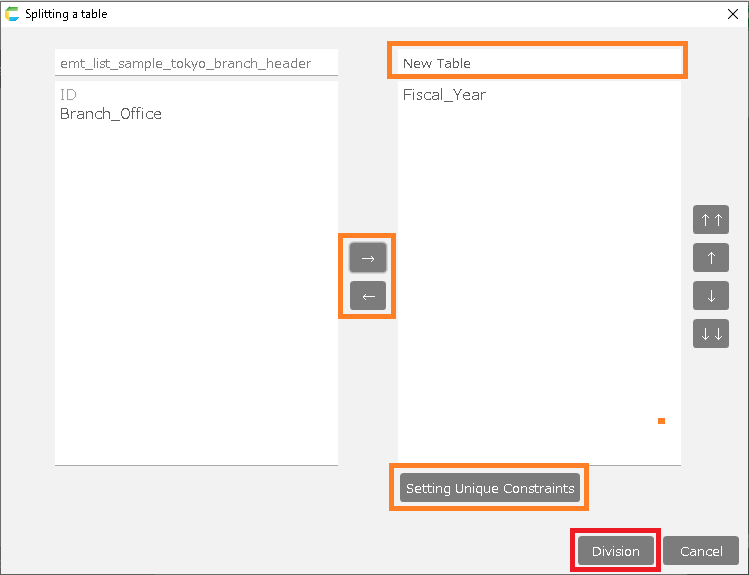
Attention
If the item to be set contains blank data, it cannot be set to "Setting Unique Constraints".To split, select a column with no blank data.
- [Merge]
Restore the split table.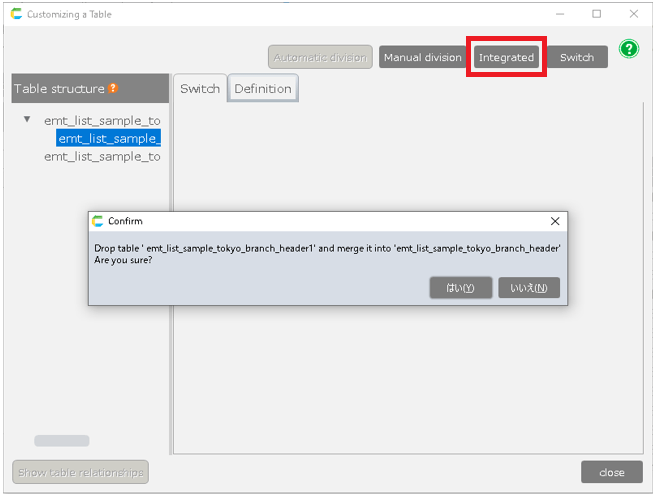
- [Swtich]
Switch to a table that has already been created. If you check the notes, you can select a table.When you click "Search Similar Table", the background color of tables with similar table items will turn yellow.Select the table and click "OK".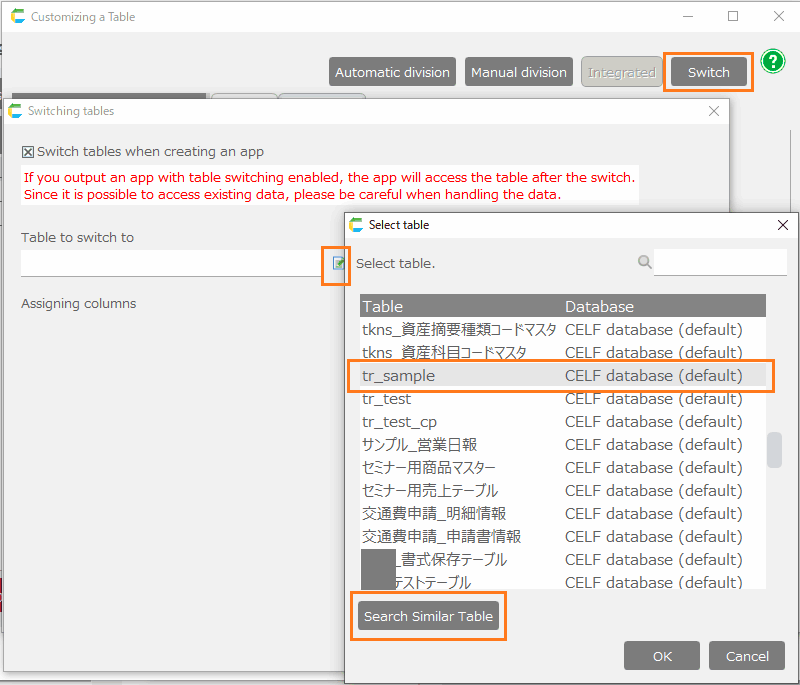 Set which item in the destination table to switch to for each item. If you do not set all items, you will not be able to switch to them.When the settings are complete, click "OK" to complete the table switching.
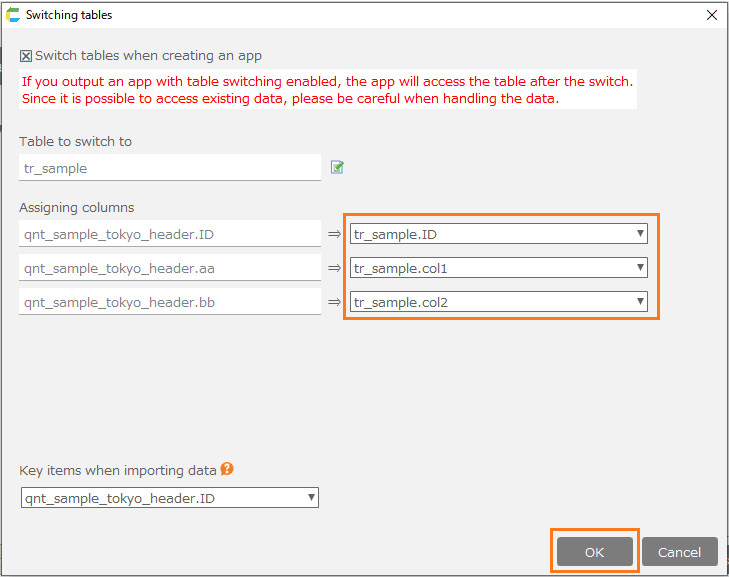
App output screen
This screen is used to output the app.Check the screen of the app to be created and the table to be used, and if everything is okay, click "Create app".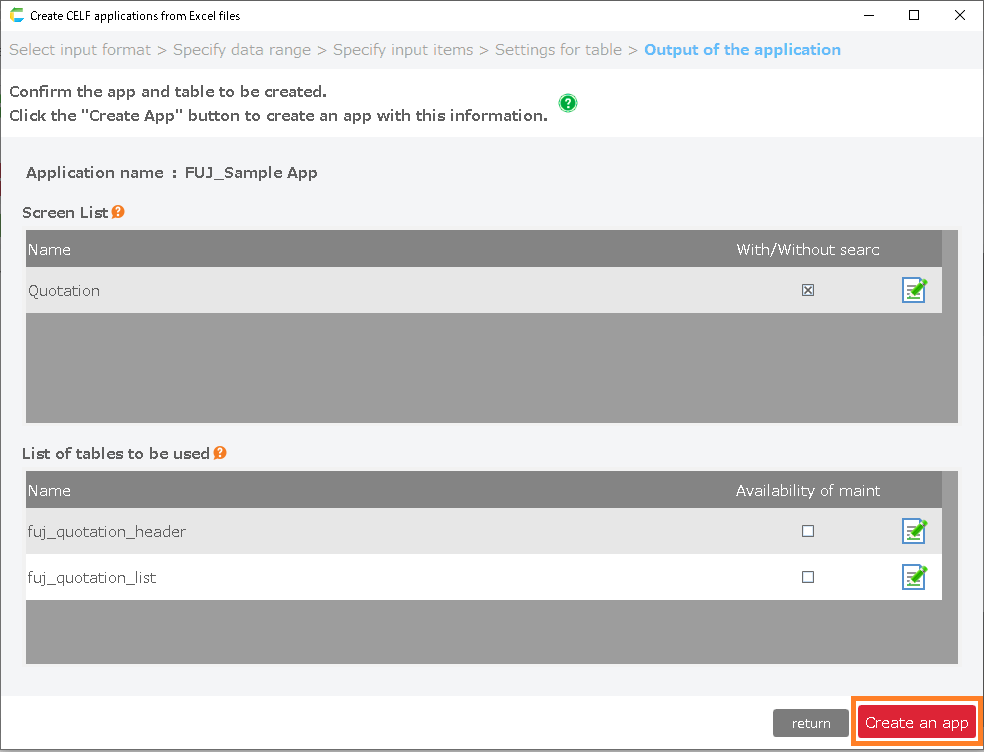
Tip
To change the screen name or table name of the app you are creating, click on the change icon.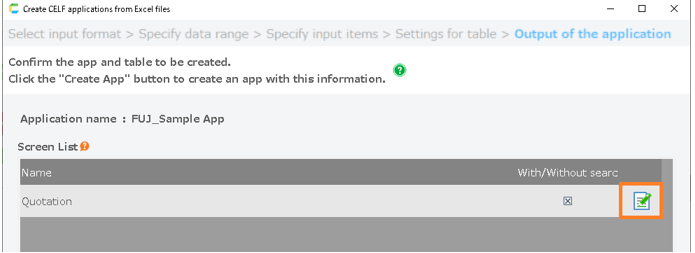
Related keywords
Customize