How to specify data range
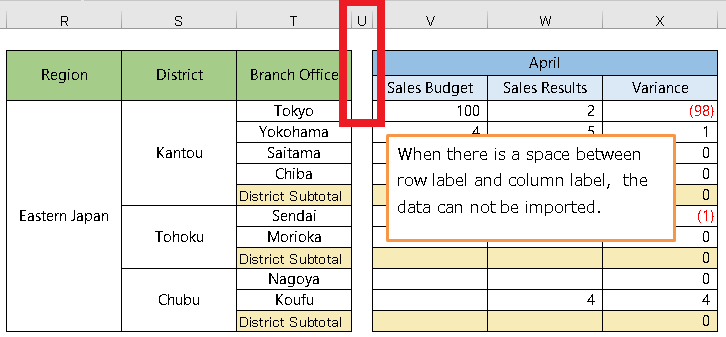
Attention
How to specify [List]
- Table settings
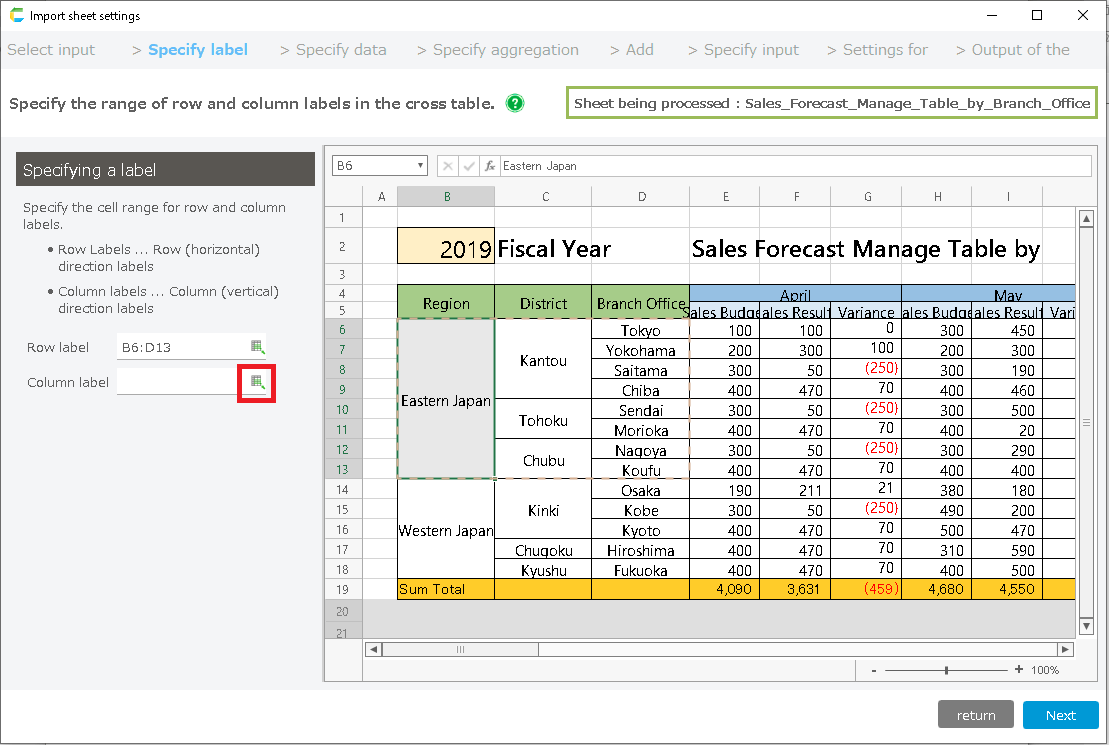
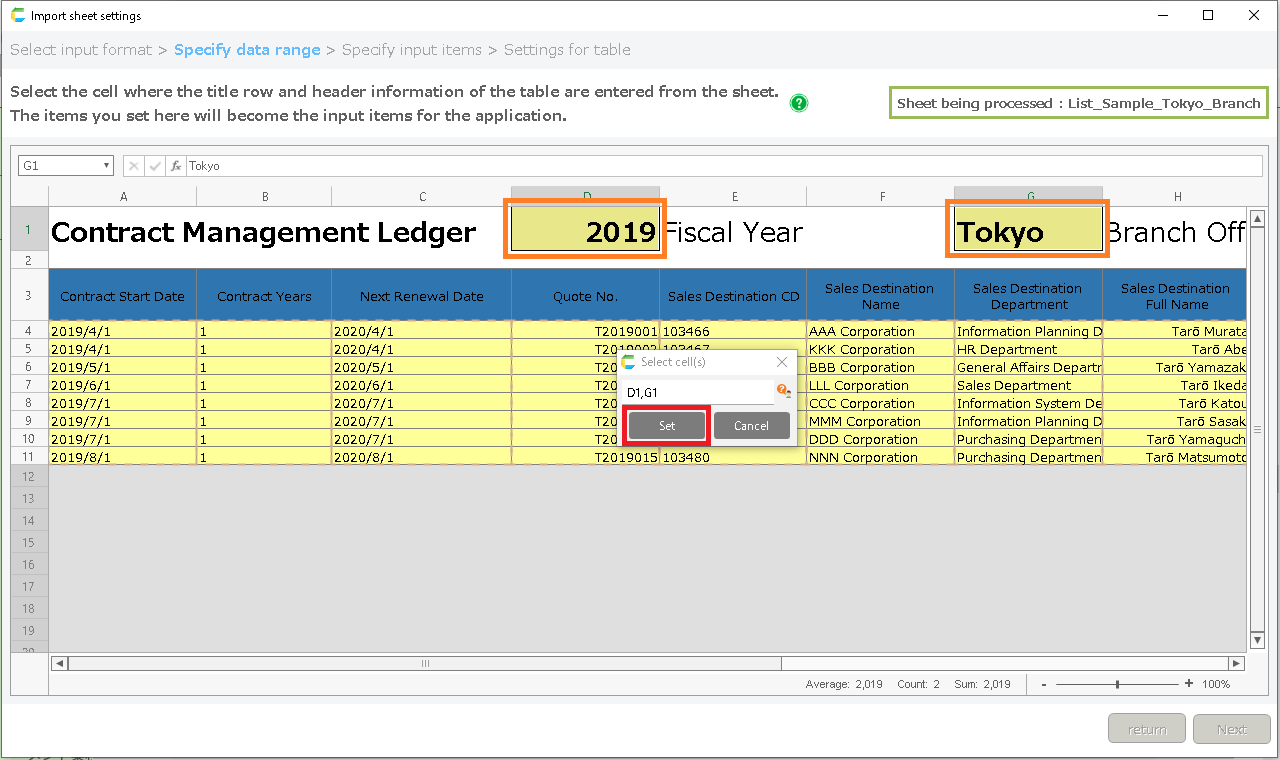
- Click "Select the title row" in the Specify Data Range dialog.
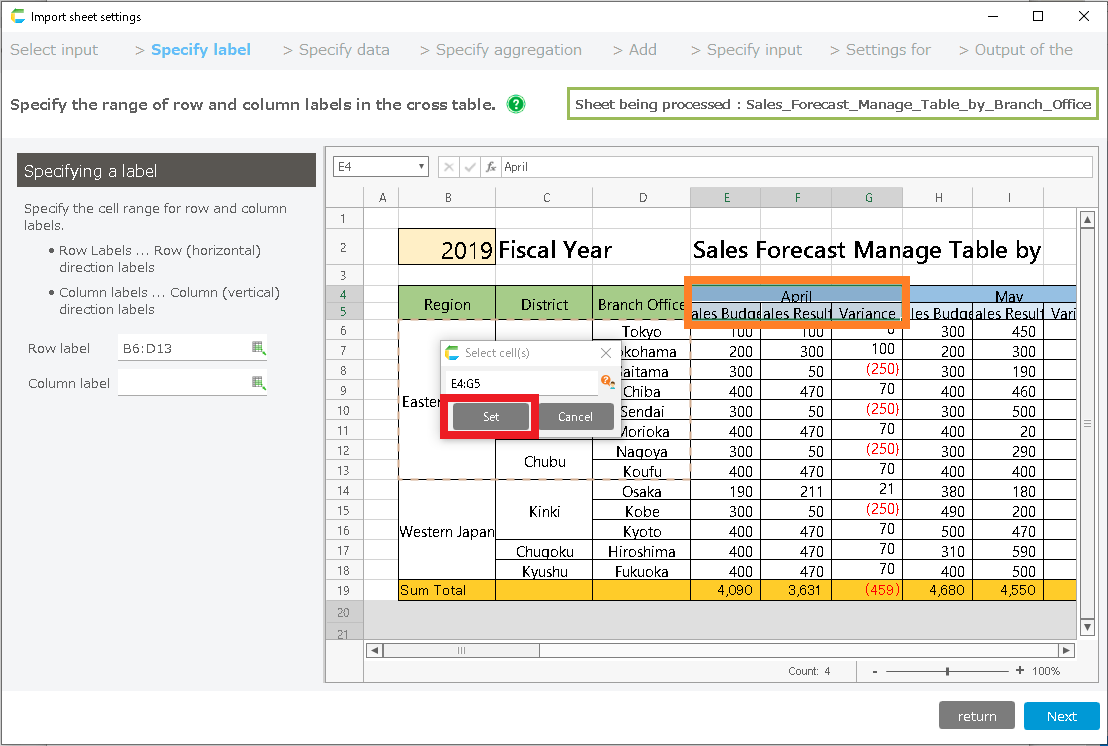
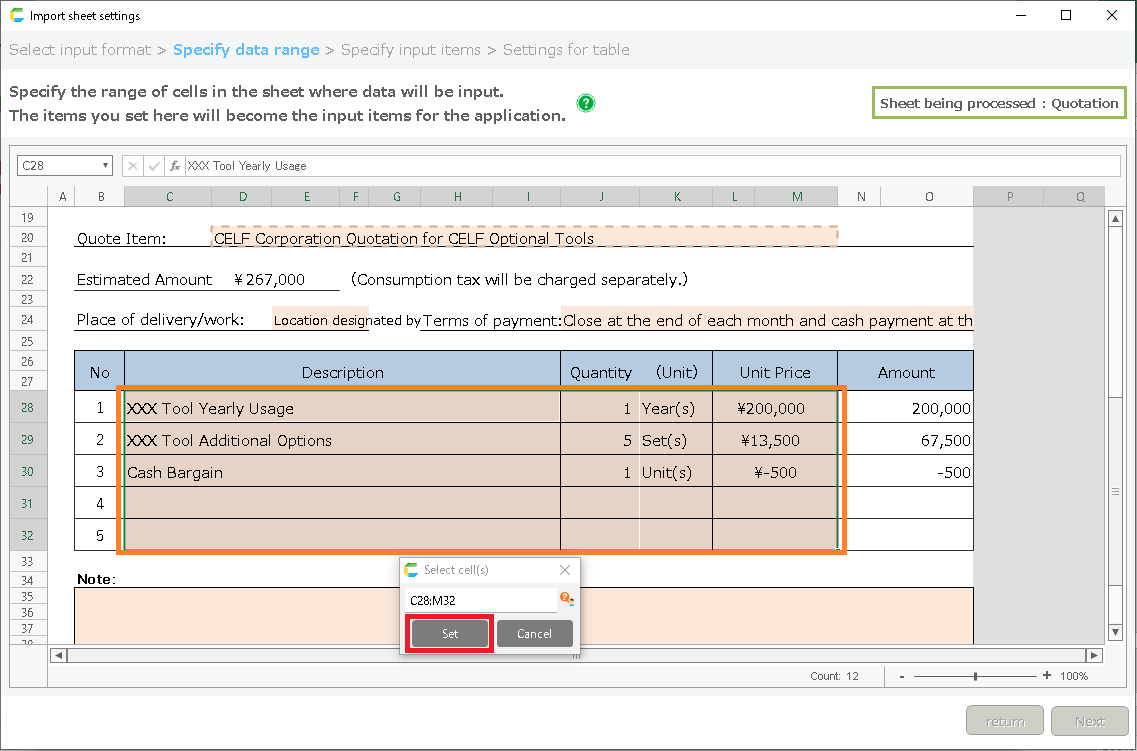
- Select a cell in the title row of the table, and click the "Set" button.
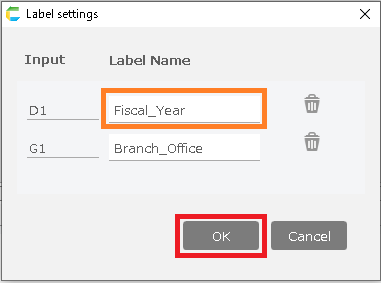
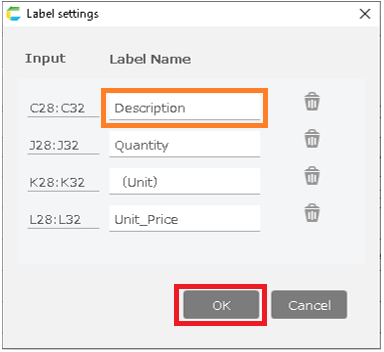
- The Label Settings dialog box will open. If you are satisfied with the contents, click the "OK" button.
Tip
The default setting for the label name is a value that is used as a candidate for the label name.If the item is labeled "<No label>" or you want to change the name to something else, please set the label name yourself.Attention
Make sure that the range displayed in the input section is the range for entering data in the table.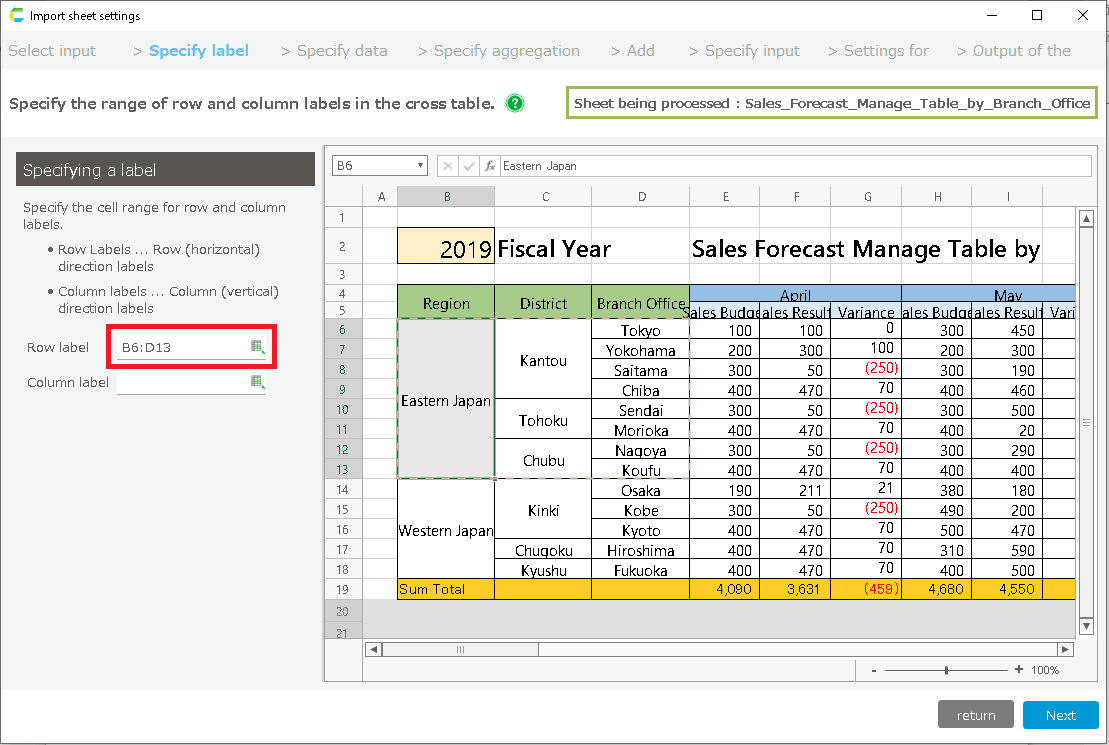
- The selected data range will be registered. If there are no problems, close this dialog and proceed to the next screen.
Attention
If there are any columns in the table that you do not want to be inputted, such as formula columns, click the trash icon to delete them.
Tip
If you want to change the label name of a registered item, click on the edit icon and rename it.
How to specify [List with Header]
- Table settings
- Click the "Table" tab in the Specify Data Range dialog.
- Click on "Select the title row".
- Select a cell in the title row of the table, and click the "Set" button.
- The Set Label dialog box will open. Check the label names in the table, and if there is no problem, click the "OK" button.
Tip
The default setting for the label name is a value that is used as a candidate for the label name.If the item is labeled "<No label>" or you want to change the name to something else, please set the label name yourself.Attention
Make sure that the range displayed in the input section is the range for entering data in the table.
- The selected data range will be registered. When you have finished setting up the "Table" and "Header", close this dialog and proceed to the next screen.
Attention
If there are any columns in the table that you do not want to be inputted, such as formula columns, click the trash icon to delete them.
Tip
If you want to change the label name of a registered item, click on the edit icon and rename it.
- Header settings
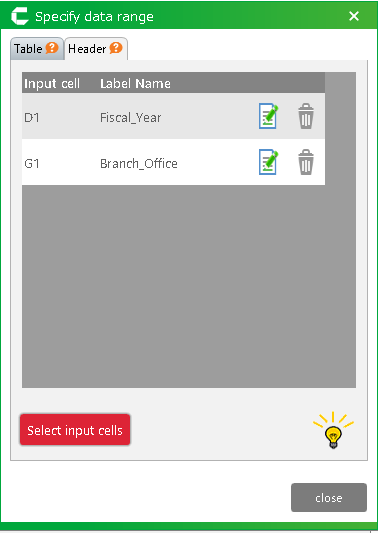
- Click on the "Header" tab in the Specify Data Range dialog.
- Click "Select input cell".
- Select the header information cell of the table and click the "Set" button.
Hint
Header information is the data that you want to manage by "Person in charge", "Store", "Department", etc. when multiple tables exist.
Tip
You can select multiple cells by holding down the Ctrl key while selecting cells, such as "A1,B1".If you have a lot of cells to select, you may want to do this several times.
- The Label Settings dialog box will open. Check the label name, and if there is no problem, click the "OK" button.
- When you have finished registering the "Table" and "Header", close this dialog and proceed to the next screen.
How to specify [Single form]
- Header settings
- Click on the "Header" tab in the Specify Data Range dialog.
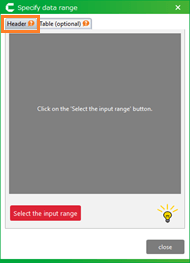
- Click "Select input cell".

- Select the data entry cell and click the "Set" button.

Tip
You can select multiple cells by holding down the Ctrl key while selecting cells, such as "A1,B1".If you have a lot of cells to select, you may want to do this several times.
- The Label Settings dialog box will open. Check the label name, and if there is no problem, click the "OK" button.
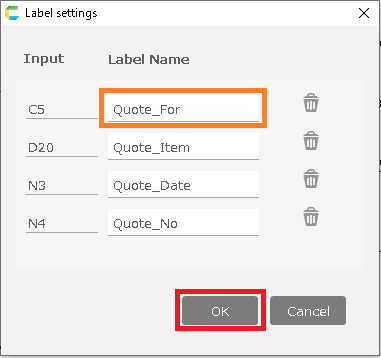
Tip
The default setting for the label name is a value that is used as a candidate for the label name.If the item is labeled "<No label>" or you want to change the name to something else, please set the label name yourself.
- When the registration of the "Header" is complete, close this dialog and proceed to the next screen.

Attention
If there is a table data area in the sheet, set the table settings as well.
- Table settings
- Click the "Table (Optional)" tab in the Specify Data Range dialog.
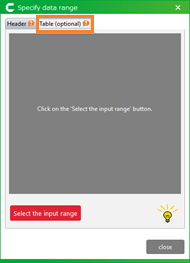
- Click "Select the input range".
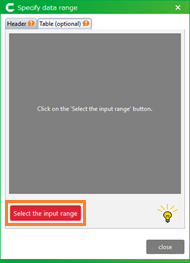
- Select the data input range of the table, and click the "Set" button.
- The Label Settings dialog box will open. Check the label name, and if there is no problem, click the "OK" button.
- When you have completed the registration of "Table (Optional)" and "Header", close this dialog and proceed to the next screen.
Attention
If there are any columns in the table that you do not want to be inputted, such as formula columns, click the trash icon to delete them.