Operation explanation by screen (cross table) βversion
Attention
Cross tables have been deprecated. Use "Multiple Sheet Combinations" instead.
Create New App screen
All types have the same screen. For operating instructions, please refer to Description of operations by screen (list / single sheet) .
Select app type screen
In this screen, the app type is selected.The usage and screen structure of the application will change depending on the type you select here.
Tip
If you wish to use a cross table, check the "Use previous cross table type (deprecated)" checkbox and select "Multiple Sheet Combination".For information about app types, see Confirm application type.For information on how to use each app type, see How to use automatically created applications.
Label specification screen
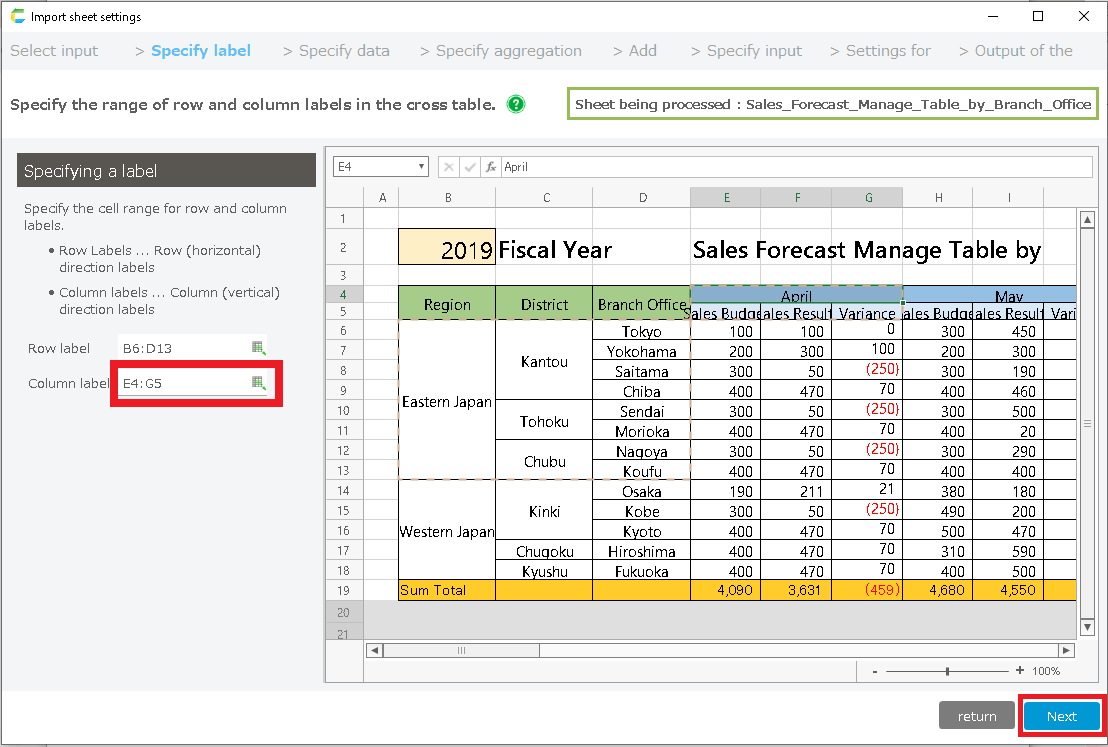
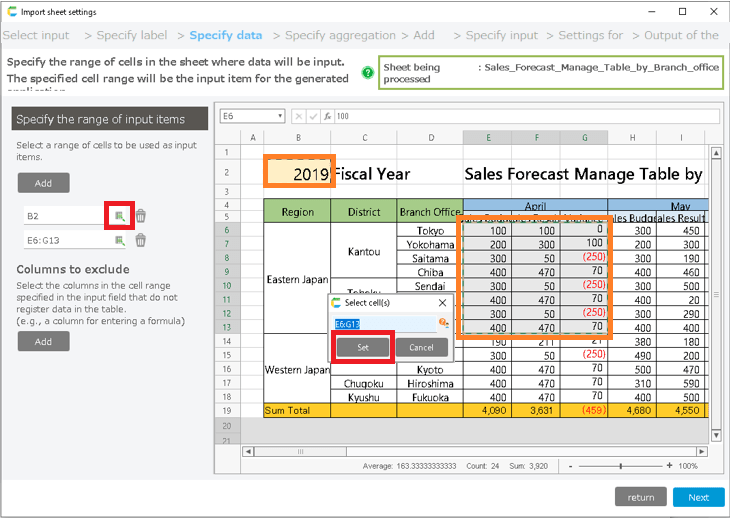
- Specify the labels. First, the row (horizontal) label is specified. Click on the icon to the right of the row label text box.
In the "Select cell(s)" window, select the target cells from the Excel layout. (You don’t need to select all, just the "East Japan" one here.)
Select only the top one of the largest categories, and then select the row label associated with that data.
Once you have specified the row labels, click "Set" in the "Select cell(s)" window.
Tip
In this sample, "Region" is the largest category, so we will select the "East Japan" data at the top of the list.
Select the district data (Kanto, Tohoku, Chubu) and branch office data (8 branches from Tokyo to Kofu) associated with "East Japan".
Make sure that the selected range is displayed in the row labels text box.
The selected area will appear encircled by an orange dotted line in the Excel sheet.
- The next step is to specify the column (vertical) labels. Click on the icon to the right of the column label text box.
In the "Select cell(s)" window, select the target cells from the Excel layout. (You don’t need to select all, just "April" in this case.
Select only the leftmost one of the largest categories, and then select the column label associated with that data.
Once you have specified the column label, click "Set" in the "Select cell(s)" window.
Tip
In this sample, "Month" (April, May, etc.) will be the largest category, so select "April" data on the far left of it.
Select the data associated with "April"(sales budget, sales actual, and variance).
Make sure that the selected range is displayed in the column label text box.
The selected area will appear as an orange dotted line in the Excel sheet. When you have finished the settings, click "Next".
Attention
- The row label must be at the top, and the column label must be at the left. If there is a blank row or column between the row and column labels, it will not be imported.
Attention
If you get the error "The upper right corner of the row label area and the lower left corner of the column label area must be tangent.", please make sure there are no blank rows or columns between the row and column labels.
If there are spaces, please open Excel, delete the spaces, and upload the file .
Tip
You cannot specify a total row or total column for the row and column labels. If the top row or the left column is the total, please delete it from Excel and upload it again.
If you want to add a total row and column, you don’t need to add them to Excel as there is a function to set the total after this.
Input item range specification screen
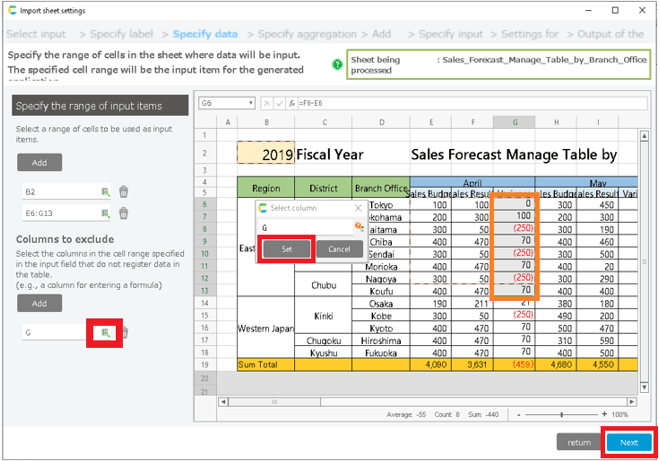
Click on the icon to the right of the text box to specify the range of input items. When you are in the application, you can enter data in the range you specified here.
Please specify only the range associated with the top category. After specifying the range, click "Set".
Attention
The header field is required for the cross table. Please set up two input fields: a header field and a cross table input field.
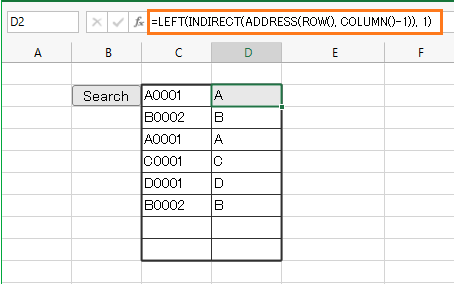
If there is a formula column, specify the formula column by clicking the icon to the right of the text box of the column to be excluded.
If you exclude the data here, the data will not be registered in the table. After specifying, click "Set". If there are no excluded columns, there is no need to specify them.
Total column specification screen
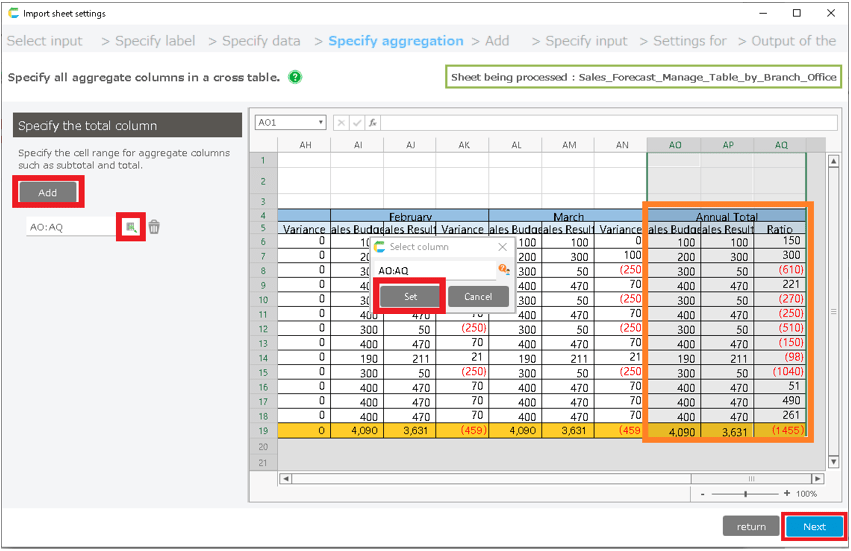
If there is a total column, such as annual total, specify here which column is the total column. If not, setting is not required.
Click "Add", select the total column, and click "Set". When you are done, click "Next".
Attention
If you specify it as a total column, it will not be registered as data in the table.
The total column is set up with a formula like "=sum(XX:XX)", but if you do not specify the total column, this formula will be registered as table data as it is.
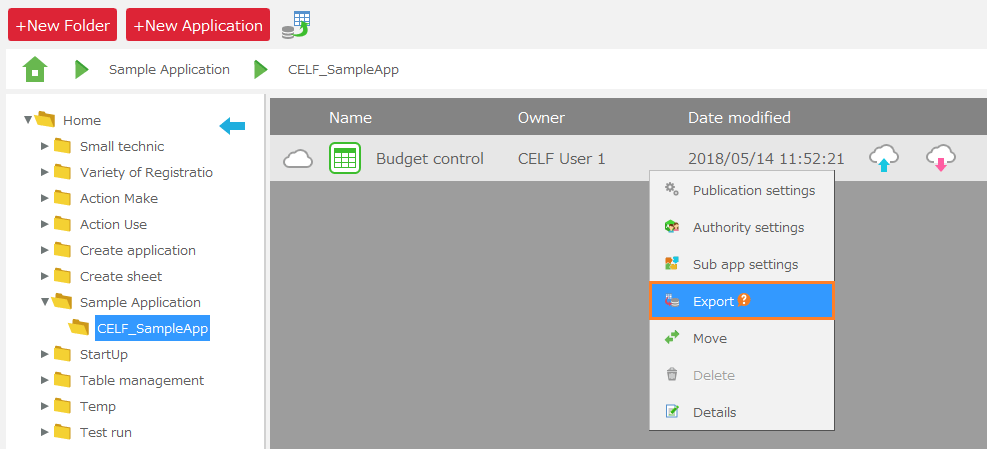
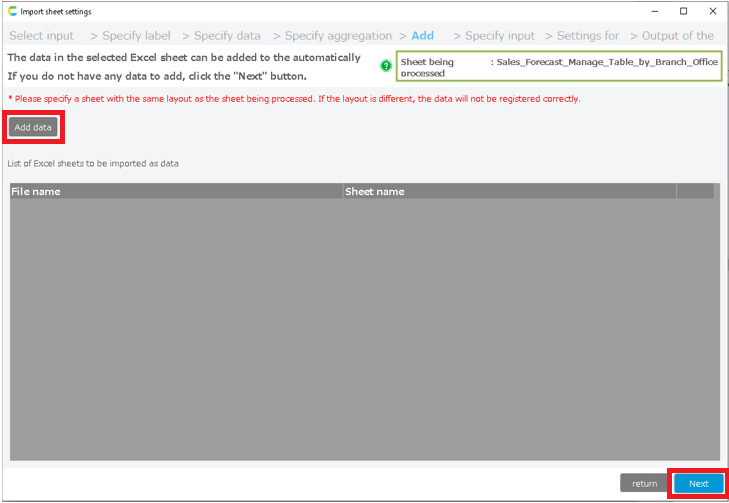
Add data screen
If you have data in another Excel book or another Excel sheet with the same layout, you can add it. Click on "Add data" to add.
If there is no data to be added, no settings are required. Click "Next".
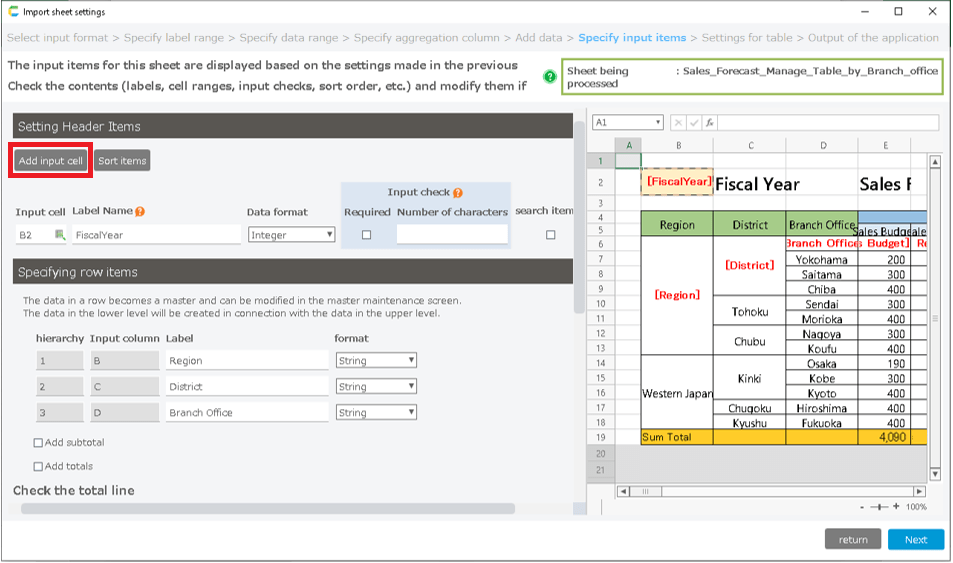
Input item specification screen [Header item settings]
[Specify header item]-[Header item settings]
The header item will be displayed based on the contents of the screen for specifying the range of input items. You can also add an input cell by clicking "Add input cell".
Attention
In the case of a cross table, the header field is required. Be sure to specify something as a header item.
- [Specify header item]-[Header item settings]
Add Input Cell button Add new input cell. Item sort button Sort the header items. The items in the application header search screen will be in the order specified here. Input cell Specify the input cell of the header item. Label Specify the table label name of the header item. Input format Specify the input format of the header item. When the application is created, it will be checked in the format specified here. Mandatory checks A mandatory check will be performed for this item when the application is launched. Character count check When the application is launched, a character count check is performed for this item. If the number of characters is greater than the number of characters you entered, an error will occur. Search item In the Header Search List screen, this item can be specified as a search item. 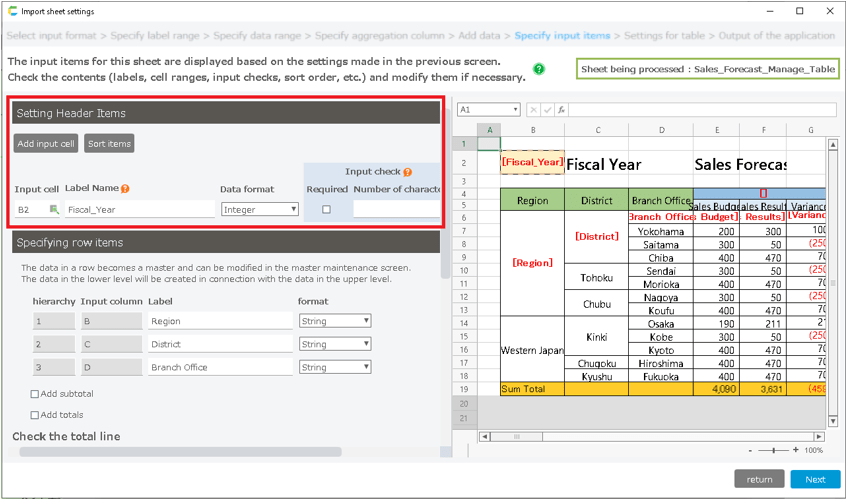
Input item specification screen [Row item settings]
[Specify input item]-[Row item settings]
The line items will be displayed based on the contents of the label specification screen. Only the label and the input format can be modified.
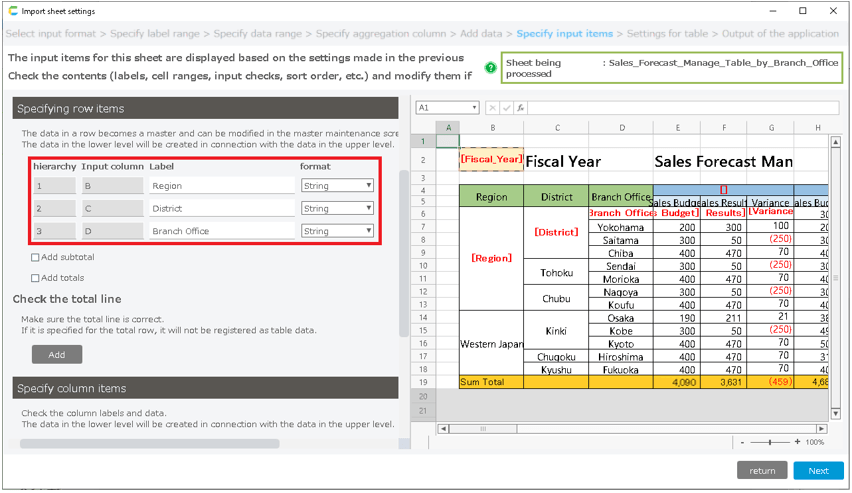
[Specify input item]-[Row item settings]
Subtotal and total can be added to the line item unit. Subtotal will be added to the unit of hierarchy "1".
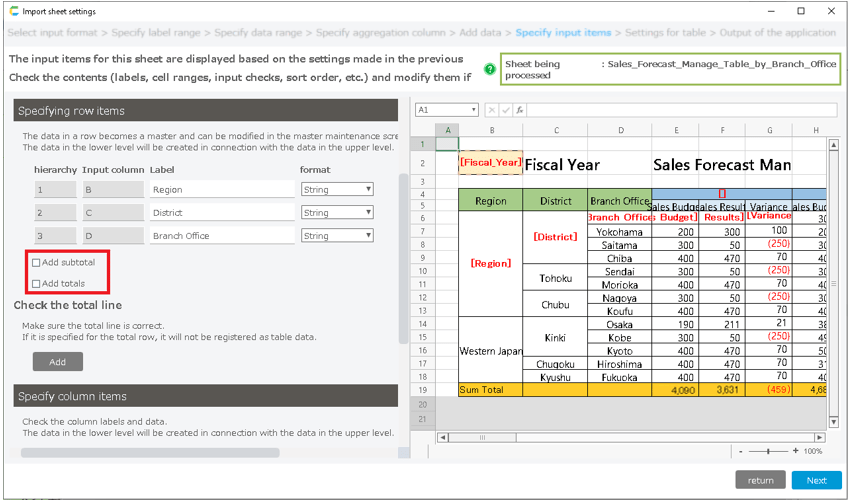
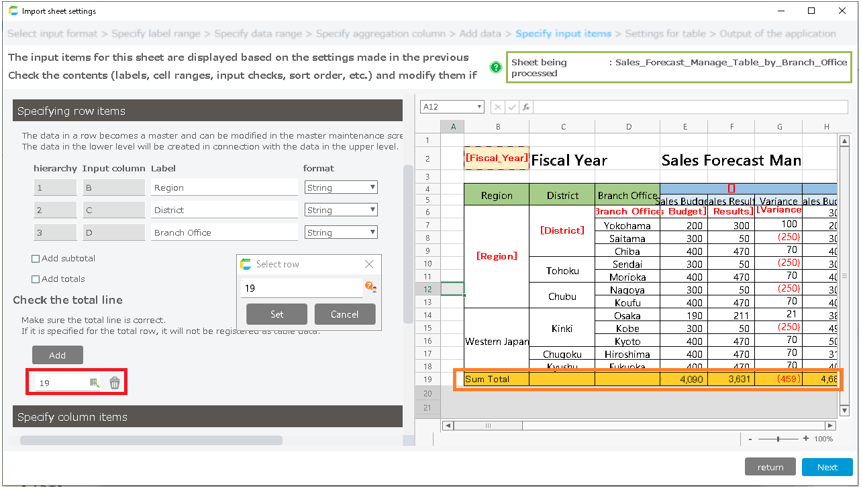
- [Specify input item]-[Row item settings]
Check the total rows detected automatically, and correct any errors. If it is specified as a total row, the data will not be registered in the table.
If there is no total line, no special specification is required.
Input item specification screen [column item settings]
[Specify input item]-[Column item settings]
The column items will be displayed based on the contents of the Specify Label screen. Enter the label name (column name of the table) of the top level category.
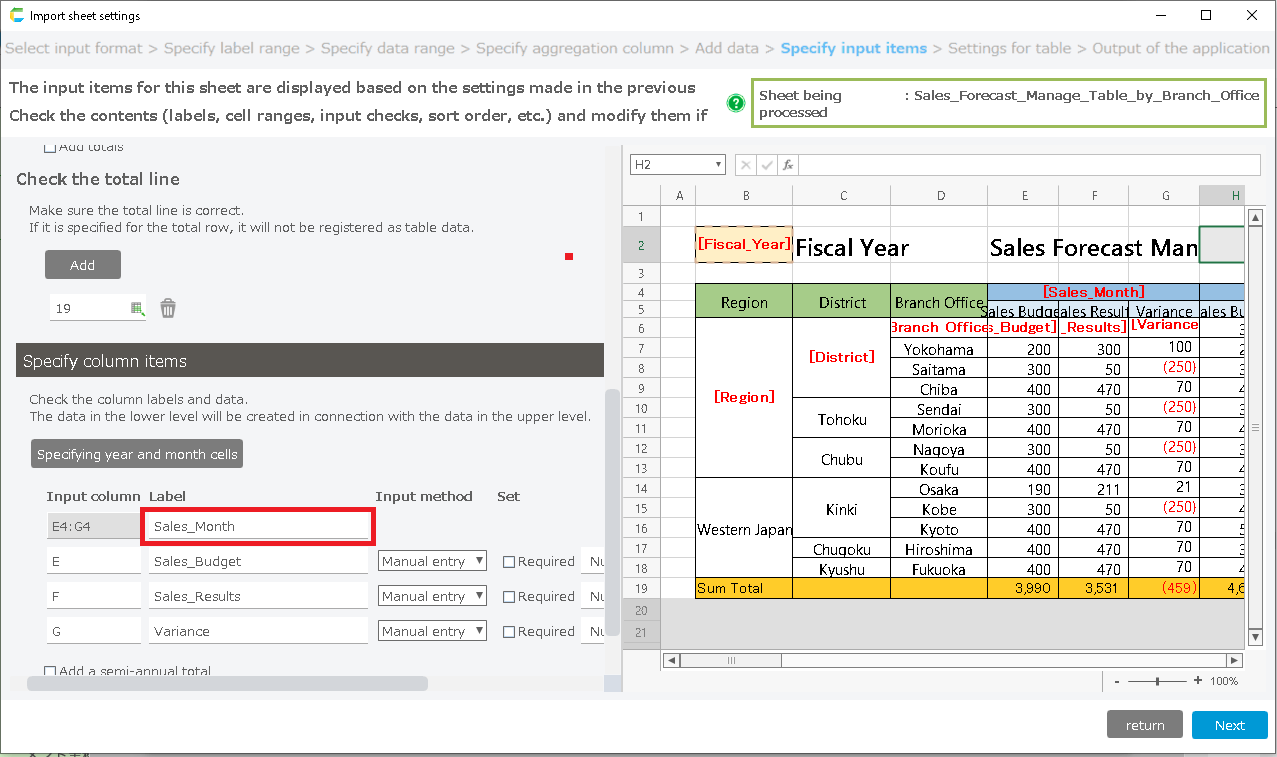
- [Specify input item]-[Column item settings]
Input column Specify the input cell for the cross table data item. Label Specify the table label name of the cross table data. Input method Specify input method for cross table data items. Refer to the next section for details. Settings Specify the input format for cross table data items. The format specified here will be checked when the application is turned on. Mandatory checks [Only when manual input is specified]A mandatory check will be performed for this item when the application is launched. Character count check [Only when manual input is specified]When the application is launched, a character count check is performed for this item. If the number of characters is greater than the number of characters you entered, an error will occur. 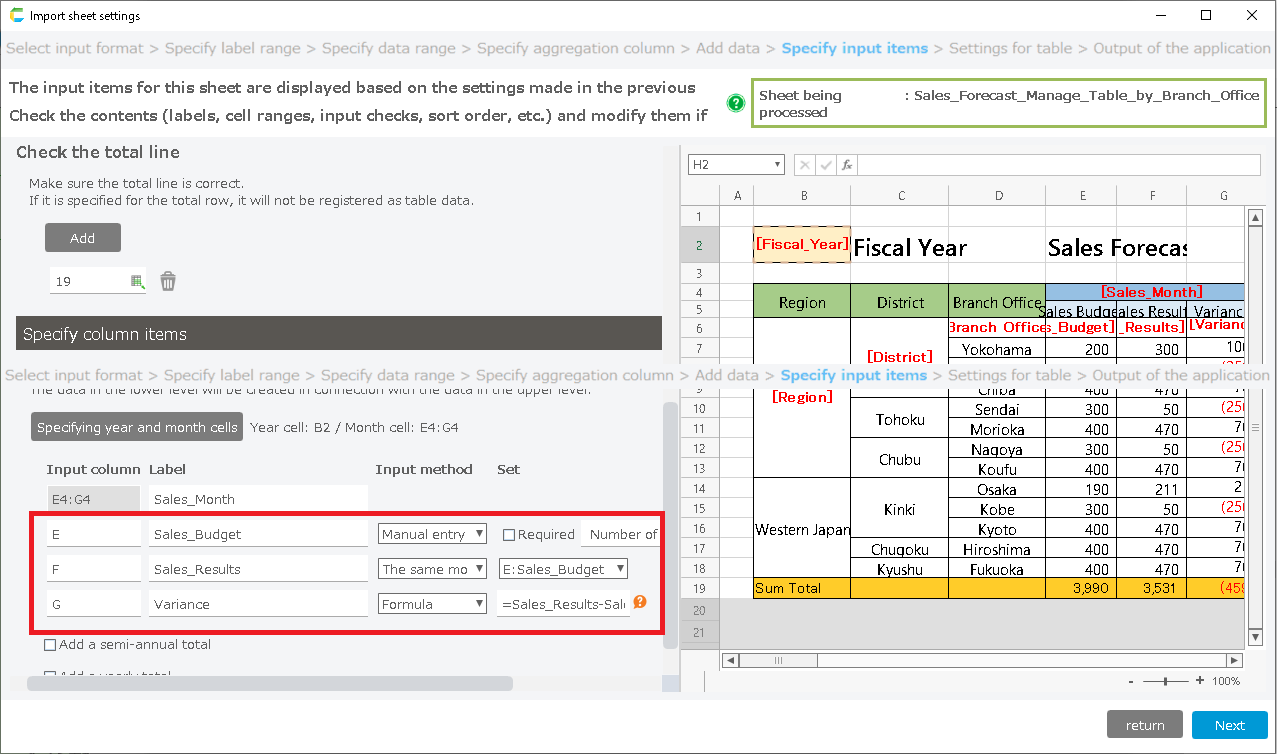
[Specify input item]-[Column item settings]
The input method can be selected from "Manual input", "Same month last year", and "Formula".
Manual input When you use the application, this will be an item that you enter manually directly into the cell. Same month last year [Only when year/month cell is specified]When you use the app, it fetches and displays the data of the same month of the previous year for the specified item. You can’t input data on the app. Formula [Only when year/month cell is specified]When you use the app, the formulas you entered here will be displayed. You cannot enter formulas in the application. The only item that can be specified is the label name entered in [Specify column item].
Tip
The formula you enter in the formula will be directly reflected in the application. If you want to get the difference between the sales budget and the actual sales, enter "Actual Sales - Sales Budget".
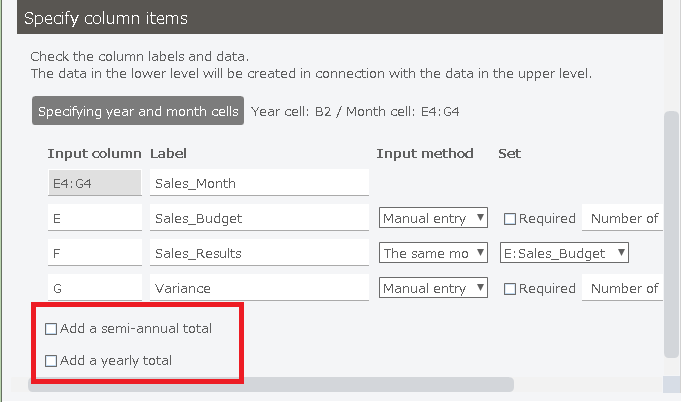
[Specify input item]-[Column item settings]
Semi-annual and annual totals can be added to each column item. Semi-annual totals can be set only when the year and month are specified.
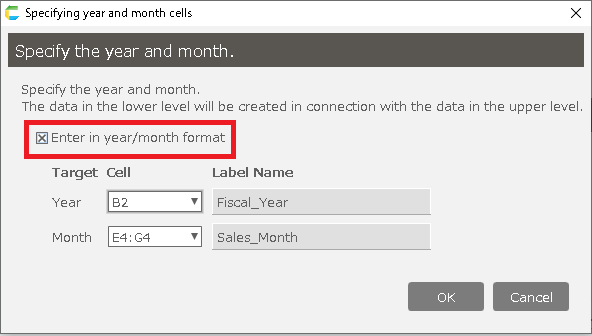
[Specify input item]-[Solumn item settings]-[Set year and month cell] (* can be skipped)
If the column item is year and month, click "Specify year and month cell" to specify the year and month cell. Select the year from the header item, and the month from the column item.
If the column item is a category other than year and month, for example, by store, there is no need to set this.
Tip
If you specify the year and month, you can specify the data for the same month of the previous year.
Attention
Table setting screen
Confirm the table and data to be created. Double-click on the table name to see the data. To see the definitions, click on the "Definition" tab.
When you are done with the confirmation, click "Complete".
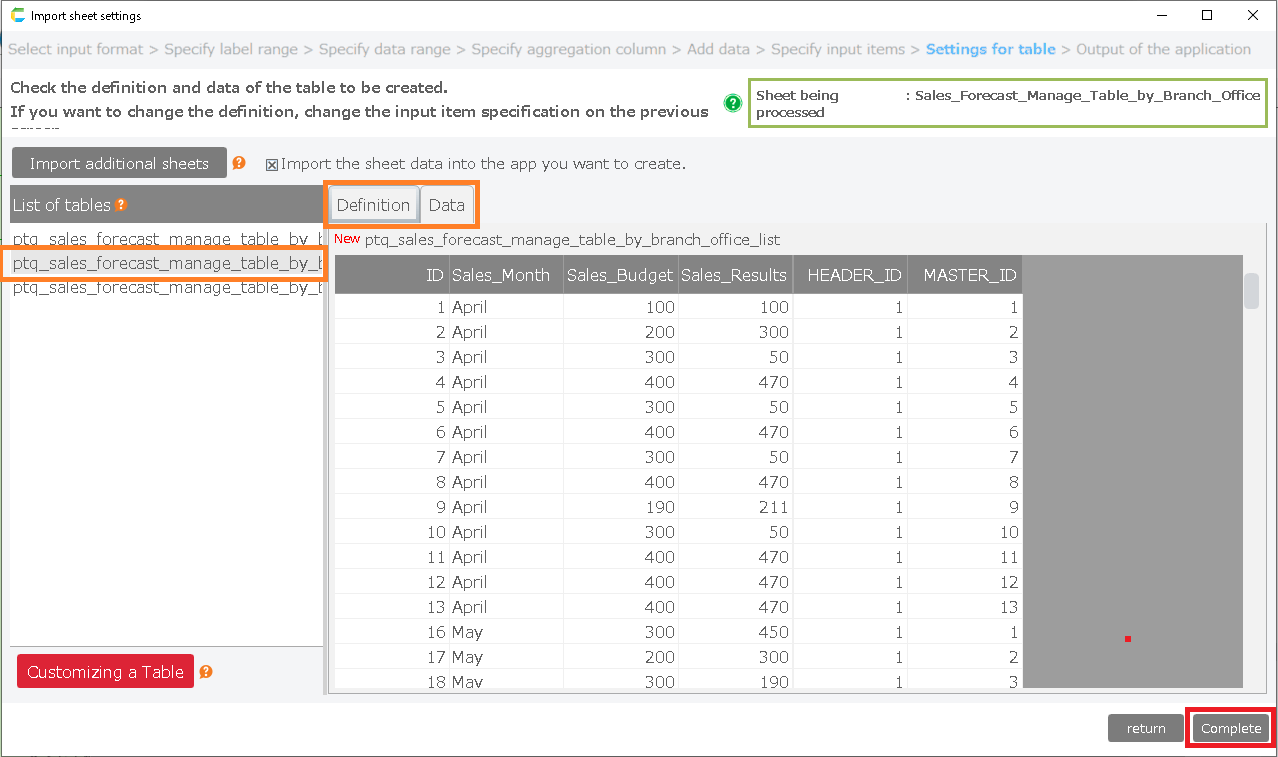
- The row items will be converted into a master table. At that time, the data is created according to the maximum number of data in the lowest level.
For example, if there are 10 branches associated with Kanto and 2 branches associated with Kansai, 8 empty data will be created for Kansai as well. (A total of 10 data will be created.)
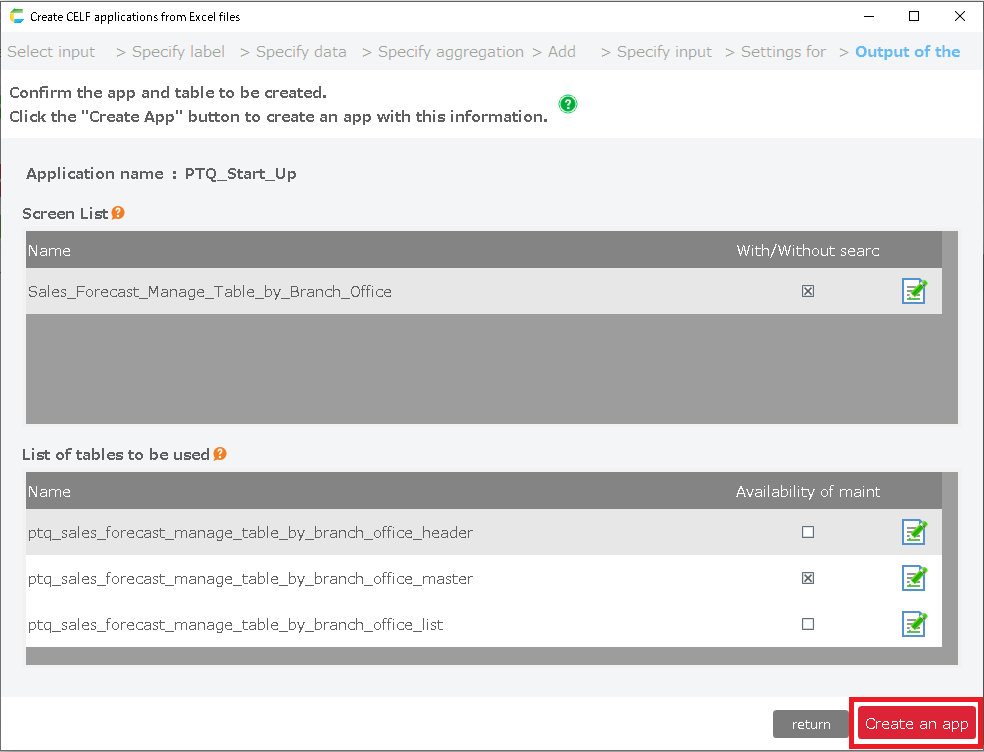
App confirmation screen
- Confirm the app sheet and table to be created. If you want to change the name, you can do so from Change icon.
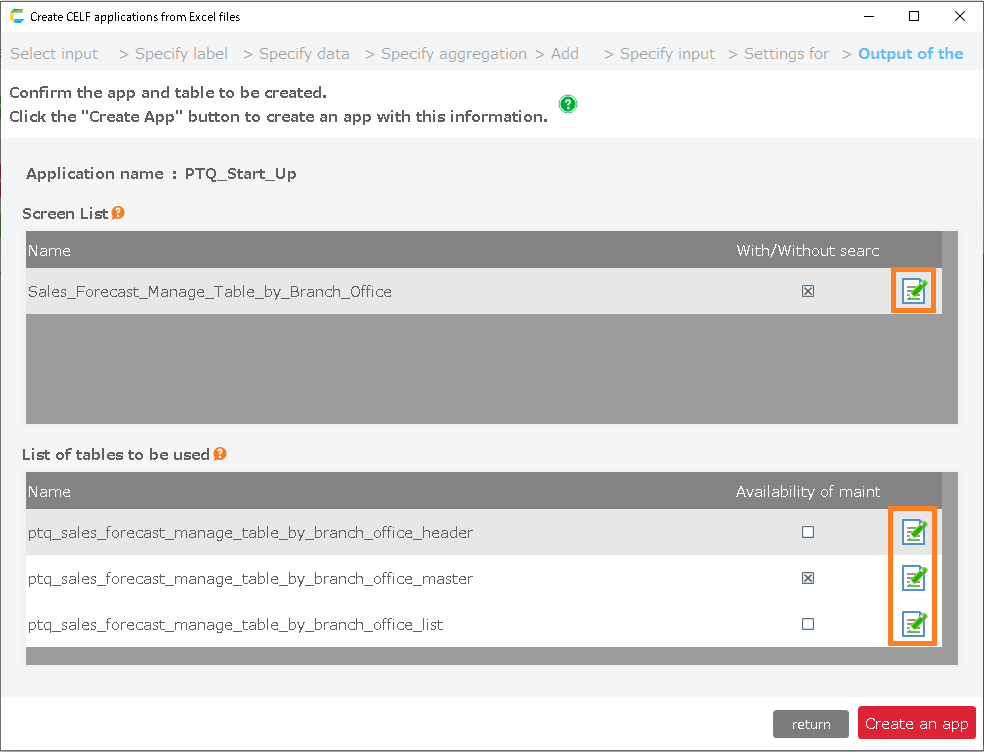
- Click the "Create app" button to create the app.
Related keywords
The upper right corner of the row label area and the lower left corner of the column label area must be tangent