Modify Multi-sheet combination app
Change input item settings
Example of changing input item settings
As an example of input item settings, this section explains how to set a "digit count check" for the input cells of a multi-sheet combination application that you have created.
Tip
In the example, an error setting is added if a value of more than 6 digits is entered and a save is executed.
To change input item settings from the edit screen
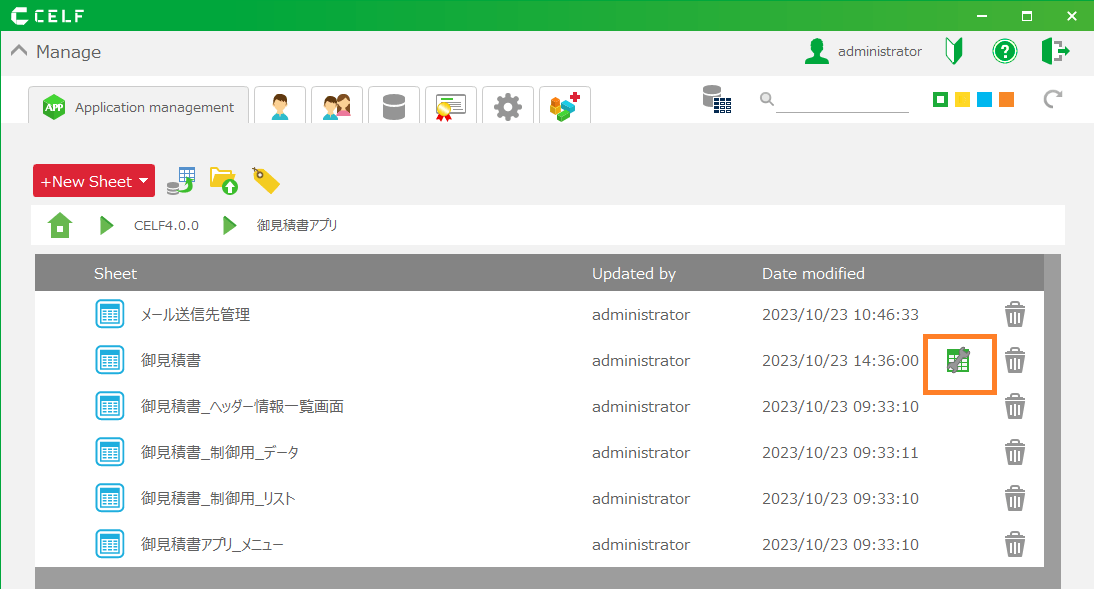
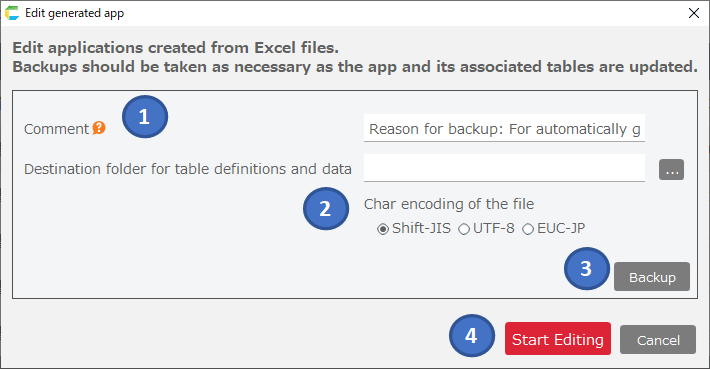
- About App modification to start editing the app.
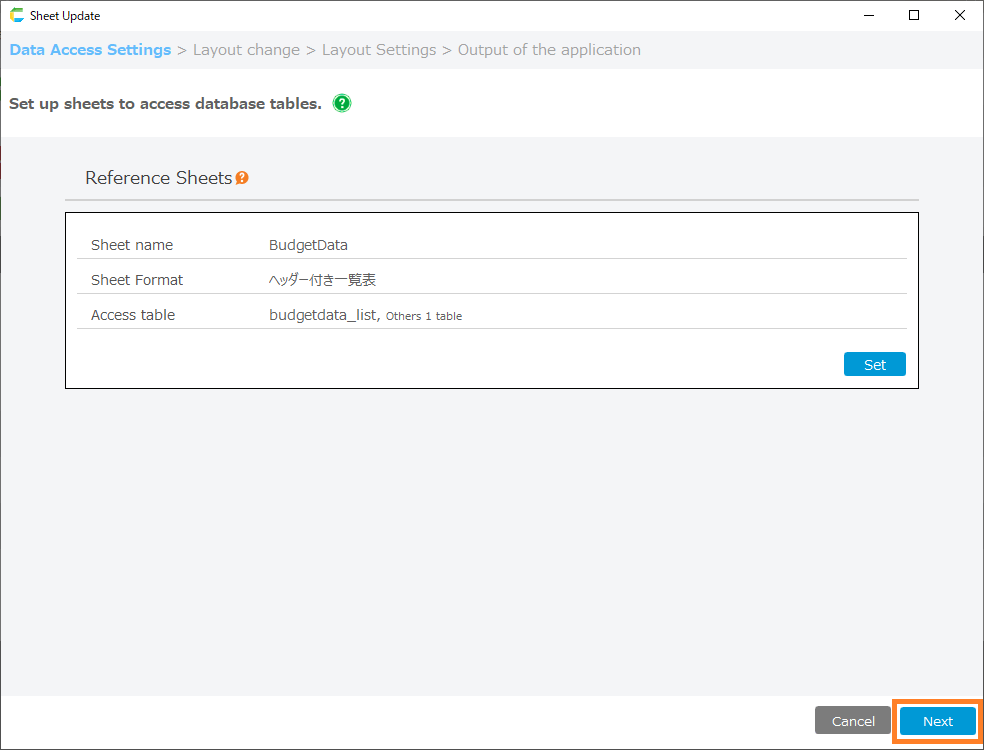
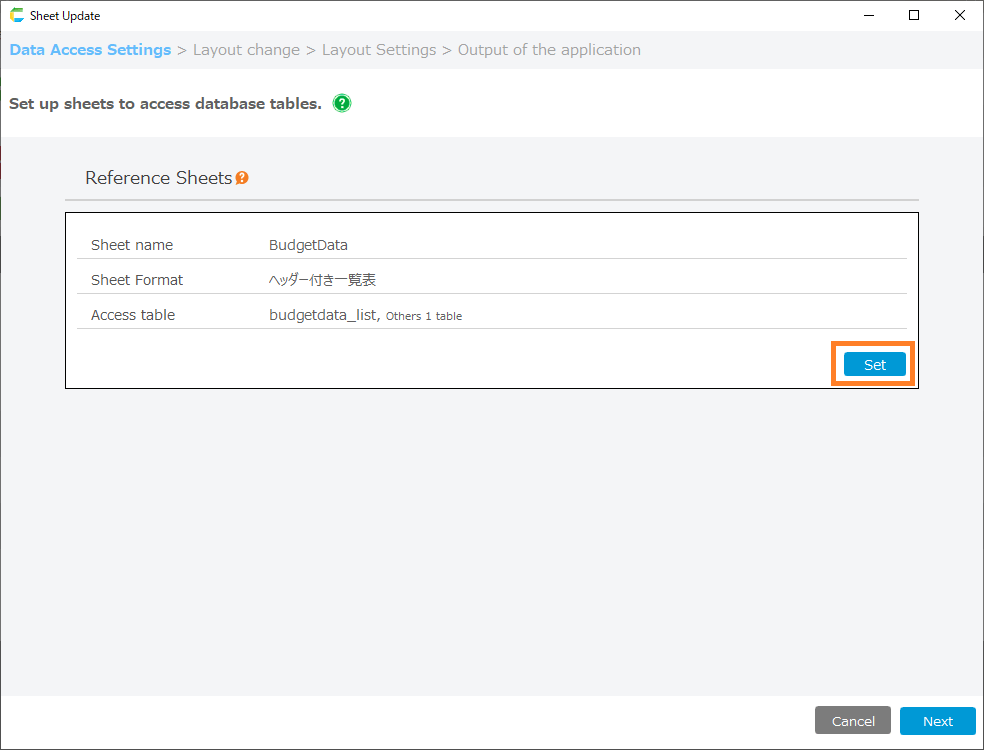
- When the Settings screen opens, click the 'Settings' button on the 'Data Access Settings' screen for the sheet referenced by the cell whose settings you wish to change.
- Proceed to the 'Specify Input Items' screen.
- Change the item settings on the Specify Input Items screen.
- When changes are complete, click the 'Next' button.

- Click the 'Done' button when you proceed to the table confirmation screen.
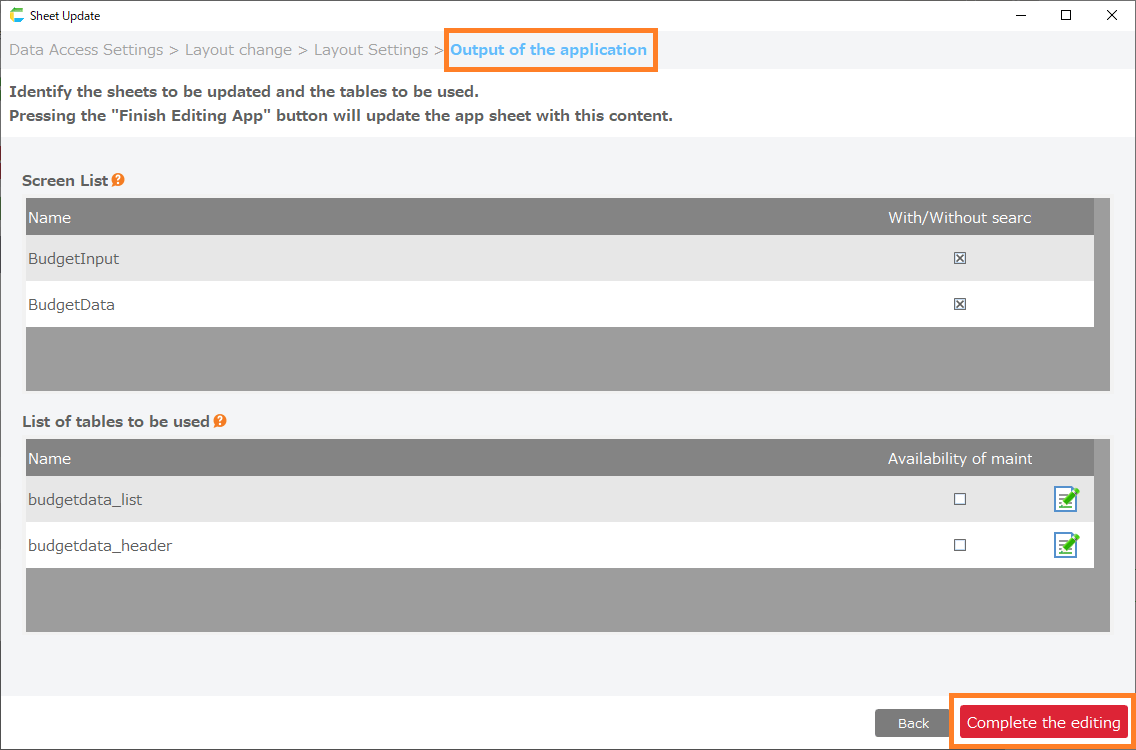
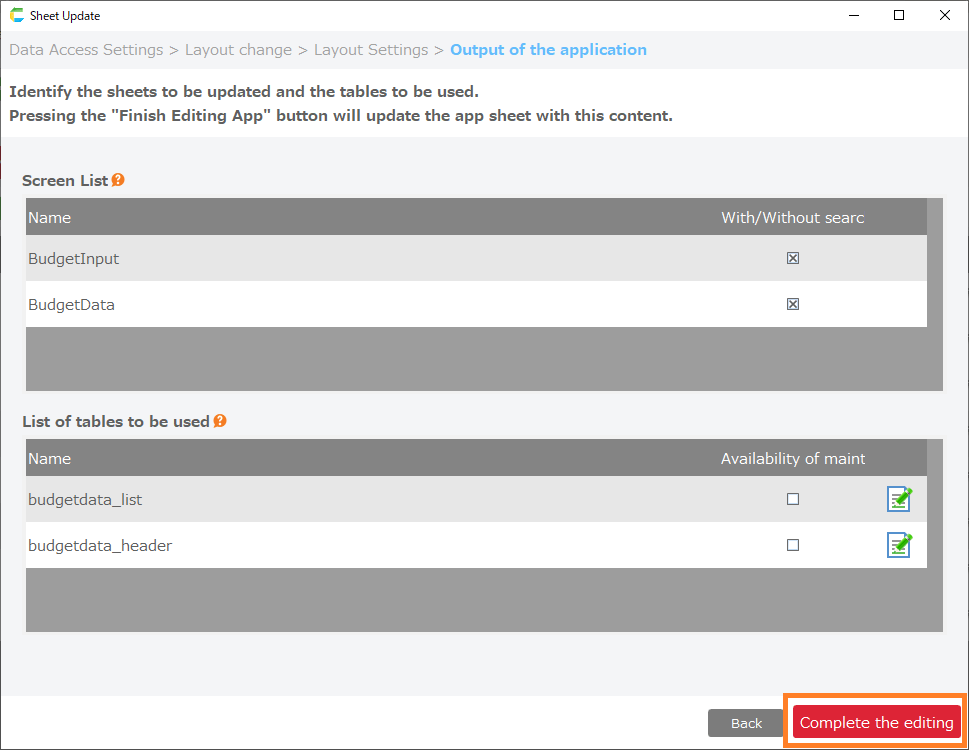
- When you return to the Data Access screen, click the 'Next' button and proceed directly to the 'Output of the application' screen.
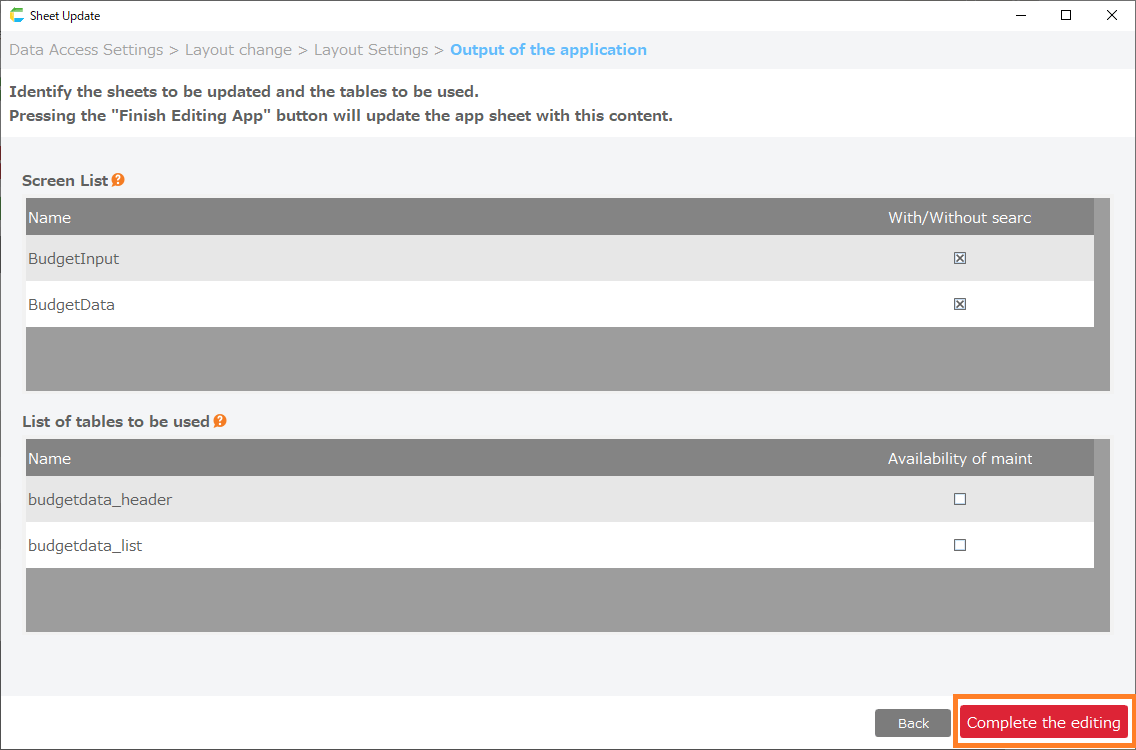
- Click the 'Complete the editing' button on the app output screen.
See also
Once you have completed editing your app, you can verify that your settings have been reflected by test running the sheet.For more information on running tests, see Test run for more information on running tests.
Change the area for data entry
Example of changing the area for data entry
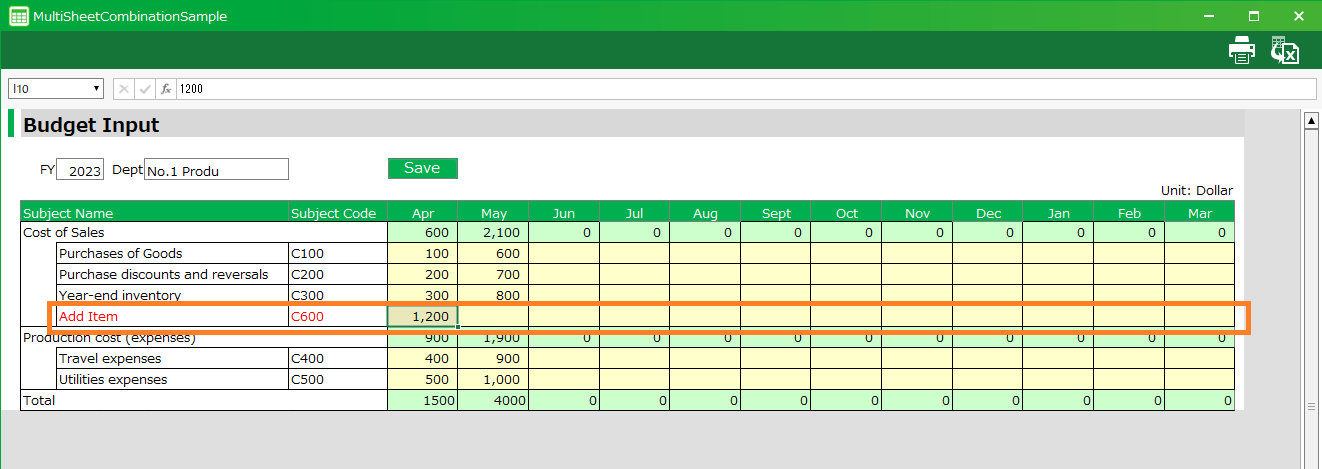
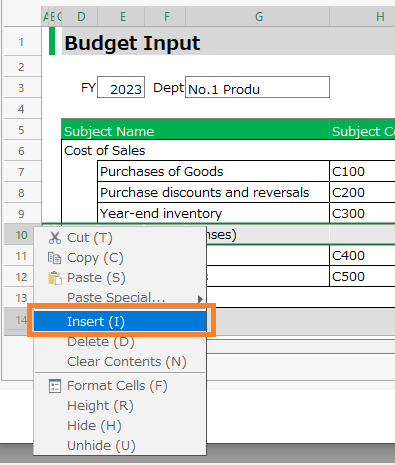
As an example of changing the data input area, this section explains how to add an input area to a multiple-sheet combination application that you have created.
Tip
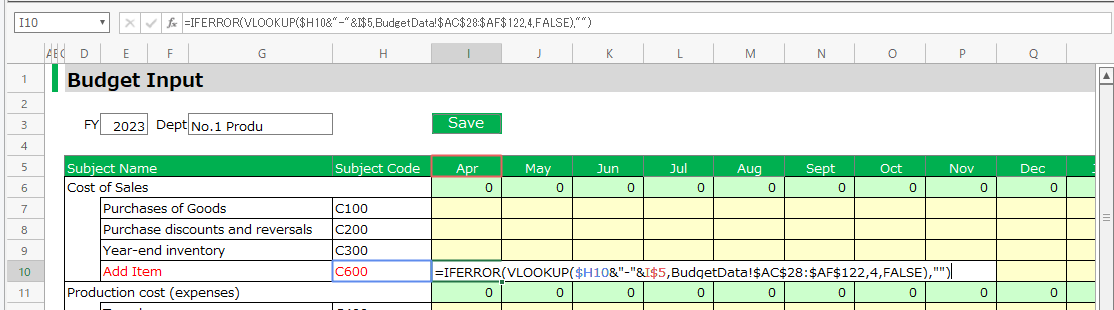
In the example, a new line is added to the application created in the sample, and the input areas 'Subject Name = Additional Item' and 'Subject Code = C600' are added.
Procedure for changing the area where data is entered from the edit screen
- About App modification to start editing the app.
- When the setup screen opens, click the 'Next' button on the 'Data Access Settings' screen to proceed to the 'Layout Change' screen.

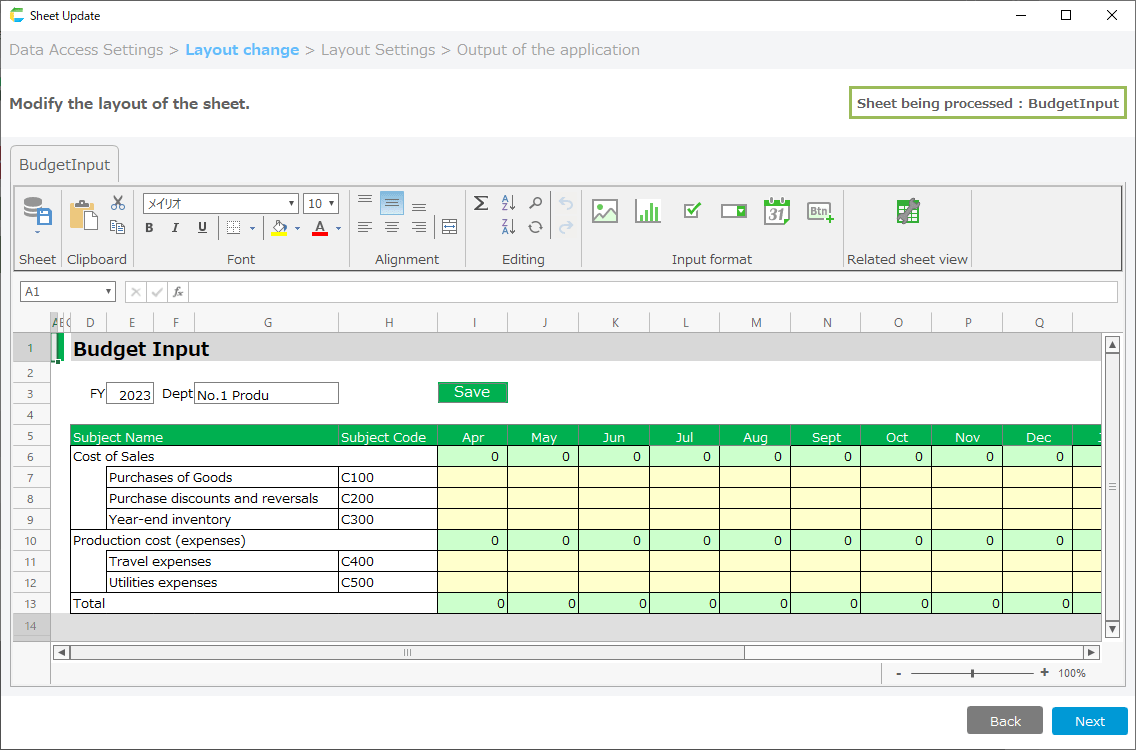
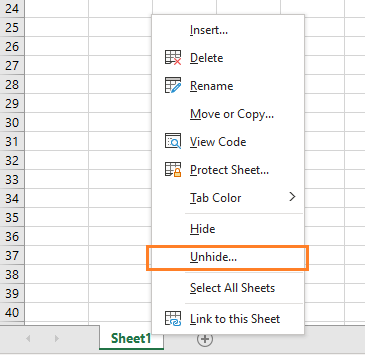
- Insert rows" on the 'Layout Change' screen to add an area for data entry.
- Set up VLOOKUP for each cell increased by 'Insert Row' in 3.
See also
As a convenient function when setting the search range for VLOOKUP formulas, you can open a sheet that can be referenced from the 'Related Sheet Display' at the top of the sheet.
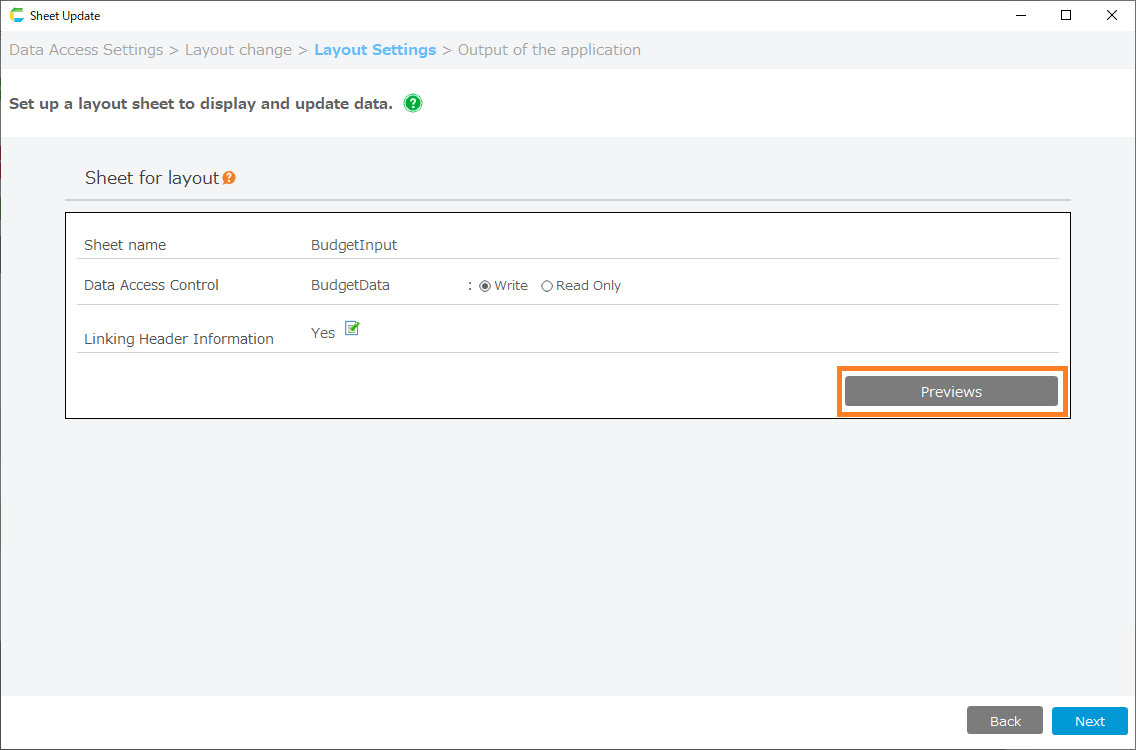
- When changes are complete, click the 'Next' button to proceed to the 'Layout Settings' screen.
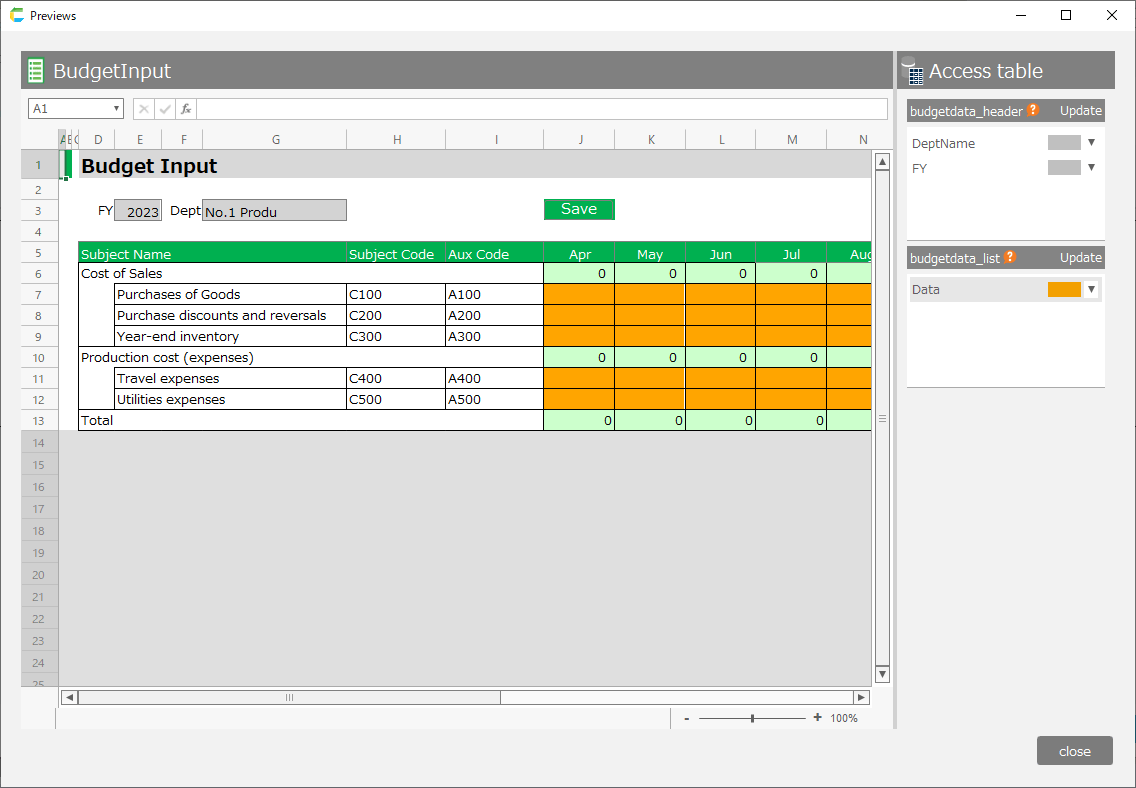
- Click the 'Preview' button to confirm the input area.
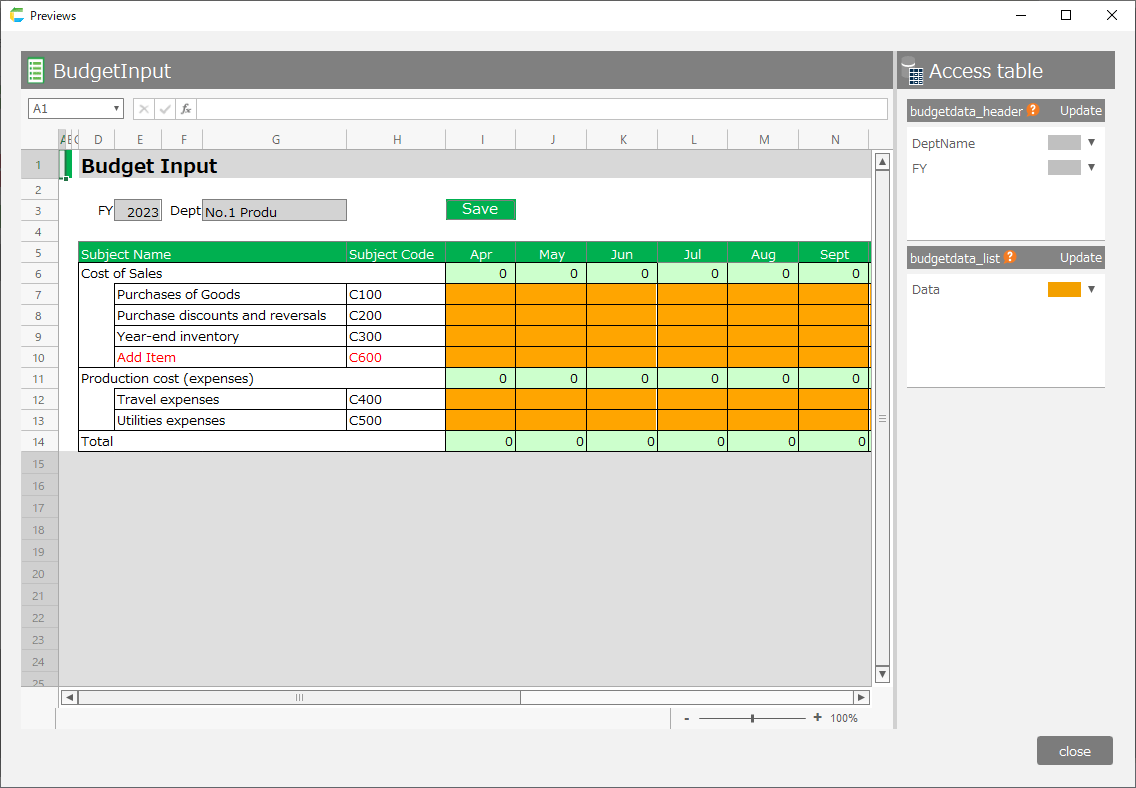
- If you are satisfied with the preview screen, return to the 'Layout Settings' screen, click the 'Next' button, and proceed to the 'Output of the application' screen.
- Click the 'Complete the editing' button on the app output screen.
See also
Once you have completed editing your app, you can verify that your settings have been reflected by test running the sheet.For more information on running tests, see Test run for more information on running tests.
Changing data search conditions
Example of changing data search conditions
As an example of changing data search conditions, this section explains how to add conditions to the VLOOKUP of a multi-sheet combination application that you have created.
Tip
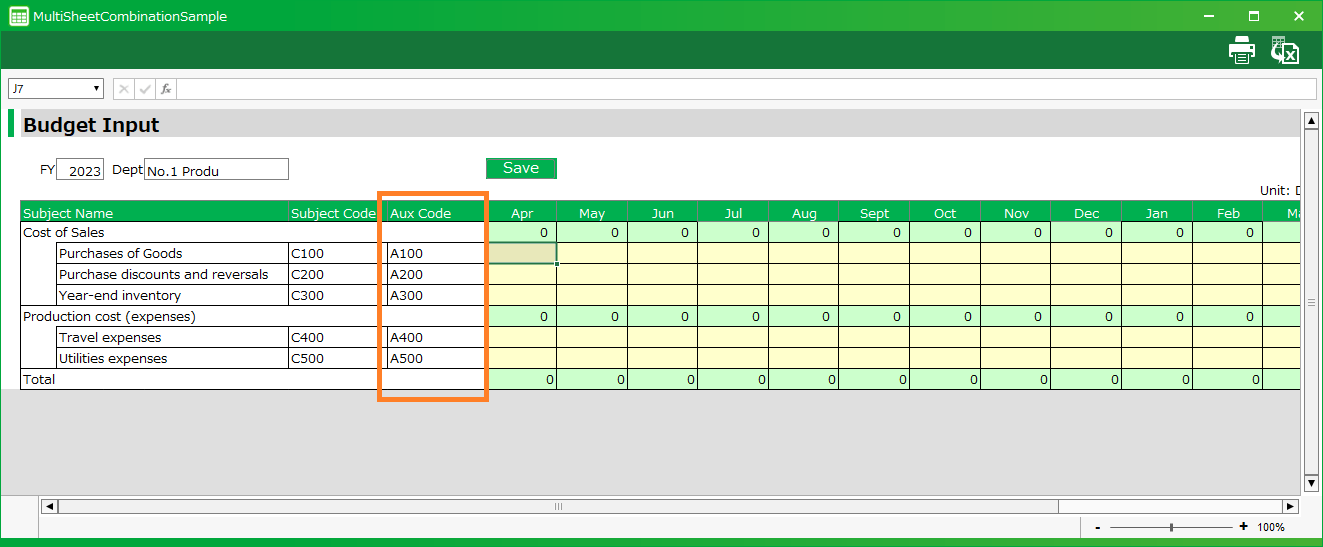
In the example, the 'auxiliary subject code' is added to the application created in the sample.The VLOOKUP conditions set in each cell before and after the change are as follows
- Conditions before change: 'subject code', 'month'.
- Conditions after change: 'Subject code', 'Auxiliary subject code', 'Month'.
Procedure for changing data search criteria from the edit screen
- About App modification to start editing the app.
- When the Settings screen opens, on the 'Data Access Settings' screen, click the 'Settings' button for the sheet referenced by the cell whose search criteria you wish to change.
Hint
The sheet that the cell refers to is the sheet that is referenced in the search range of the VLOOKUP formula.
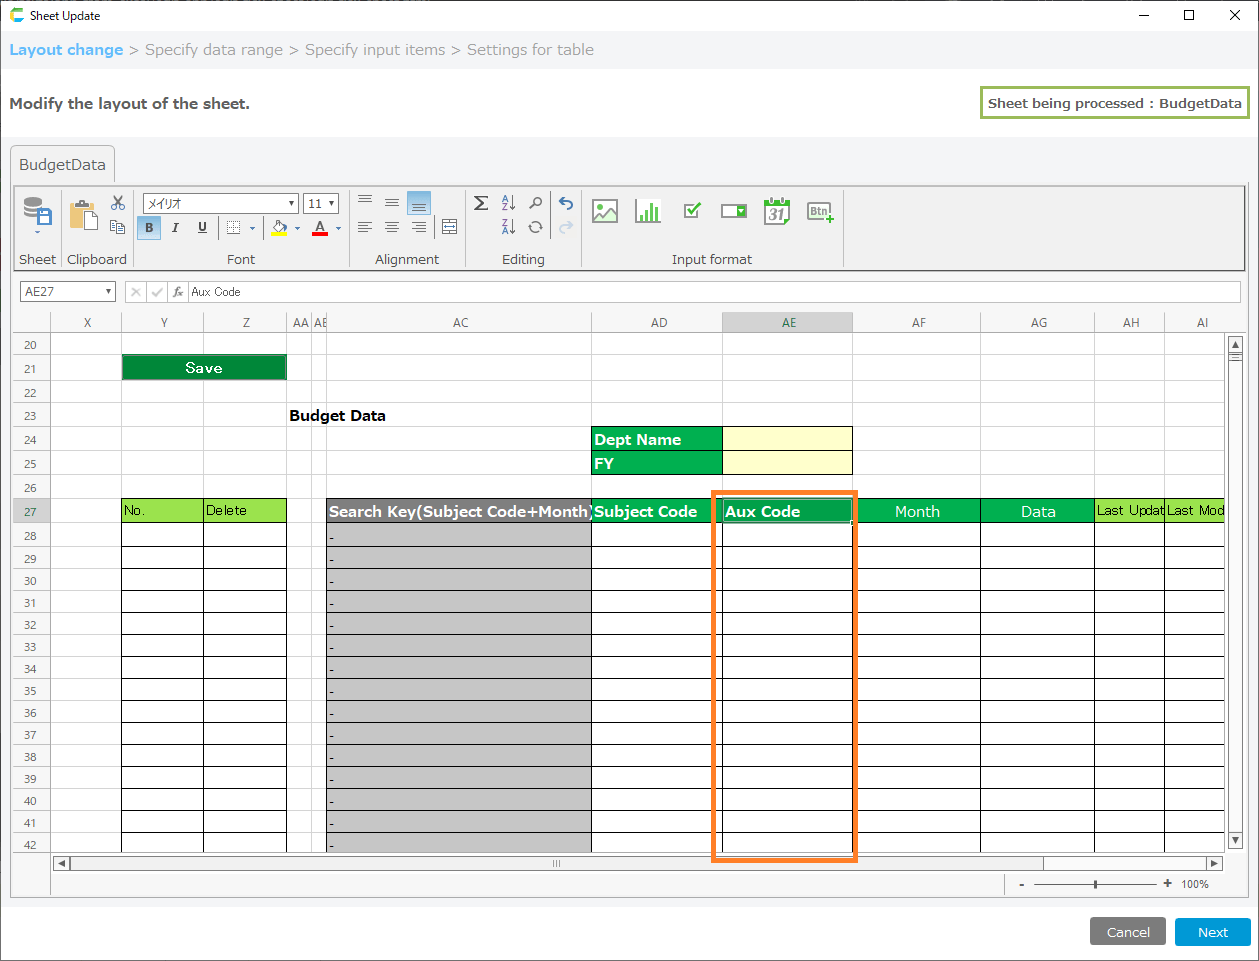
- After proceeding to the 'Layout Change' screen, insert columns into the table and add the columns that will be used as search criteria for the data.
Tip
In the example, a column is inserted to increase the number of search criteria, but to decrease the number of search criteria, delete the column.
- Modify the formulas in the search key columns.

Tip
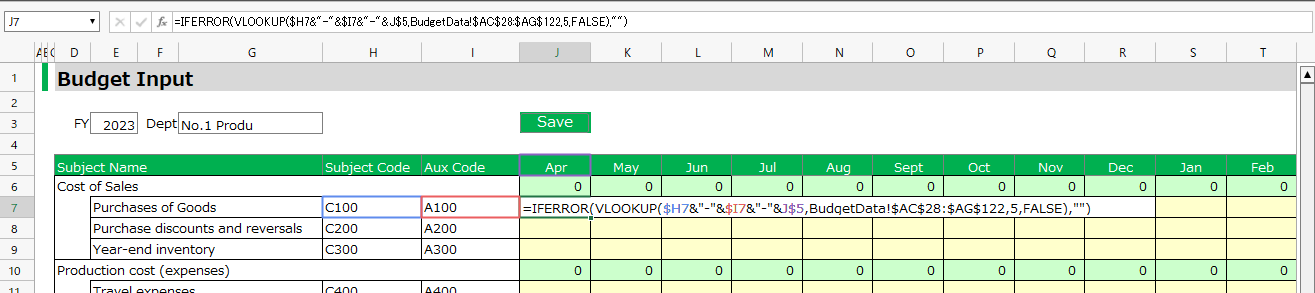
In the example, the 'Auxiliary Account Code' is added to column AE of the table.The formulas before and after the change in the search key columns are as follows
- Formula before change: =AD28&"-"&AE28
- Formula after change: =AD28&"-"&AE28&"-"&AF28
- When you have finished changing the table layout, click the 'Next' button.
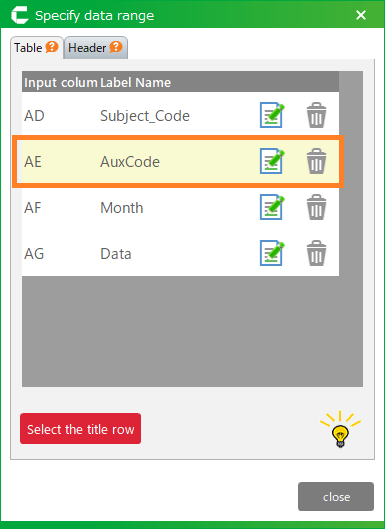
- On the 'Specify Data Range' screen, check that the columns you added to the table are displayed and click the 'Next' button.
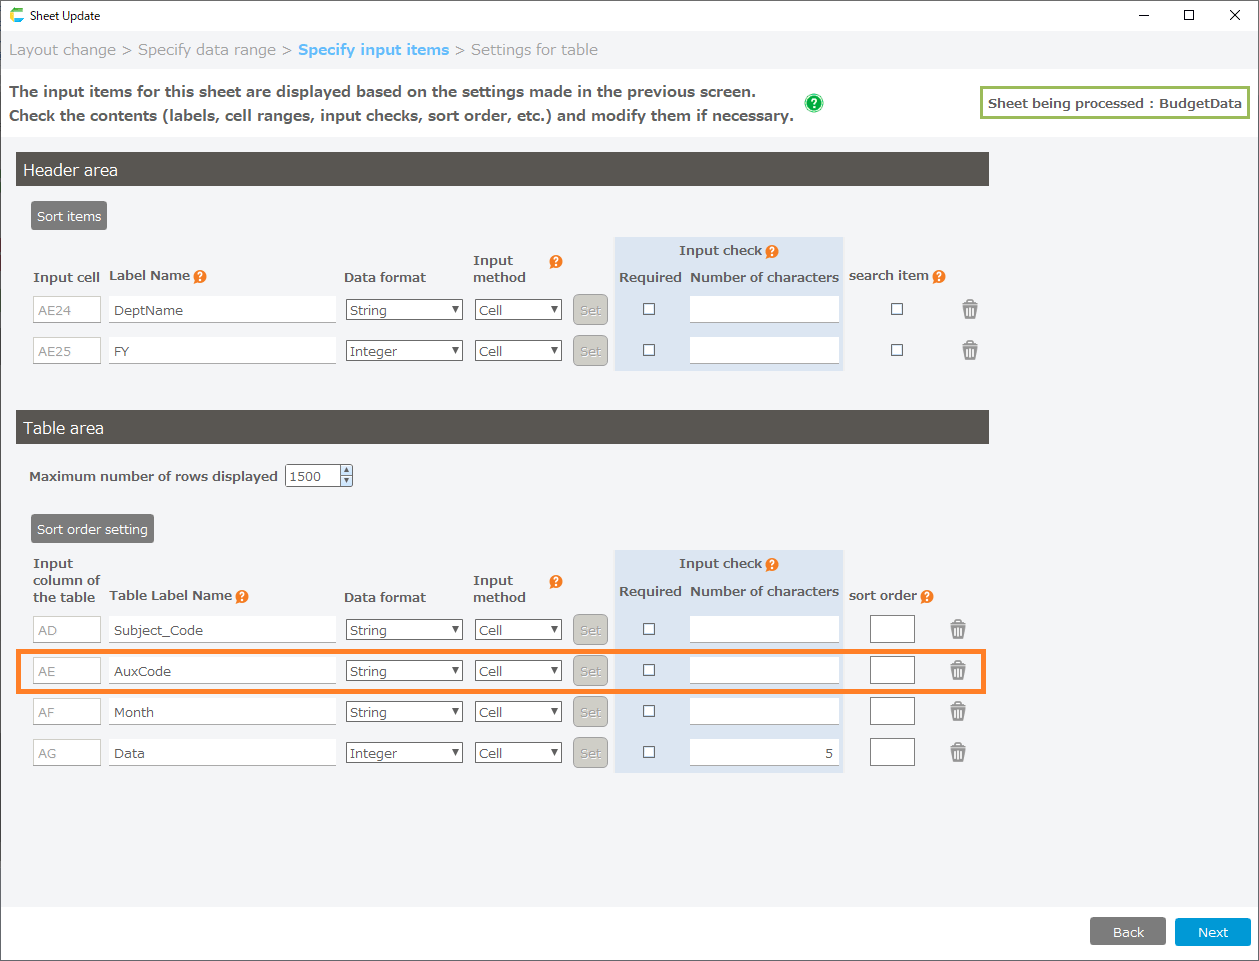
- On the 'Specify Input Items' Screen, configure the items as necessary, and click the 'Next' button when the settings are complete.
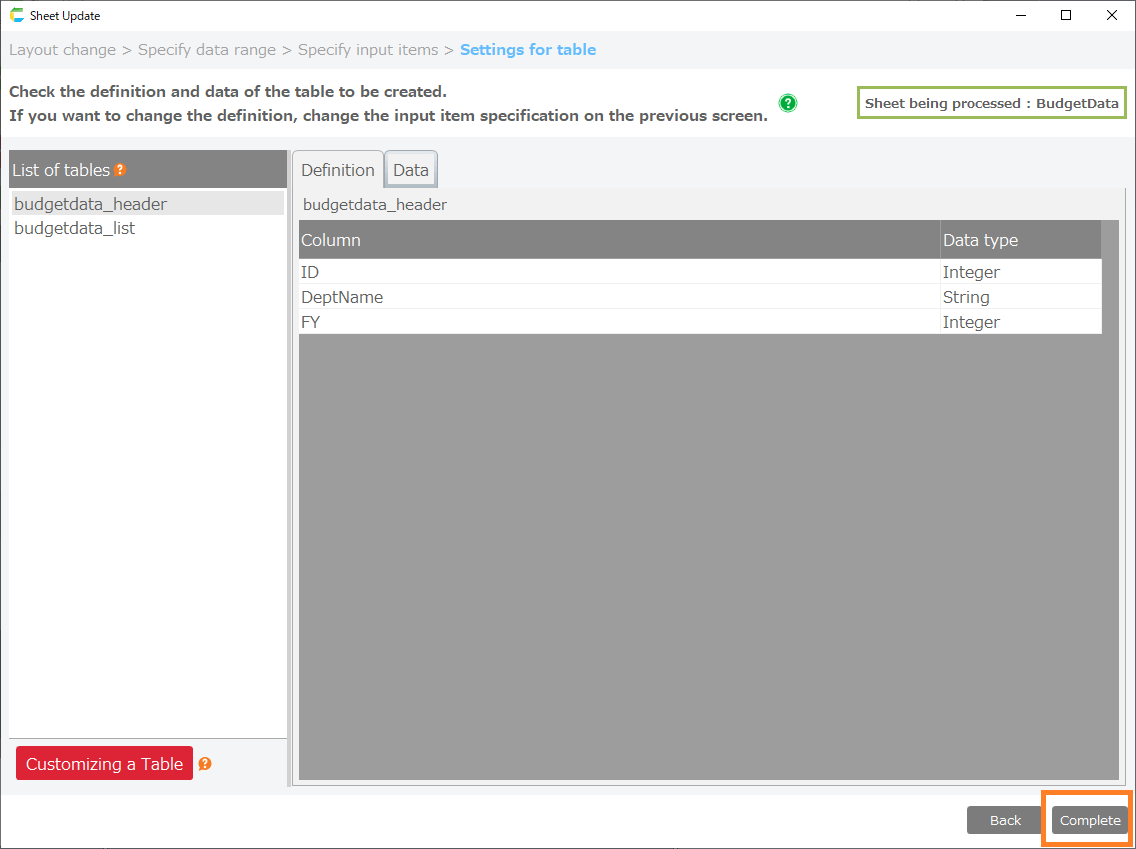
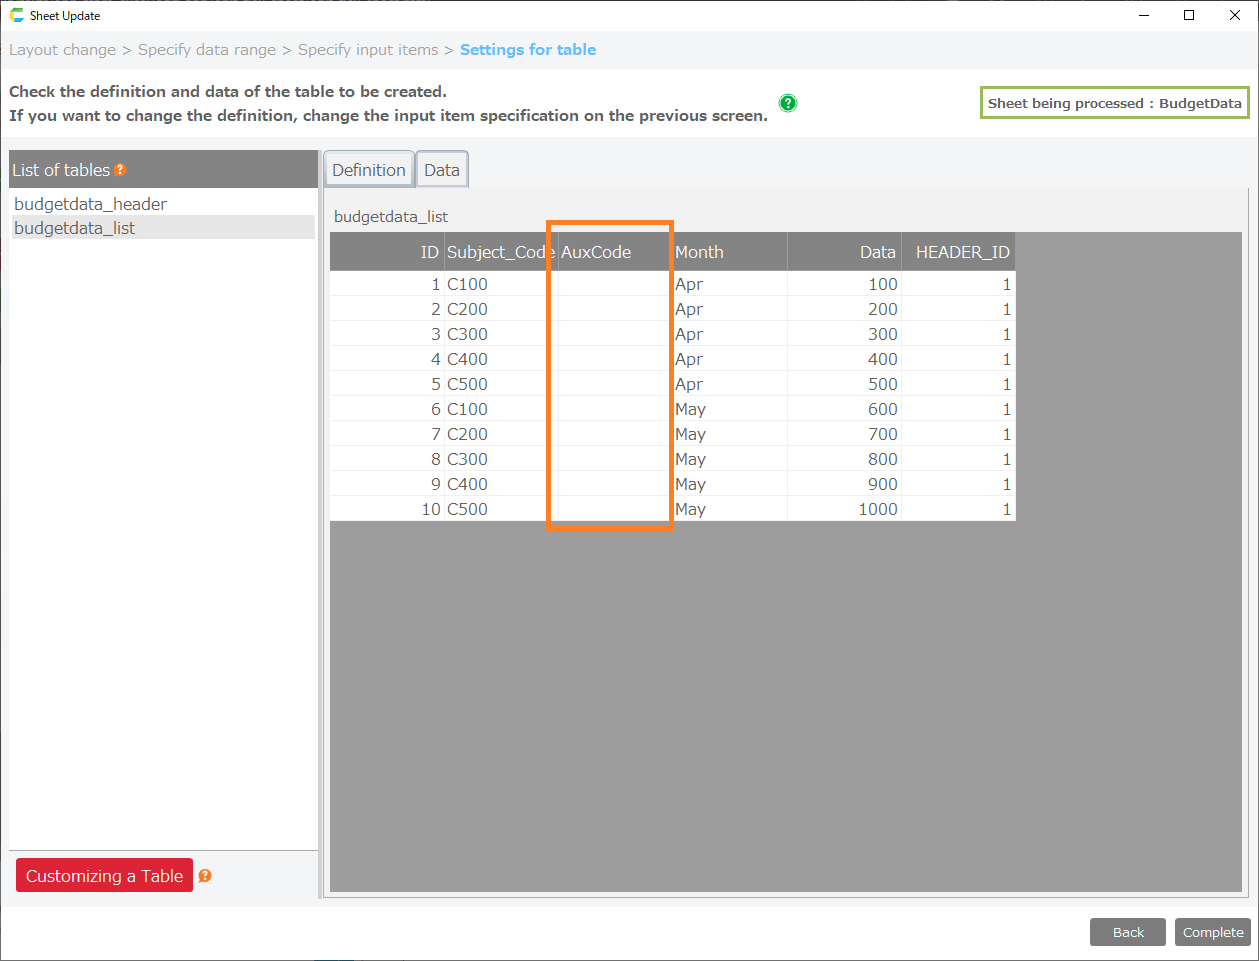
- On the 'Settings for table' screen, verify that the items added to the table appear in the list table, and click the 'Complete' button.
- When you return to the Data Access screen, click the 'Next' button.

- On the 'Layout Change' screen, 'Insert Columns' is used to add an area to be used as a search condition for data.
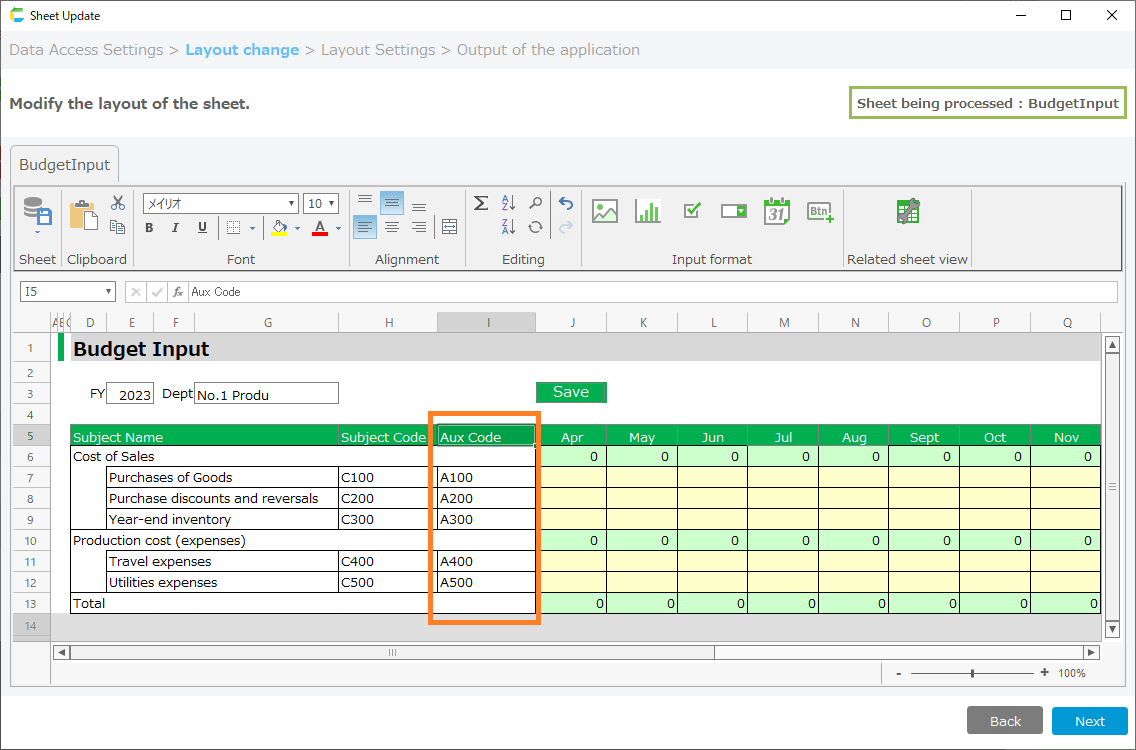
- Once you have added the search criteria area, modify the VLOOKUP formula in the data entry area.

Tip
In the example, the VLOOKUP formula for cell 'J7' is modified as follows
- Formula before modification: VLOOKUP($H7&"-"&I$5,Budget data!$AC$28:$AF$122,4,FALSE)
- Formula after modification: VLOOKUP($H7&"-"&$I7&"-"&J$5,Budget data!$AC$28:$AG$122,5,FALSE)
See also
As a convenient function when setting the search range for VLOOKUP formulas, you can open a sheet that can be referenced from the 'Related Sheet Display' at the top of the sheet.
- After completing the modifications, click the 'Next' button to proceed to the 'Layout Settings' screen.
- Click the 'Preview' button to confirm the input area.
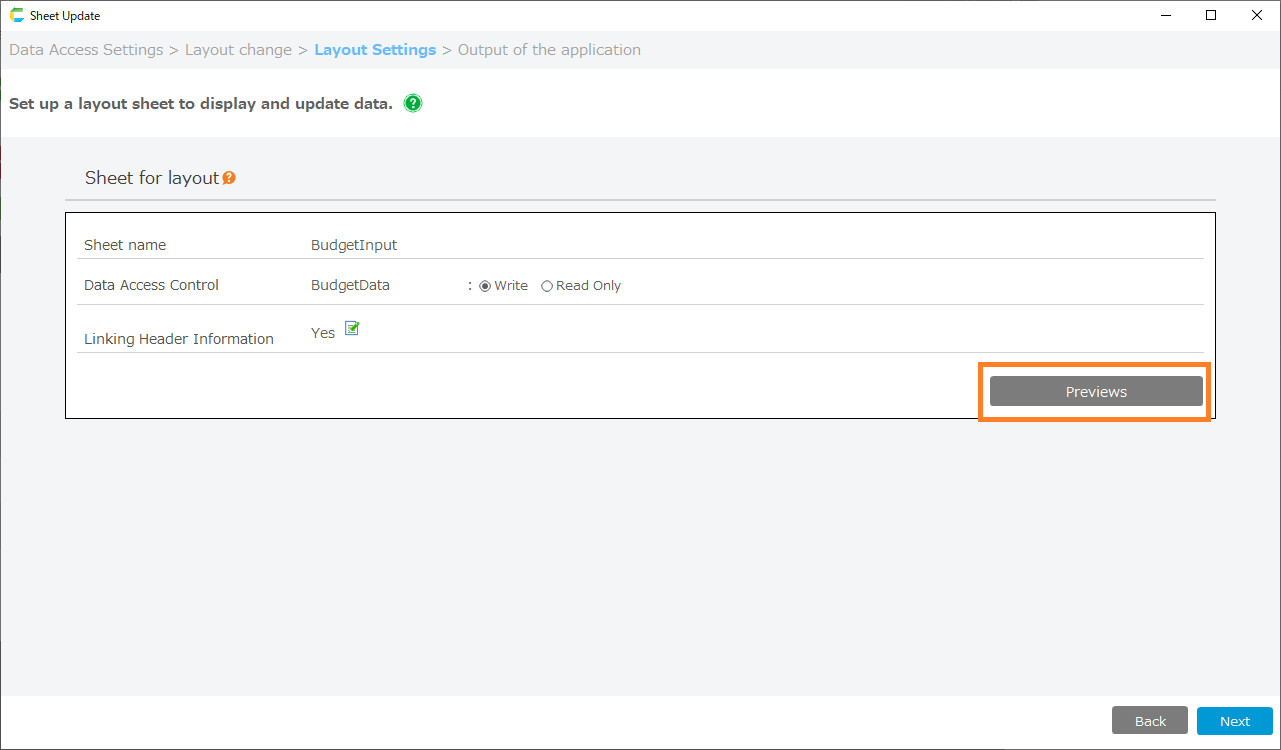
- If you are satisfied with the preview screen, return to the 'Layout Settings' screen, click the 'Next' button, and proceed to the 'Output of the application' screen.
- Click the 'Complete the editing' button on the app output screen.
See also
Once you have completed editing your app, you can verify that your settings have been reflected by test running the sheet.For more information on running tests, see Test run for more information on running tests.