Add data viewing control to the header information list sheet
Attention
Regarding how to add data viewing control to the header information list sheet in version 3.6.1 or earlier, see [Previous Version] Add data viewing control to the header information list sheet.
Add a process to control the data that can be viewed by the user in the app’s header information list sheet that you created.
Allow only administrator users to view administrative items
- Login to CELF and click the "Manage" button to open the management screen.
Tip
The "Manage" button appears when you are logged in as an administrator .
- Double-click the app you want to customize.
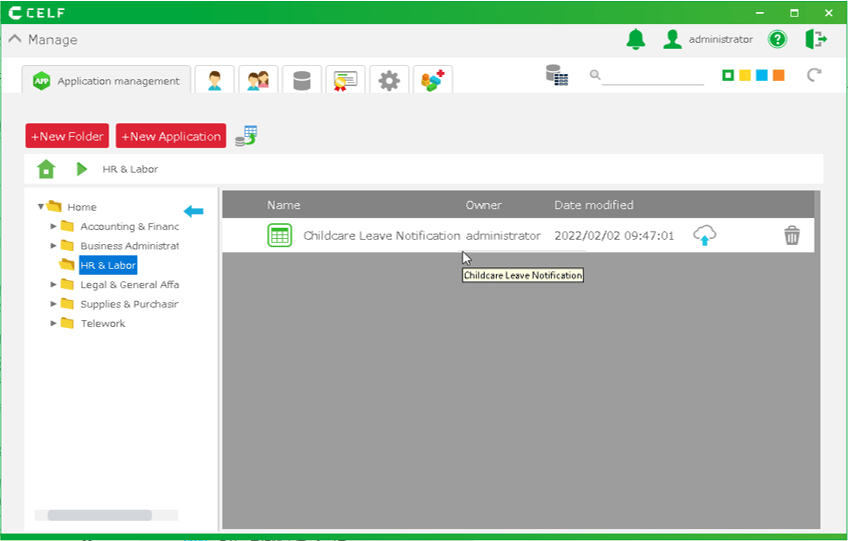
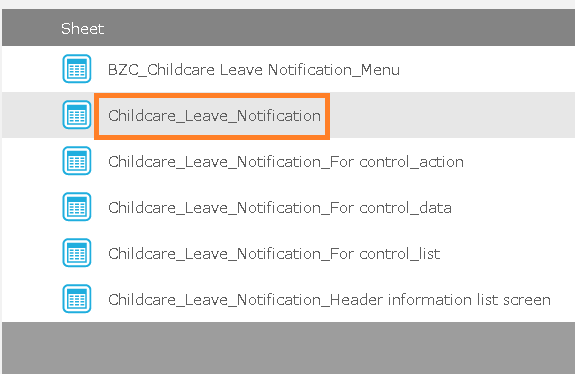
- Double-click the header information list sheet.
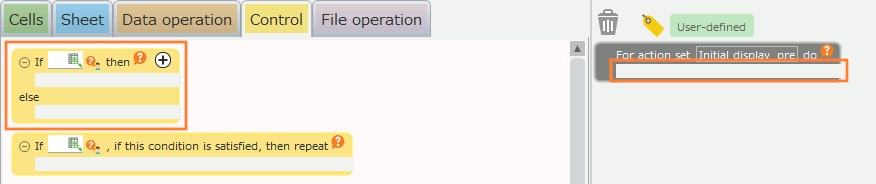
- Click the
 button.
 - Double-click the action set under "List view".
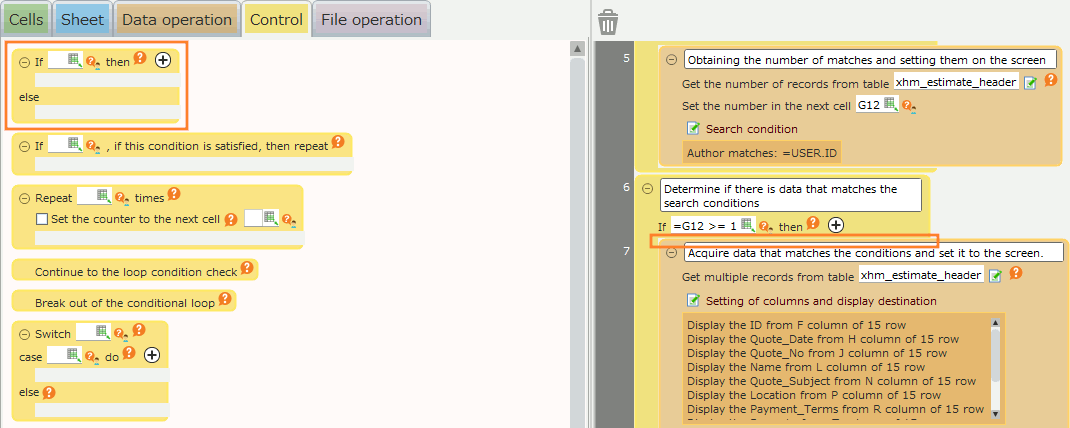
- Add the "Determine condition" action from the "Control" tab by dragging and dropping it onto the "Obtaining the number of matches and setting them on the screen" action.
Hint
The area where you can add an action will change to orange. Make sure the color of the area you want to add changes and then release the mouse button.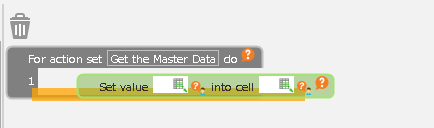
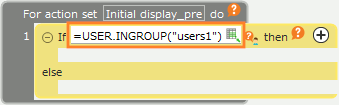
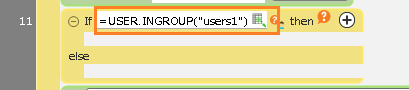
- Enter '=USER.INGROUP("[group name]")' as a branch condition for the "Determine condition" action you added.
Hint
For [Group name] to be entered in the condition, enter the administrator group.
Hint
The expression in the figure determines if the logged-in user belongs to the group "users1".
Tip
This condition will be used several times later, so it’s useful to copy it into e.g. a notepad.
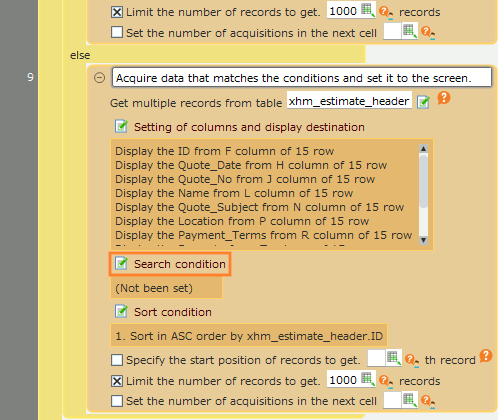
- Drag and drop the "Get number of records from table" action to the "If ___ then" part of the "Determine condition" action that you added.
- Copy the "Get number of records from table" action you moved by dragging and dropping it into the "otherwise" part of the "Determine condition" action you added.
Hint
You can copy an action by dragging and dropping it while holding down Ctrl.
- Click the Set Search Condition button in the copied "Get number of records from table" action.
Hint
- Click the search condition button for the copied action in the "otherwise" part of the "Determine condition" action.
- Be careful not to confuse it with the "If ___ then" part.
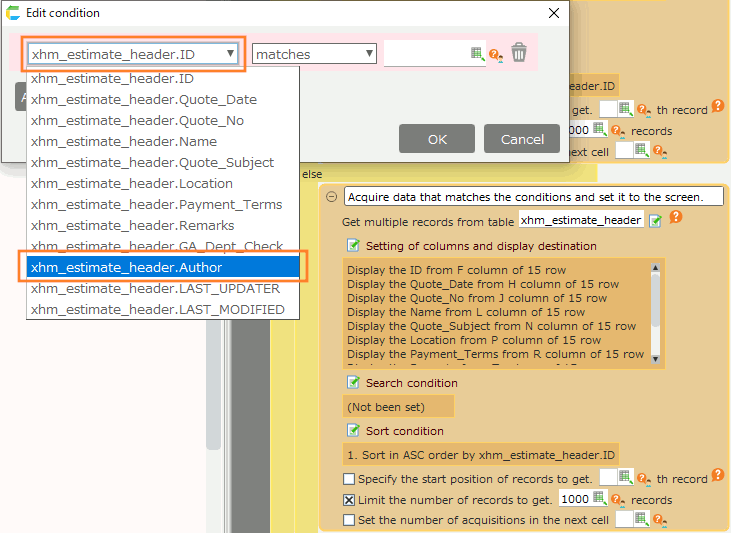
- In the search condition setting screen, select the author for the "XX" part of "XX matches YY".
- In the search condition setting screen, enter "=USER.ID" in the "YY" part of "XX matches YY".
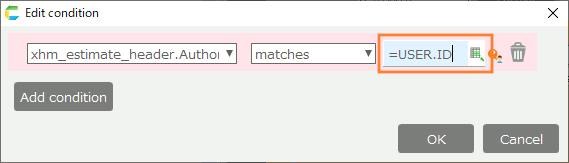
- Click the OK button to close the search condition setting screen.
Hint
The search condition you set in the action will be displayed.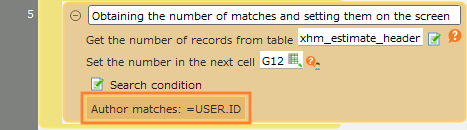
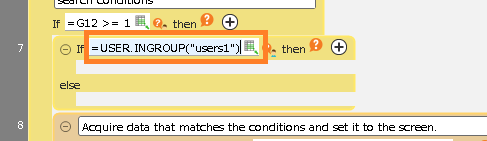
- Add the "Determine condition" action from the "Control" tab by dragging and dropping it on top of the "Get multiple records from table" action.
- Enter '=USER.INGROUP("[group name]")' as a branch condition for the "Determine condition" action you added.
Hint
For [Group name] to be entered in the condition, enter the administrator group.
Hint
The expression in the figure determines if the logged-in user belongs to the group "users1".
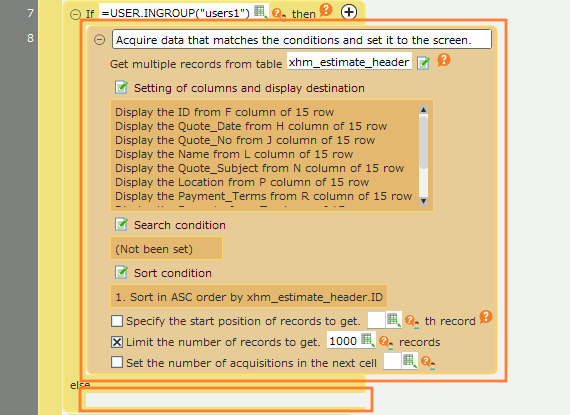
- Drag and drop the "Get multiple records from table" action to the "If ___ then" part of the "Determine condition" action that you added.
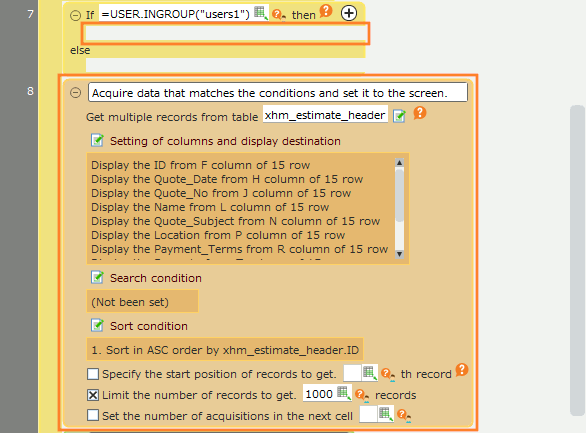
- Copy the "Get multiple records from table" action you moved by dragging and dropping it into the "otherwise" part of the "Determine condition" action you added.
Hint
You can copy an action by dragging and dropping it while holding down Ctrl.
- Click the Set Search Condition button on the copied "Get multiple records from table" action.
Hint
- Click the search condition button for the copied action in the "otherwise" part of the "Determine condition" action.
- Be careful not to confuse it with the "If ___ then" part.
- In the search condition setting screen, select the author for the "XX" part of "XX matches YY".
- In the search condition setting screen, enter "=USER.ID" in the "YY" part of "XX matches YY".
- Click the "OK" button.
Hint
The search condition you set in the action will be displayed.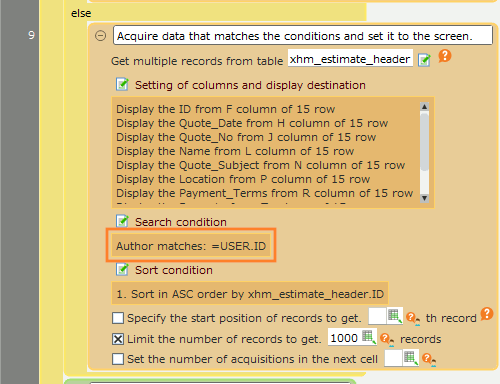
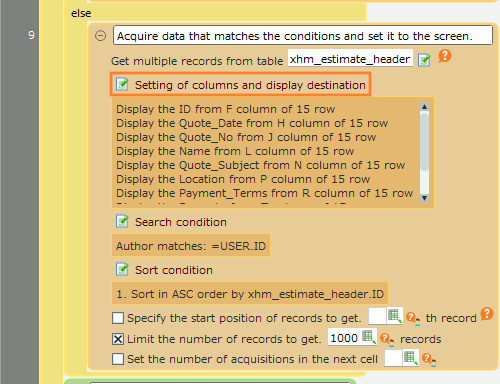
- In the copied "Get multiple records from table" action, click the Set button for the columns to be displayed and the destination.
Hint
- Click the search condition button for the copied action in the "otherwise" part of the "Determine condition" action.
- Be careful not to confuse it with the "If ___ then" part.
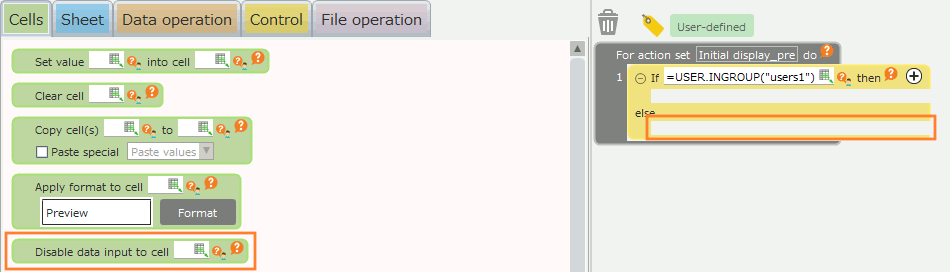
- In the copied "Get multiple records from table" action, remove the administrative item from the displayed column.
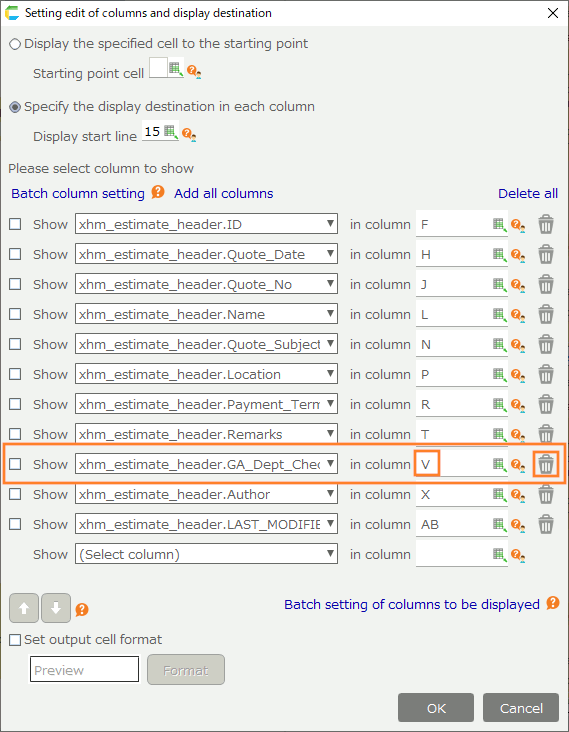
Hint
To delete an item, click the Trash button.
Hint
If there is more than one management item, you need to delete all of them.
Hint
Make a note of the columns that show deleted administrative items in Notepad or some other place, as they will be used later for actions.
- Click the OK button to close the Settings to Display Column and Destination screen.
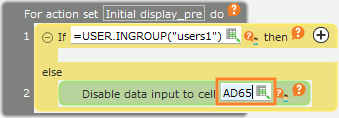
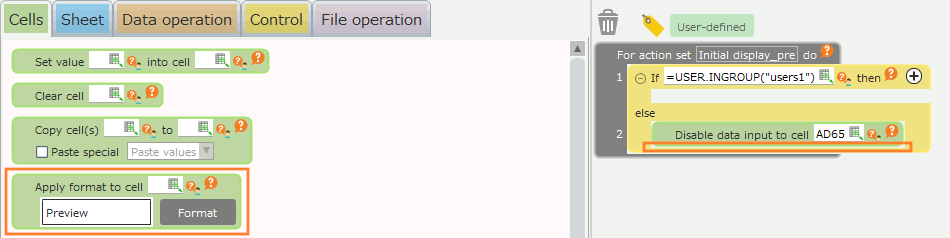
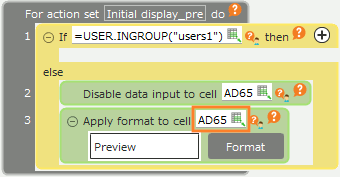
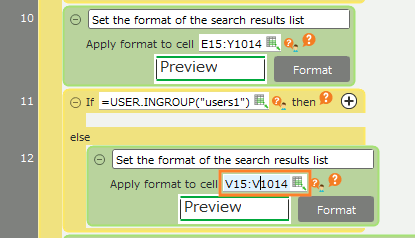
- Add the "Determine condition" action from the "Control" tab by dragging and dropping it on top of the "Set value to cell" action.
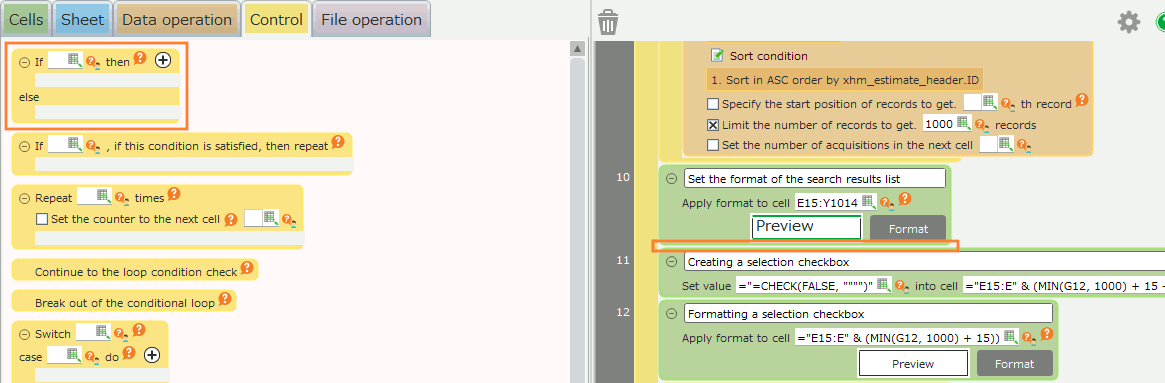
Hint
Look for the action commented on as "Creating a selection checkbox".
- Enter '=USER.INGROUP("[group name]")' as a branch condition for the "Determine condition" action you added.
Hint
For [Group name] to be entered in the condition, enter the administrator group.
Hint
The expression in the figure determines if the logged-in user belongs to the group "users1".
- Copy the "Set cell format" action by dragging and dropping it onto the "otherwise" part of the "Determine condition" action you added.

Hint
Look for the action commented as "Set the format of the search results list".
Hint
You can copy an action by dragging and dropping it while holding down Ctrl.
- Change the cell range of the copied "Set cell format" action.
Hint
Change the alphabets of the columns to those of the administrative items you deleted in step 23.
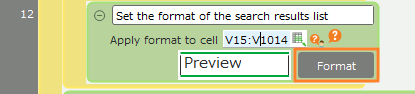
- Click the "Format" button on the copied "Set cell format" action.
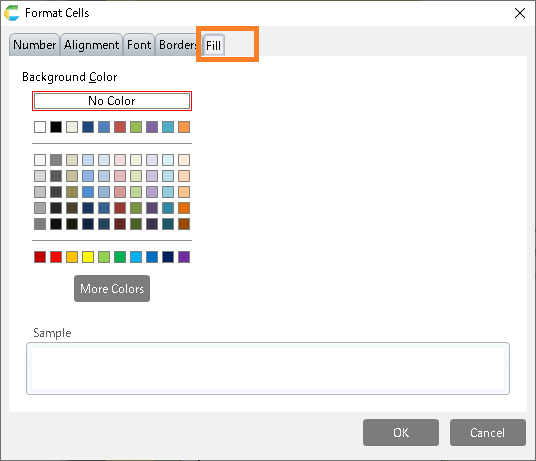
- On the "Set cell format" dialog, click the "Fill" tab.
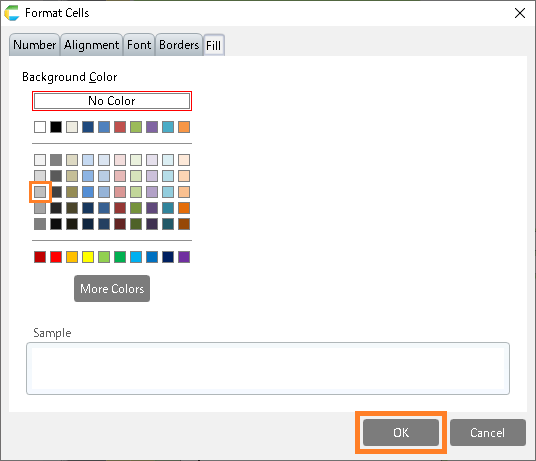
- Select the shading color of the cell to gray.
Hint
If you follow the steps, the action will be set up as shown in the figure
Hint
If there are more than one management item, you need to set up steps 27. to 31. for each item.
Tip
We have changed the background color of the cells to indicate that they are not viewable, so you can set a color other than gray
- Click the "OK" button.