Create a master table
This is the procedure for creating a master table when you create an app with the "Create from Excel file" function.
When you create a master table, and a code is entered, the name associated with the code can be automatically entered.
Ex.) When you enter the seller code, the seller name and address are automatically entered.
It prevents input errors and eliminates the need for double entry.
Attention
- You can only create them automatically with the "Create from Excel file" function.
- It can only be created in list or single sheet format, not in cross table format.
Create a master table
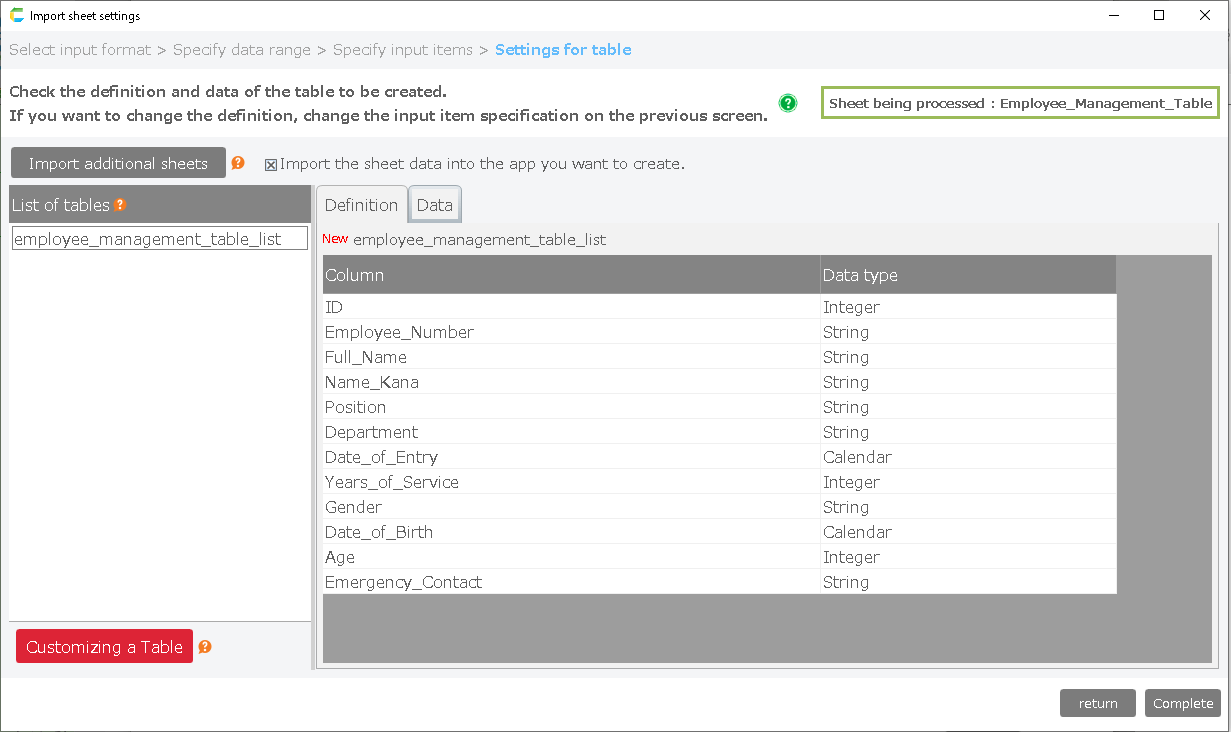
- Create the app by referring to "Create from Excel File".
Please proceed to the table definition screen.
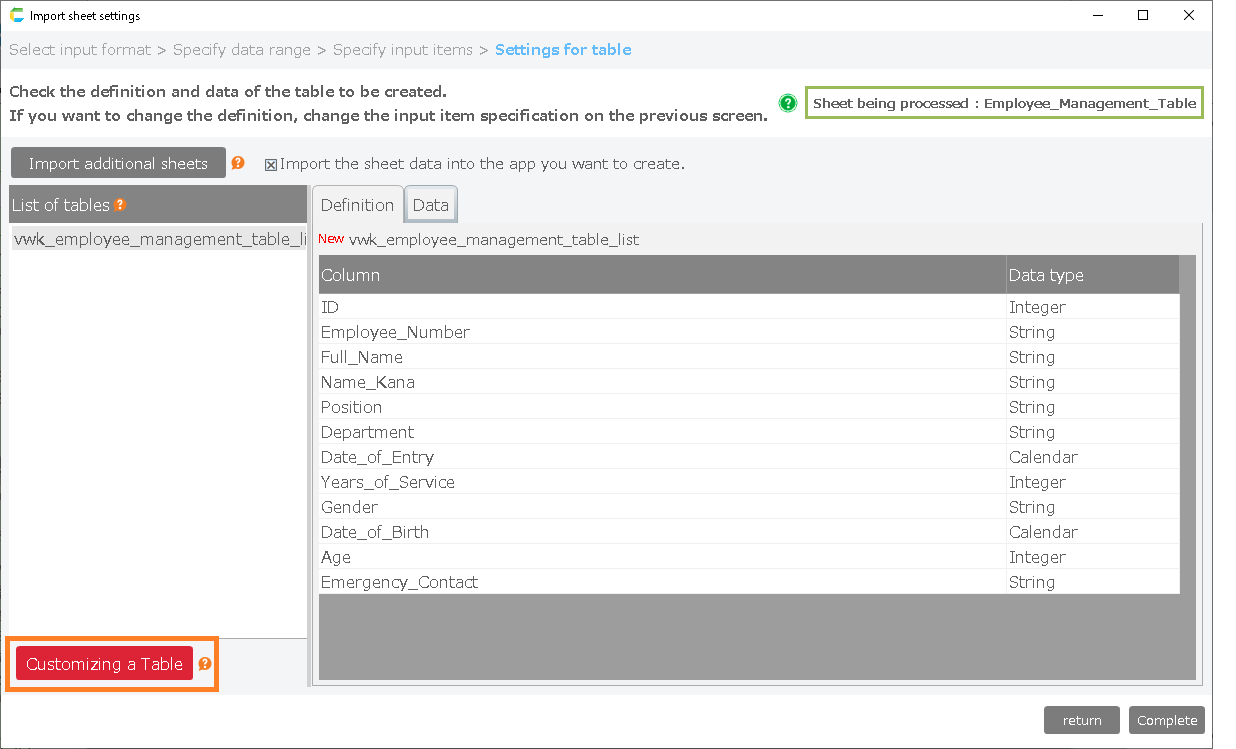
- Click the red button "Customizing a Table" at the bottom left of the screen.
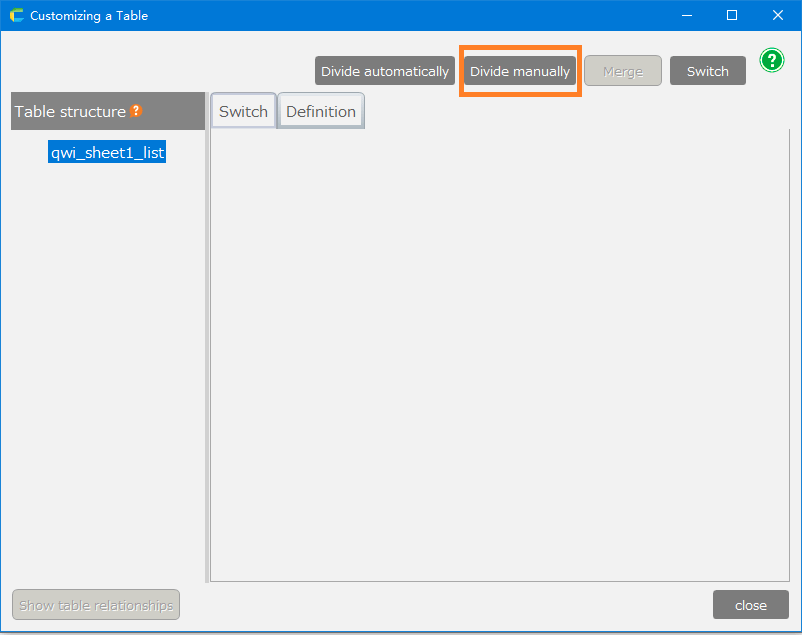
- Click the "Divide manually" button at the center of the table customization screen.
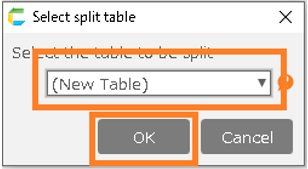
- Select the table to be divided to. Select "(New Table)" to divide to a new table.
If you want to modify a table that has already been divided, please select the appropriate table. After making your selection, click "OK"
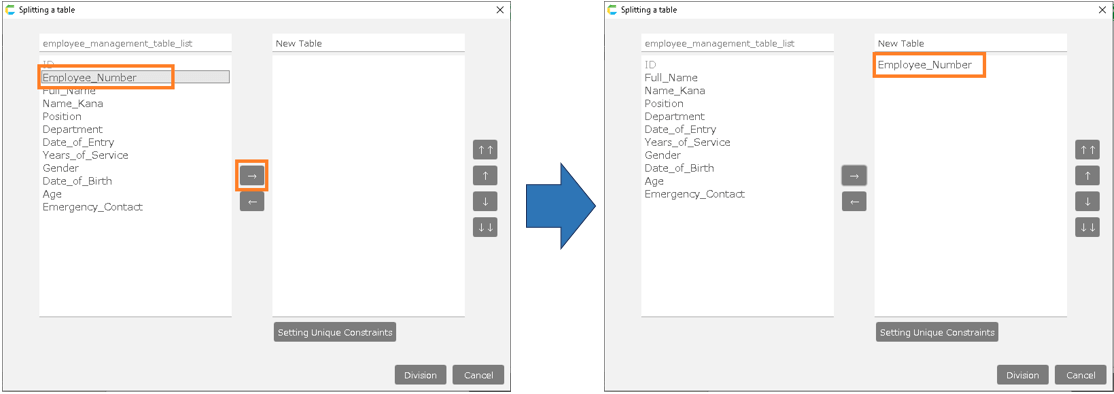
- Click "→" to select the item you want to move from the source table to the destination table.
If you want to undo this, select the item from the destination table and click "←".
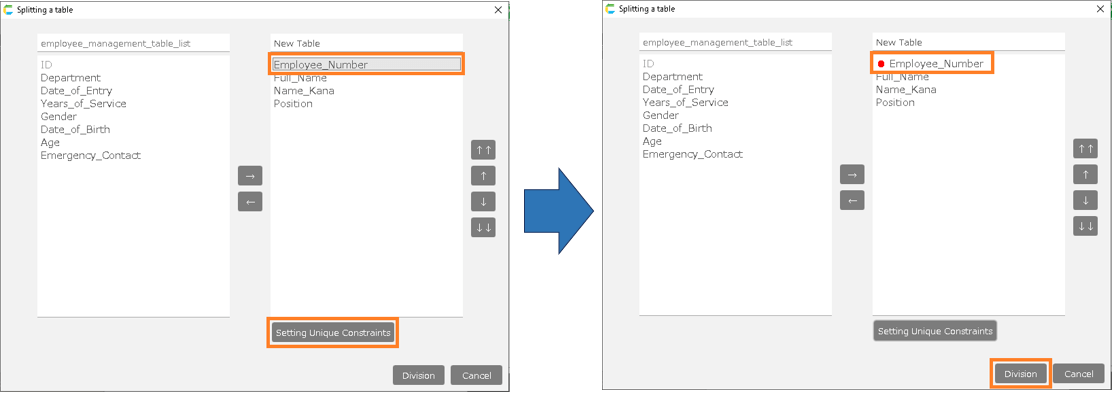
- When you are done moving through all the items, set the "Unique constraint".
This setting allows you to link unique constraint items with other items. When set, a "●" will be added to the name of the item. After setting, click "Division".
Tip
Here, "Employee Number" is used as a unique key, so when you select "Employee Number", your name, kana (Japanese alphabet) and title will be obtained automatically.
Attention
If any blank data is included in the field, it cannot be set in "Unique constraint settings".
To divide, select an item with no blank data.
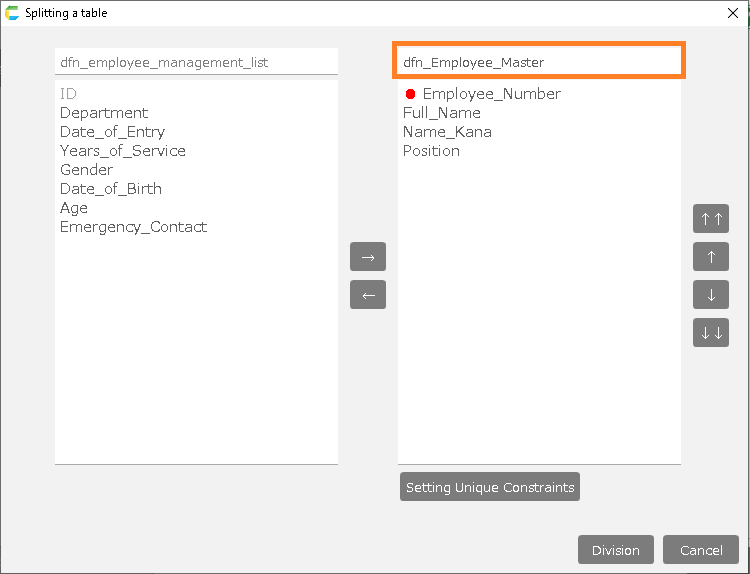
- Enter the name of the table to be divided.
Tip
If you have a common string (prefix) at the beginning of your app name and table name, you can put it at the beginning of the name of the table you are creating here as well, so you can quickly identify which table is used by which app. In this case, I have added "dfn_".
For tables that will be commonly used by various apps, there’s no need to add a prefix.
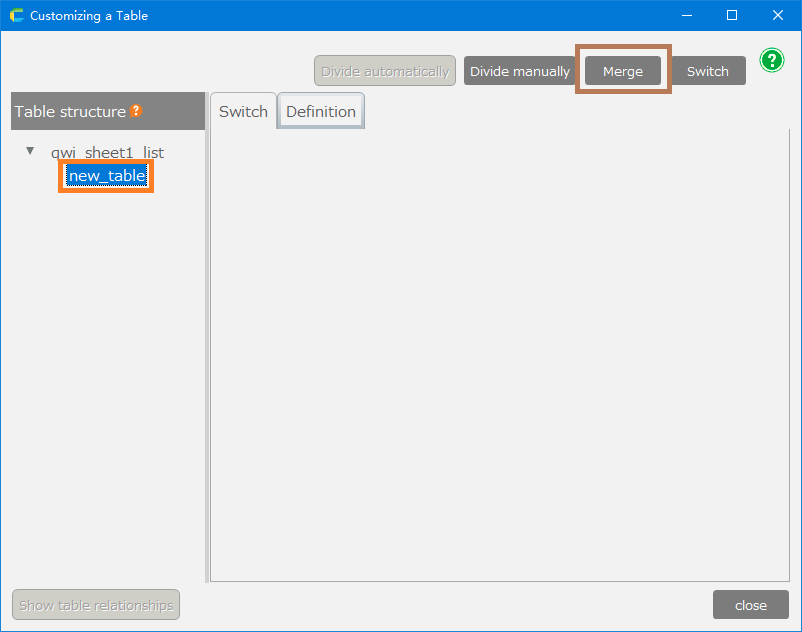
- If you want to undo a divided table, select the table you want to undo and click "Merge".
- When you are done customizing, click "Close".
- Follow the rest of the steps to complete the app creation, referring to "Create from Excel File".
- In the app, the items you set as unique constraints will become a list box. You can’t input the items other than items with unique constraints.
- When you select data from the list box, the other items are automatically set.
- If you want to modify data, you can open the maintenance screen from the menu. The maintenance screen is automatically created when you divide the screen into sections.
- You can modify data from the maintenance screen.