Create a Workflow App
- Start circulation by specifying data
- Execute circulation processes (application, approval, etc.)
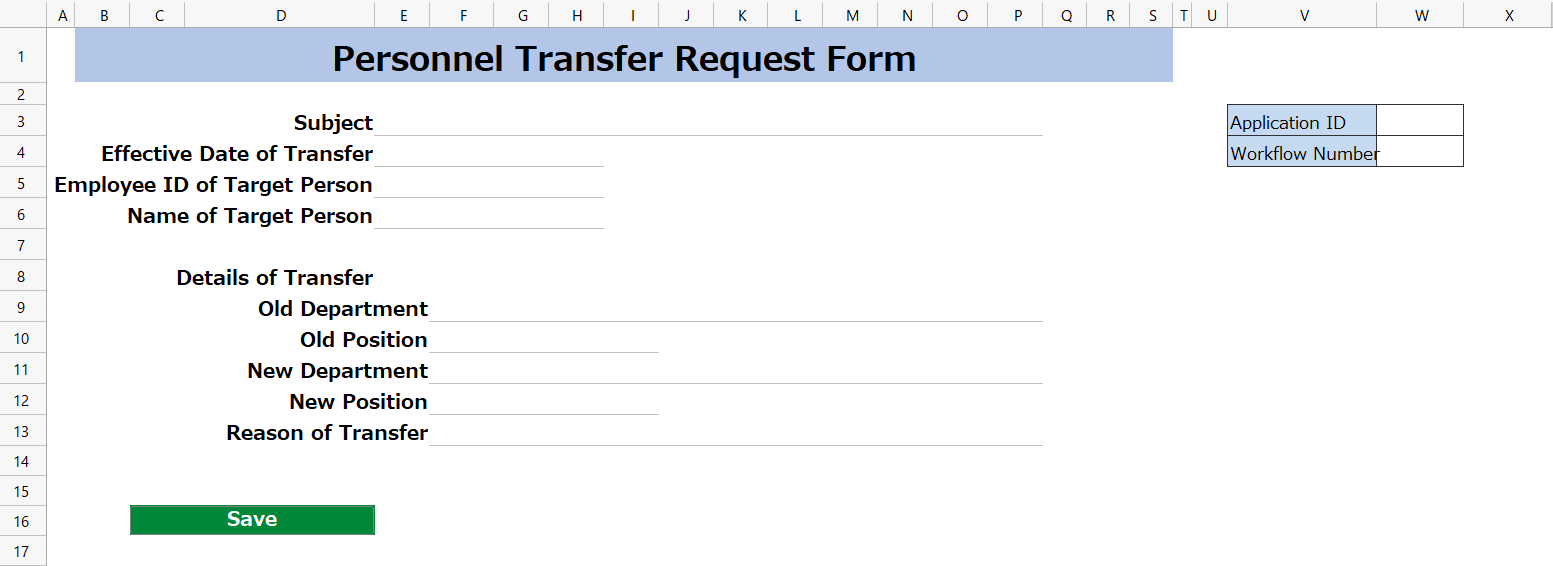
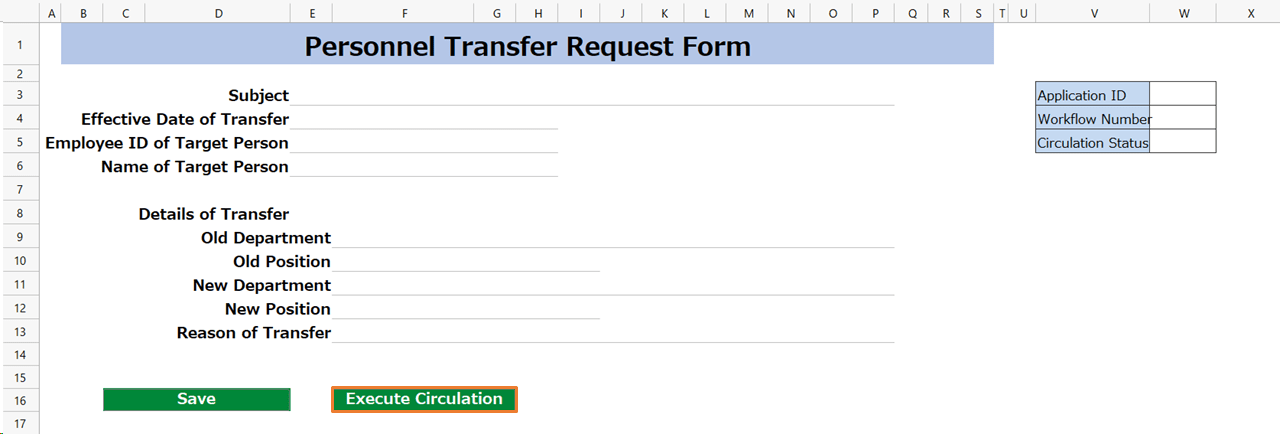
'Personnel Transfer Request Form' Sheet
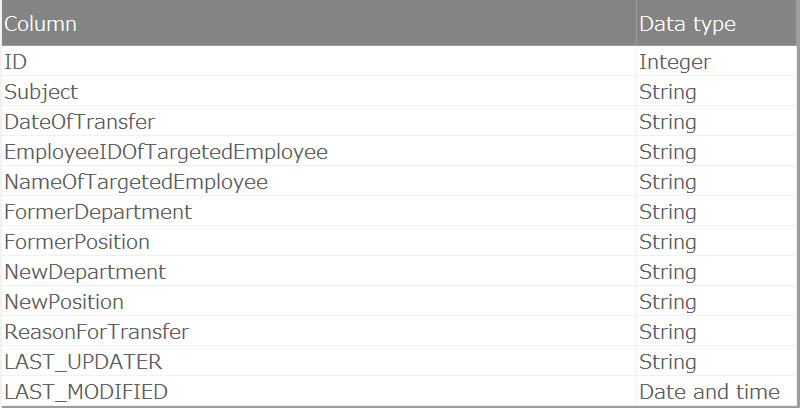
'personneltransferrequestform_header' table that stores data from the 'Personnel Transfer Request Form' sheet
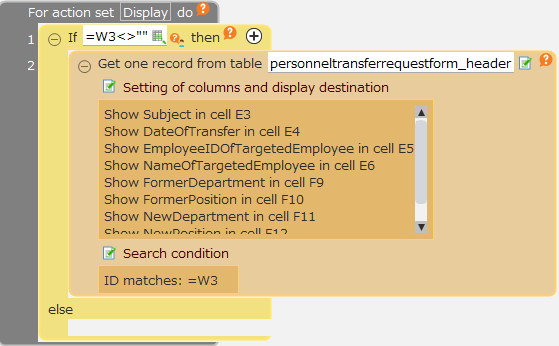
'Initial display' action of the 'Personnel Transfer Request Form' sheet
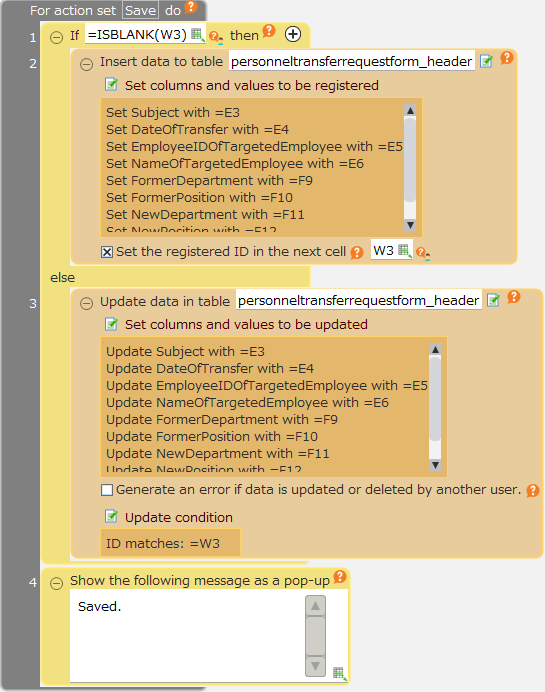
'Save' action corresponding to the 'Save' button on the 'Personnel Transfer Request Form' sheet
1. Start circulation by specifying data
Use the 'Start circulation of the following data in the circulation data[]' action to specify data and start the circulation.
Tip
When the circulation starts, a number (workflow number) is issued to identify the data in circulation.
Various workflow actions will search for the target data using this number and process accordingly.
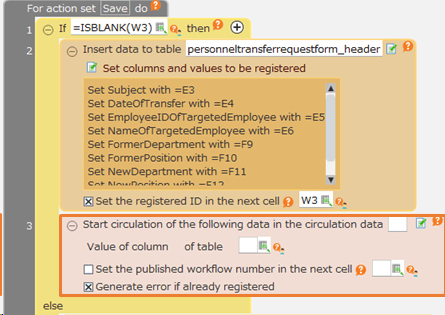
- Open the 'Personnel Transfer Request Form' sheet of the 'Personnel Transfer Request Form' app.
- Click the 'Save' button and open the 'Save' action set.
- Incorporate the 'Start circulation of the following data in the circulation data[]' action into the 'Save' action set. Drop it after the 'Insert data to table[]' action.
Note
This position is used because it uses the value of the data ID (W3 cell) registered by the 'Insert data to table[]' action.
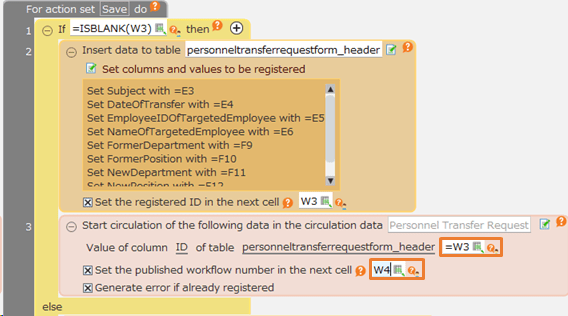
- Click the circulation data selection button and select 'Personnel Transfer Request Form'.
- In the data specification cell, select '=W3'.
- Check 'Set the issued workflow number to the following cell' and select W4 cell. This cell will be used for specifying the 'Workflow Number' in subsequent workflow actions.
Hint
Cells W3 and W4 are located at the following positions on the 'Personnel Transfer Request Form' sheet.

With the above steps, clicking the 'Save' button will register new data and start the circulation simultaneously.
Block Updates to Data in Circulation
Furthermore, set up actions in the 'Save' action set to prevent tampering with data during or after circulation.
Hint
Similar measures are necessary if there are other update processes, such as deletion.
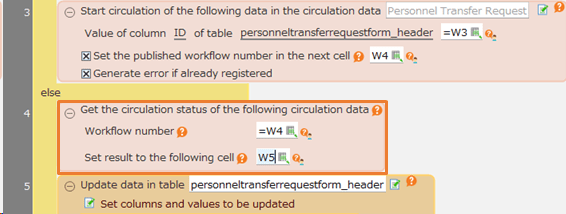
- Prepare a cell W5 to save the 'Circulation status'.

- Drop the 'Get the circulation status of the following circulation data[]' action before the 'Update data in table []' action, and enter the following.
(The status of the circulation data corresponding to the workflow number in cell W4 is output to cell W5.)
- After action 2, drop and enter the following three actions from the 'Control' tab.
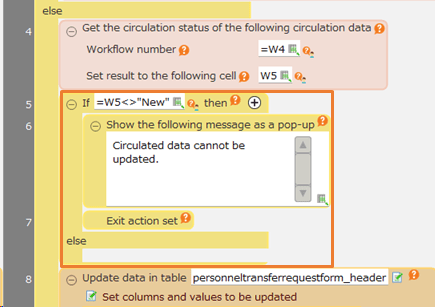
If the circulation status is not 'New', a message will be displayed and the process will be terminated.
Hint
'New' is the value in the initial settings. If you have changed the status settings in 'Set up the Circulation Process', please adjust accordingly.
2. Execute Circulation Process
- Create a 'Execute Circulation' button at any location on the 'Personnel Transfer Request Form' sheet.
Hint
If created by copying a button, please make sure the button ID (the second argument of the BUTTON function) is different from the original button.
If left the same, clicking it will execute the same action set as the original button you copied from.
- Click the 'Execute Circulation' button and create a new 'Execute Circulation' action set.
- Drop the 'Execute circulation process for the following circulation data' action, and enter as follows.

Hint
W4 is the address of the cell where the workflow number is entered.
With the above steps, clicking the 'Execute Circulation' button will allow the circulation process to be executed.
Next Step
This completes the setup. For basic usage, please refer to Execute a Workflow.