Set up the Circulation Process

- Status … The state of the circulation data
- Operation … The action taken by the person in charge on the circulated data
- Process … The combination of status transitions and operations
Tip
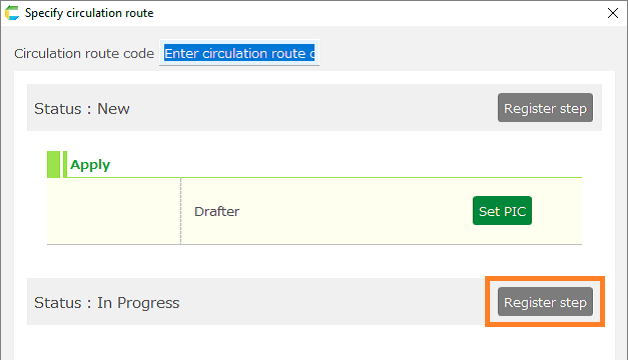
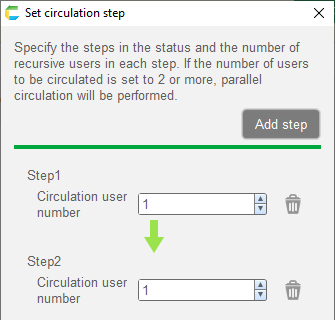
For setting up steps and assigning persons in charge, please refer to Register Circulation Routes.
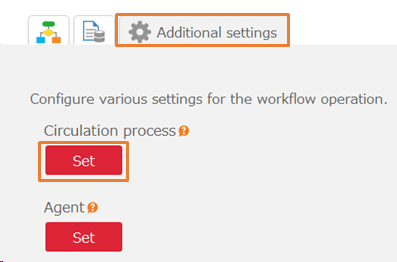
Various settings are made in the 'Set process' dialog, which opens when you click the 'Set' button for the circulation process in the 'Additional settings' tab of the workflow management screen.
Attention
If there are workflows, circulation data, or circulation routes being circulated based on registered processes, the processes, statuses, or operations cannot be edited.
If you need to edit the processes, statuses, or operations, please perform the following steps to resolve the above conditions.
- Complete all the workflows currently in circulation.
- Delete all the circulation data from 'Circulation targets management'.
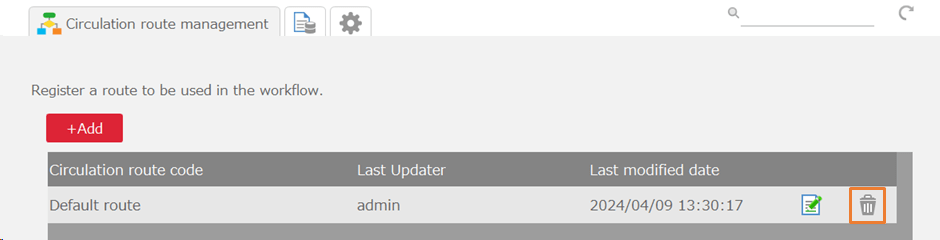
- Delete all the circulation routes from 'Circulation routes management'.
Register a Status
- In the 'Set process' dialog, click the 'Register status' button.
- In the opened 'Register status' dialog, perform the necessary registration/editing.
① +Add … Add a new row at the end.
② Arrow Buttons … Move the status up or down. The order reflects the initial order at the time of process registration.
③ Status Name … Enter the status name.
④ Delete Button … Delete the status.
- Click the 'OK' button.
Note
The topmost status becomes the first status in the workflow and cannot be moved or deleted.
Register Circulation Process
- In the 'Set process' dialog, click the 'Register operation' button.
- In the opened 'Register operation' dialog, perform the necessary registration/editing.

① +Add … Add a new row at the end.
② Operation Name … Enter the operation name.
③ Delete Button … Delete the operation.
- Click the 'OK' button.
Register Process
Note
Registration of statuses/operations must be completed beforehand.
For information on circulation process, please refer to here.
- Register/edit processes in '2. Process settings' of the 'Set process' dialog.

① +Add … Add a new row at the end.
- ② Main process … Check the boxes as primary fundamental processes.
- The final status (a status with no further status) of the workflow must be specified.
Tip
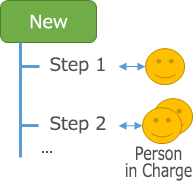
If there are multiple steps within the same status, the behavior changes depending on whether it is the main process or not.
- If it is the main process … It is circulated one step at a time through the person in charge’s circulation operation. (Example: Approve)
- If it is not the main process … Regardless of the number of subsequent steps, it is circulated to the first step of the next status by the person in charge’s circulation operation. (Example: Revert)
③, ④, ⑤ Status, Operation Name … These are the statuses and operations that make up the process.
- ⑥ Alias Status Button … Sets an alias that is used only when transitioning to the next status in the specified process.
Aliases are used, for example, in the circulation status names obtained by the 'Get List of Circulation Data' action.
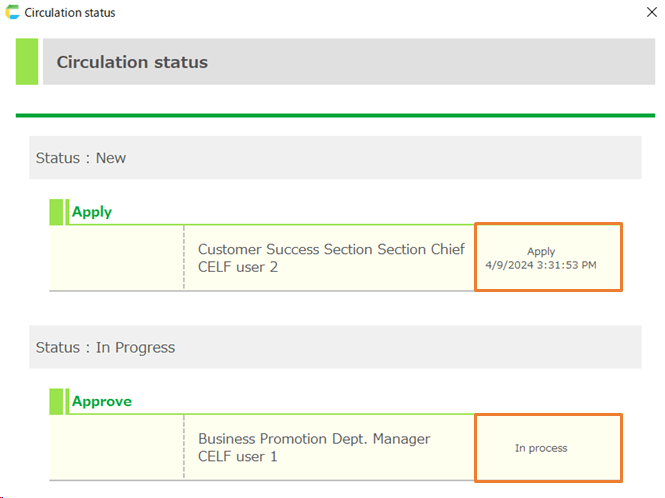
For example, the third line of the image above is set as follows.
As a result, the alias 'reverted' is used only when the 'New' status is achieved through the 'revert' operation.
⑦ Delete Button … Deletes the process.
Attention
When branching the workflow from a non-main process, the 'Status after operation' of that process must meet one of the following conditions.
- A status that is considered complete (a status with no subsequent status) (e.g., “Rejected” in the example above)
- A status that comes before the status where the workflow branches (e.g., 'New' in the example above)
- In the 'Set process' dialog, click 'OK'.