Set up an agent
Designate any user as an 'Agent'.
An agent can perform circulation processes on behalf of the original person in charge.
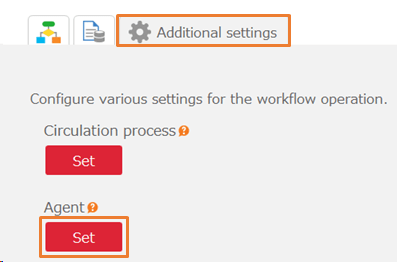
Agent(Proxy) settings are configured in the 'Agent settings' dialog, which opens by clicking the 'Set' button for agent in the 'Additonal Settings' tab of the workflow management screen.
Register an Agent
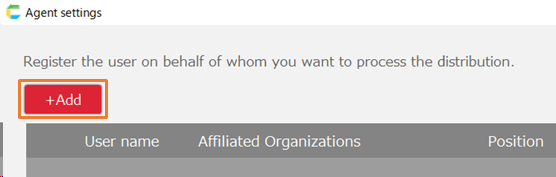
- In the 'Agent settings' dialog, click the '+Add' button. Here, specify the user to be proxied.
- Select the user to register in the 'Register agent' dialog.
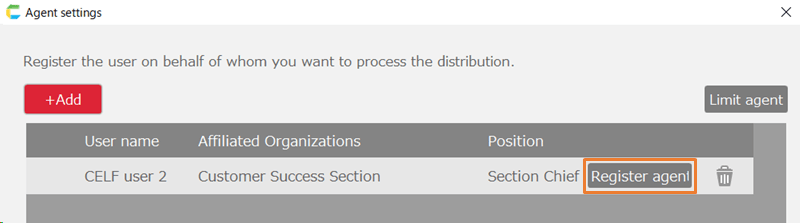
- The selected user row is added. Next, to specify a proxy for this user, click the 'Register agent' button in the added row.
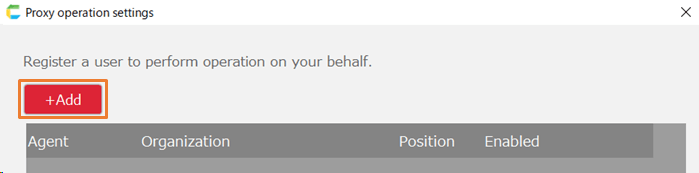
- In the displayed 'Proxy operation settings' dialog, click the '+Add' button.
- Clicking the edit button displays the 'Register agent' dialog. Select the user you want to register as an agent.

If 'Enable Proxy' is checked, the specified user can perform proxy processing.
- Click the 'OK' button.
Tip
An icon is displayed in the row for the principal if there is at least one valid agent.
Delete an Agent
- In the 'Agent settings' dialog, click the 'Register agent' button for the user row you want to edit.
- In the 'Proxy operation settings' dialog, click the trash icon for the user row you want to delete.
- Click 'OK' in the confirmation message.
Delete the principal
- In the 'Agent settings' dialog, click the trash icon for the user you want to delete.
- Click 'OK' in the confirmation message.
Note
If an agent is registered, the registered agent associated with the principal will also be deleted.