Get One Table Data
Choose source table
- Open 'Action set setting' dialog.
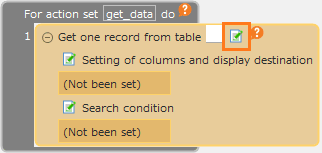
- Drag 'Get one record from table' action from Data operation tab and set into edit area.'
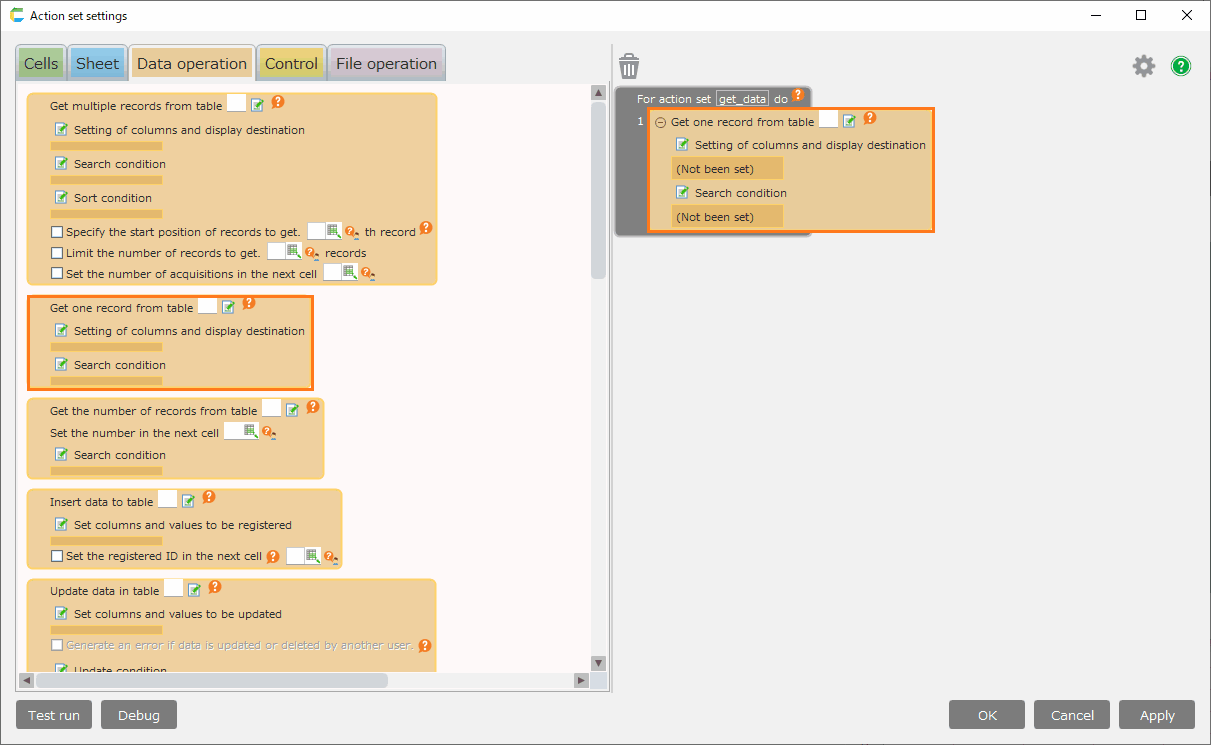
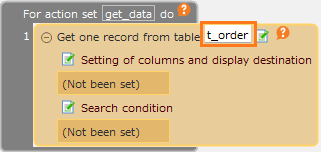
- Click 'Select table' button.
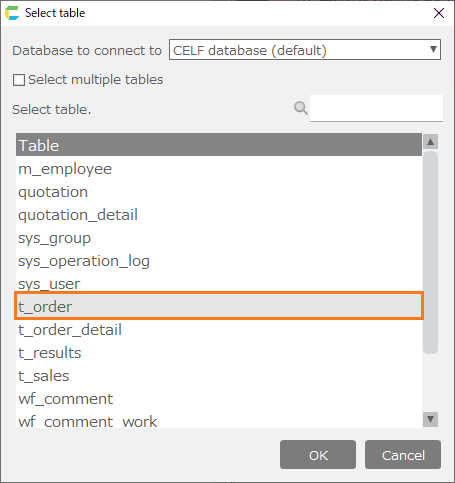
- In 'Select table' dialog, select source table and then click 'OK' button.
Tip
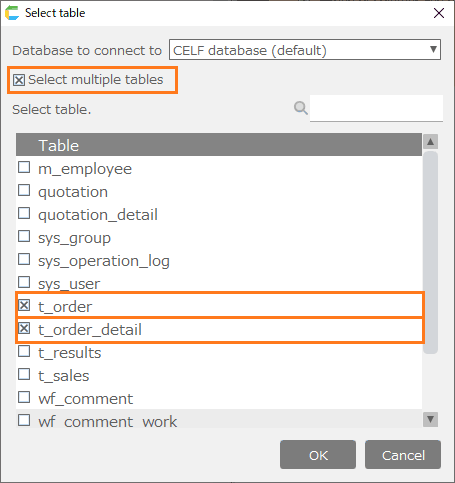
In case of multiple source tables, you can select multiple tables by checking 'Select multiple tables'.
After clicking the 'OK' button, you will see that the table has been set up in the action.
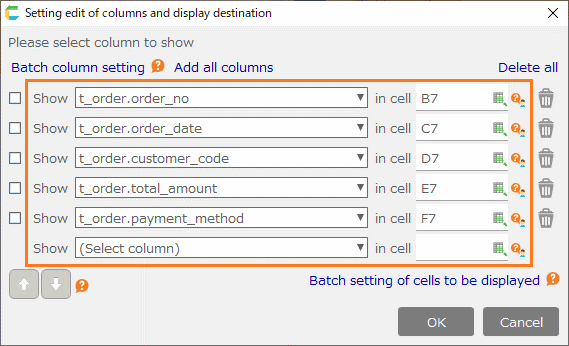
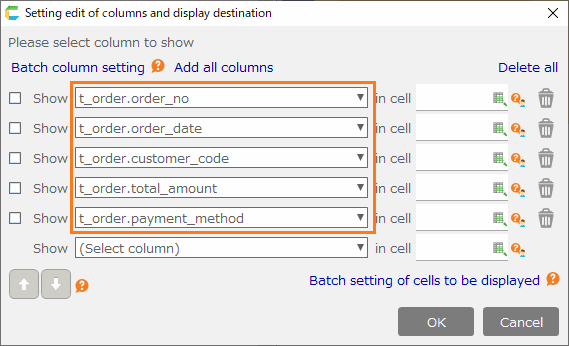
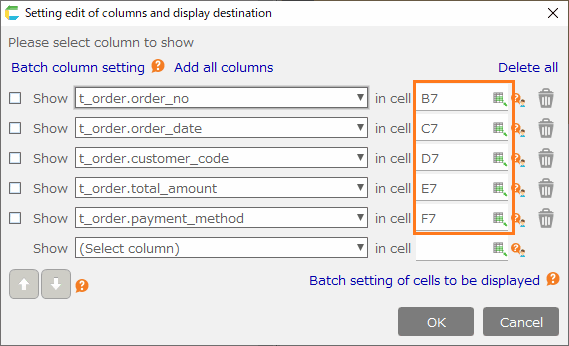
Set source column and display destination cell
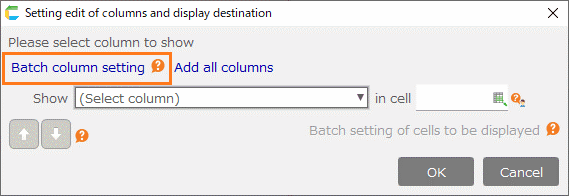
- Click 'Setting of columns and display destination' link button.
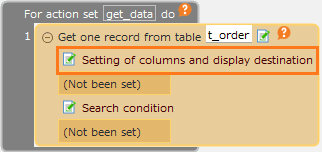
- In ‘Setting edit of columns and display destination’ dialog, set the cell for source column and display destination value.
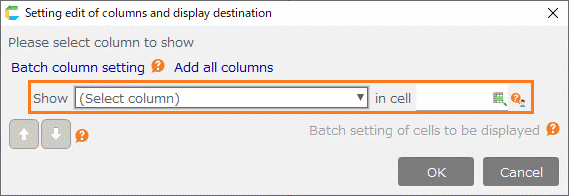
There are two ways to specify the columns to be retrieved.
- Select from the drop-down list.
- Click on the 'Batch column setting' link button to use the batch setting function.
See also
See Batch setting of columns to be retrieved for the batch column setting function.
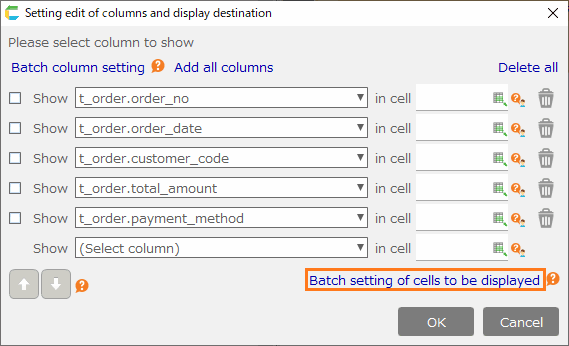
There are three ways to specify the columns to be displayed
- Type directly into the text box.
- Select cells from the sheet.
- Click on the 'Batch setting of cells to be displayed' link button (right-lower in the dialog) to use the batch setting function.
See also
See Batch setting of cells to be displayed for the batch setting of cells to be displayed.
Tip
In the cell of display destination, you can set the following formula to return address character except the setting way like 'A1' or 'D5'
- Use input value in =B5 ・・・ B5 cell as address
- Use ="B"&5 ・・・ character connection to set address
- Use =ADDRESS(5,2,4) ・・・ ADDRESS function to set 5th row 2nd column (B5) cell
Tip
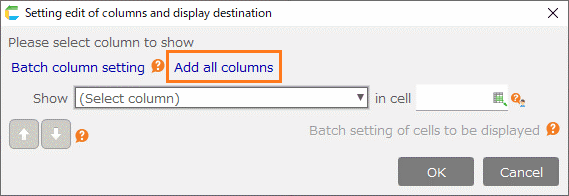
Clicking the ‘Add all columns’ link button will set all columns in the selected table.
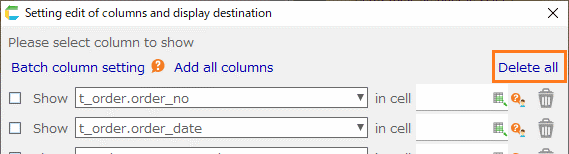
Clicking the ‘Delete all’ link button will delete all the columns you have set up.
See also
You can change the order in which columns are displayed. For details, see Changing the Display Order of Columns.
- Once set, click the ‘OK’ button.
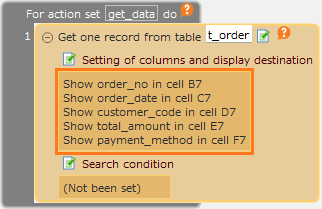
After clicking the 'OK' button, you will see that the columns to be retrieved and the cells to be displayed have been set in the action.
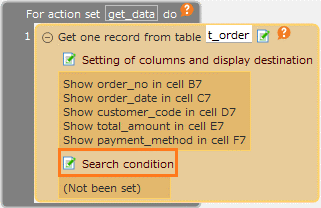
Set search condition
- Click 'Search condition' link button.
- Set search condition in ‘Edit condition’ dialog.
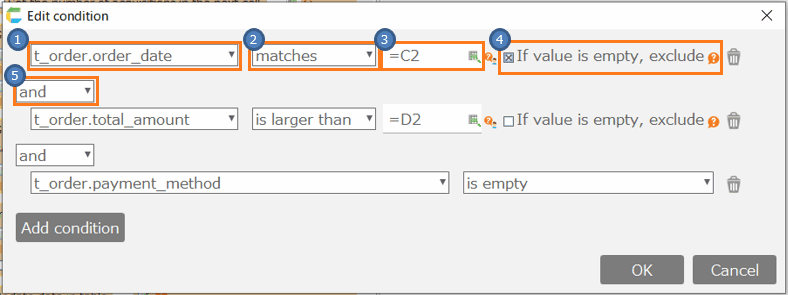
- [1] Column name
- Select column to be specified as a condition.
- [2] Condition
Select condition type. Available condition types are as below
Condition Search target matches The data matches the set value (A = B) does not match The data does not match the set value (A <> B) includes The data includes the set value (A like '%B%') not includes The data does not include the set value(A not like '%B%') starts with The data starts with the set value (A like 'B%') not starts with The data does not start with the set value (A not like 'B%') ends with The data ends with the set value (A like '%B') not ends with The data does not end with the set value (A not like '%B') is not smaller than The data is not smaller than the set value(A >= B) is larger than The data is larger than the set value (A > B) is not larger than The data is not larger than the set value (A <=B) is smaller than The data is smaller than the set value(A < B) matches one of the following The data matches one of the given values (A in (B, C, D)) not matches any of the following The data does not matches any of the given values (A not in (B, C, D)) is empty Blank data (A = '') is not empty Not blank data (A <> '') - [3] Value
- Input value to set as condition. You can use formula or function, or input by cell reference.
- [4] If value is empty, exclude
- If checked, values that are empty at the time of action execution will be excluded from the conditions.
- [5] Join condition between conditions
- Set join condition between conditions. You can select 'Or' or 'And'.
Tip
If multiple source tables are selected, gear icon is displayed.You can set columns on the right side by clicking the gear icon and checking 'Select table columns'.You can set table join conditions by selecting relational tables here.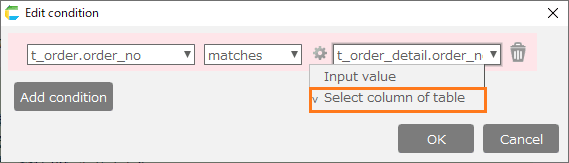
Attention
Some combinations of column data types, conditions, and values may result in automatic value substitution when the action is executed.Refer About automatic replacement of values compared to date/time type columns for details.
Once set, click the ‘OK’ button.
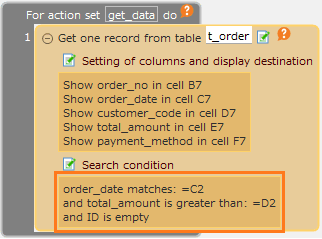
After clicking the 'OK' button, you will see that the search criteria have been set in the action.
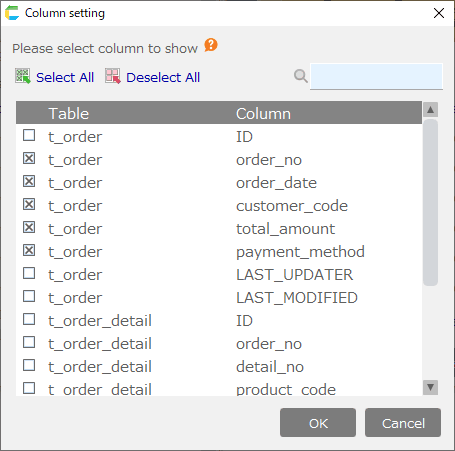
Batch setting of columns to be retrieved
The batch column setting function allows you to select and deselect columns at once.
- Click 'Batch column setting' link button.
- In the 'Batch column setting' dialog, select (check) or deselect (uncheck) the column.
Attention
If you deselect a column set in the ‘Setting edit of columns and display destination’ dialog, the settings in the ‘Setting edit of columns and display destination’ dialog will be deleted.
Once set, click the ‘OK’ button.
After clicking the 'OK' button, you will see that the columns have been set in the 'Setting edit of columns and display destination' dialog.
Batch setting of cells to be displayed
The batch cell address setting function sets cells from a sheet in a batch.
- Click 'Batch setting of cells to be displayed' link button.
- When the ‘Batch cell address setting' dialog box appears, select the cells to be displayed from the sheet. Cell addresses will be set in the "selected cell" (red boxed area) of the target columns.
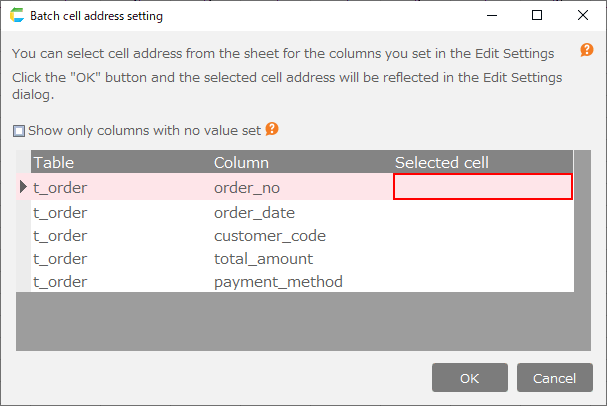
Tip
When a cell is clicked, the target column (red frame part) automatically moves and can be set continuously.
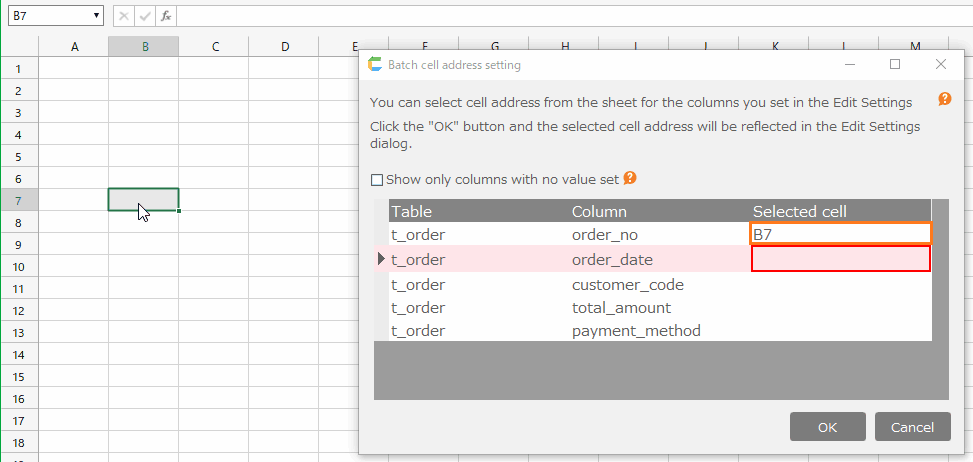
Once set, click the ‘OK’ button.
After clicking the 'OK' button, you will see that the cell addresses have been set in the 'Setting edit of columns and display destination' dialog.
Important
To get one record from table, users require the following permissions..
- Application author
And also, Application author needs the following permission to tables.
- Reference
Regarding permission setting, refer Set Table Permission.

Related keywords
select, where