Assemble Action set
Action set is a function to run multiple procedures automatically. By specifying action set, the action set can handle like Excel macro by recongnizing condition, getting value from cell, assembling each visual action like reading and writing to database and then can set loop the actions. Here is the way how to assemble actions.
Set action set.
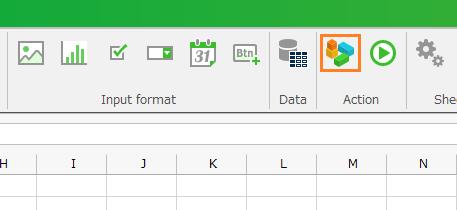
- Click 'Action set settings' button from ribbon menu, and then 'Action definition' dialog is opened.
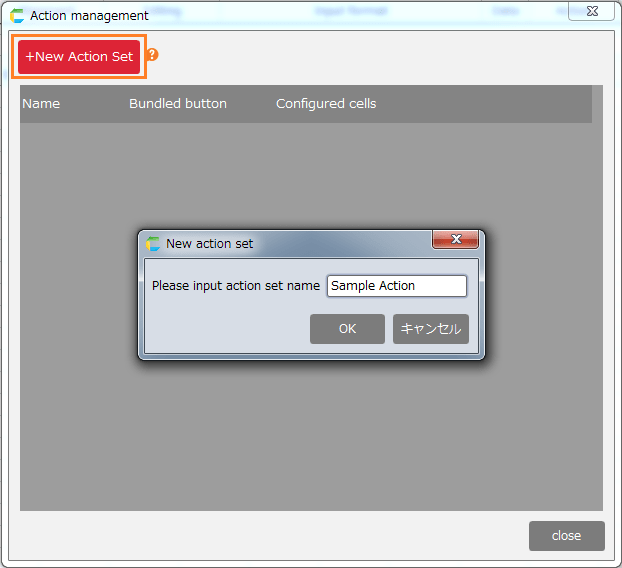
- Click '+New Action set' button, input the action set name, and then click 'OK' button.
Create Action set
- Input action set name, and then 'Action set settings' dialog is opened.
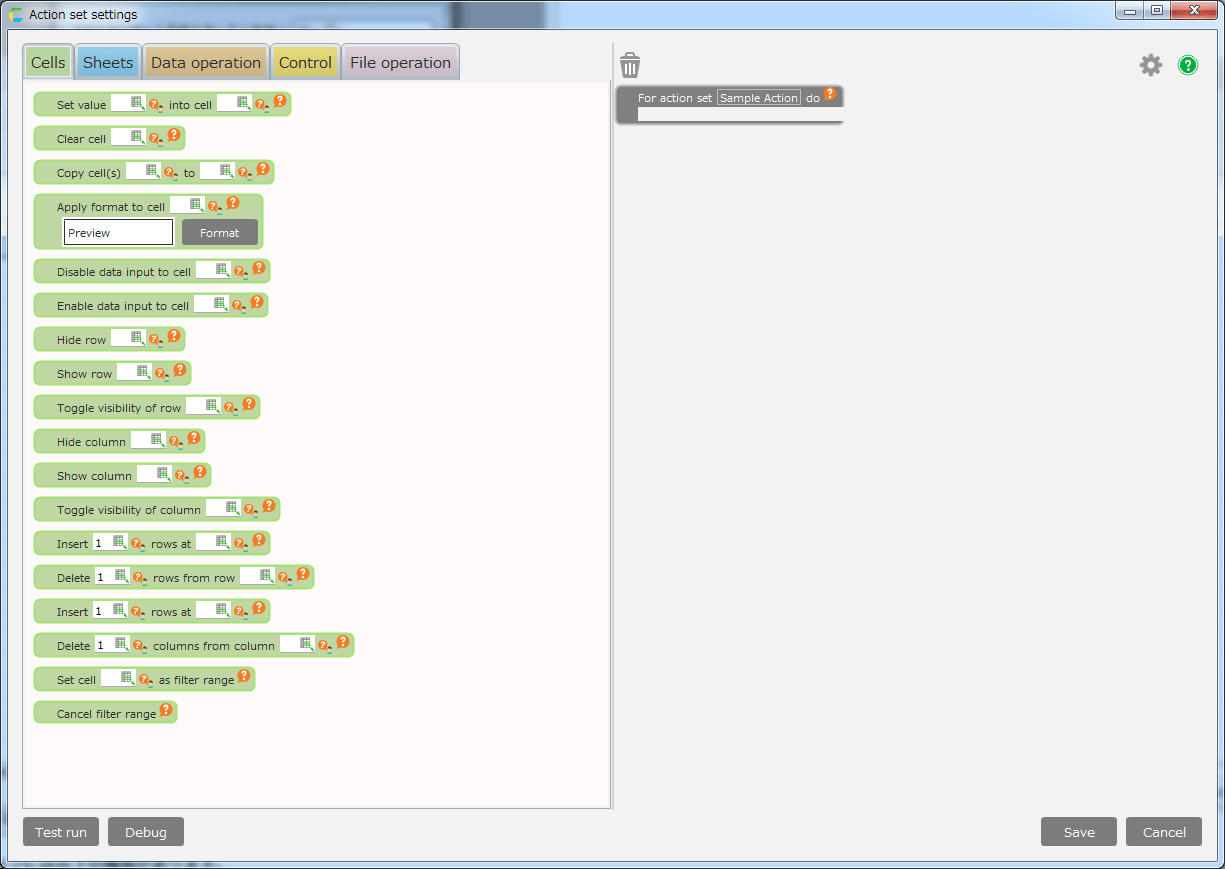
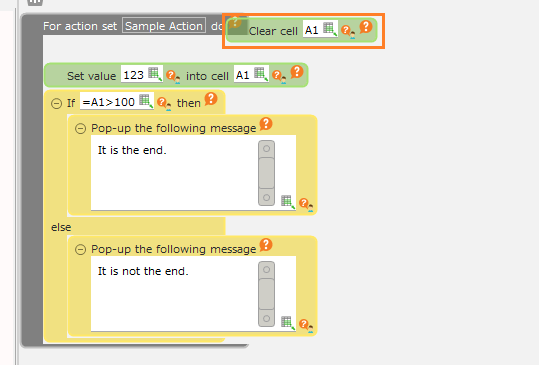
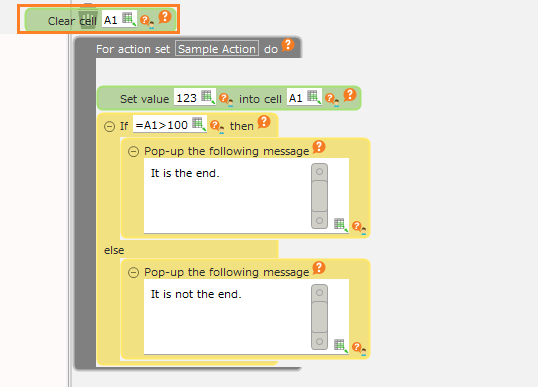
There are following action type.
Type Details Cells This is the action group about cell like setting the value into the cell. Sheets This is action group about sheet operations like the action to change sheet. Data operation This is action group about data like getting data from table. Control This is action group about condition like the action for branch on condition. File operation This is action group about file operation like uploading the file. Tip
You can add the available action by registering 'External Option'. Regarding registering external option, refer Add new extension or CELF Homepage .
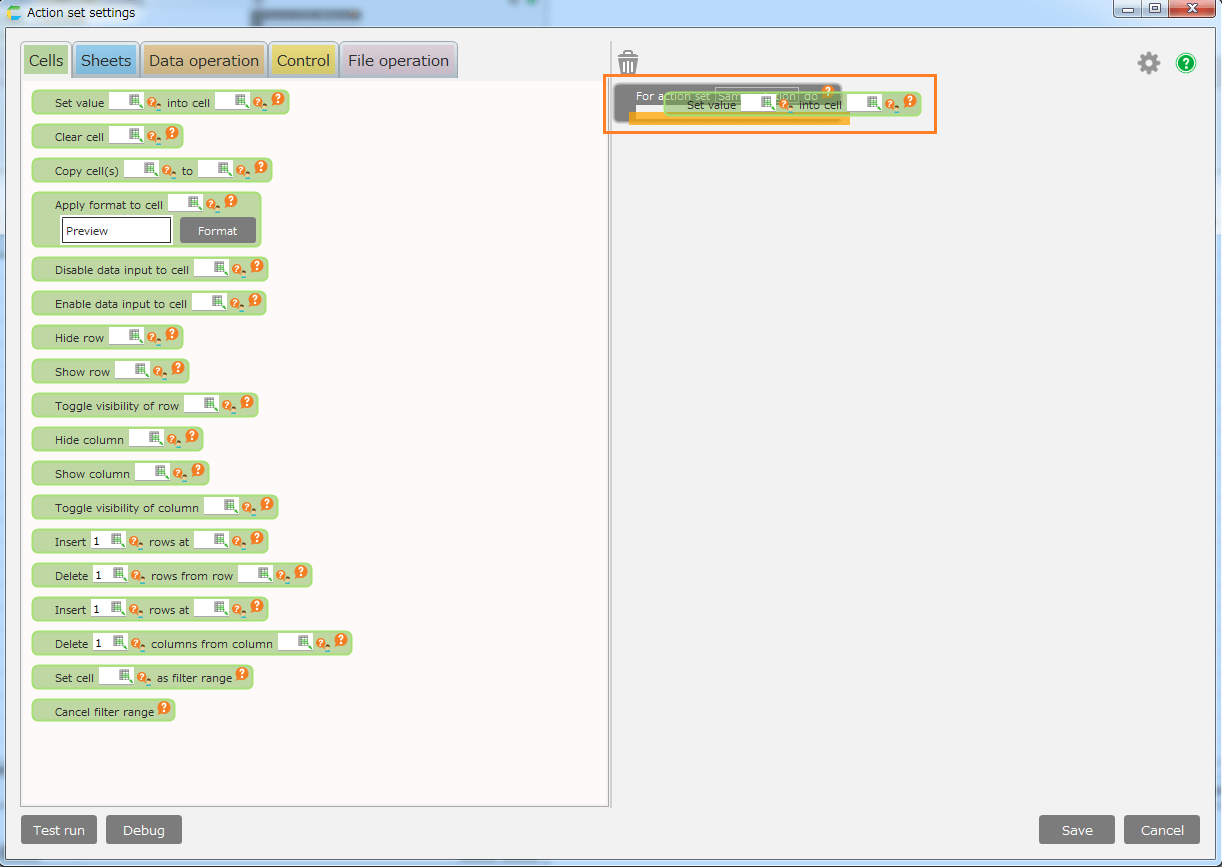
- Click action tab to use in 'Action set settings' dialog, and then drag it with keeping left click into edit area on the right side from the pallet area on the left side.
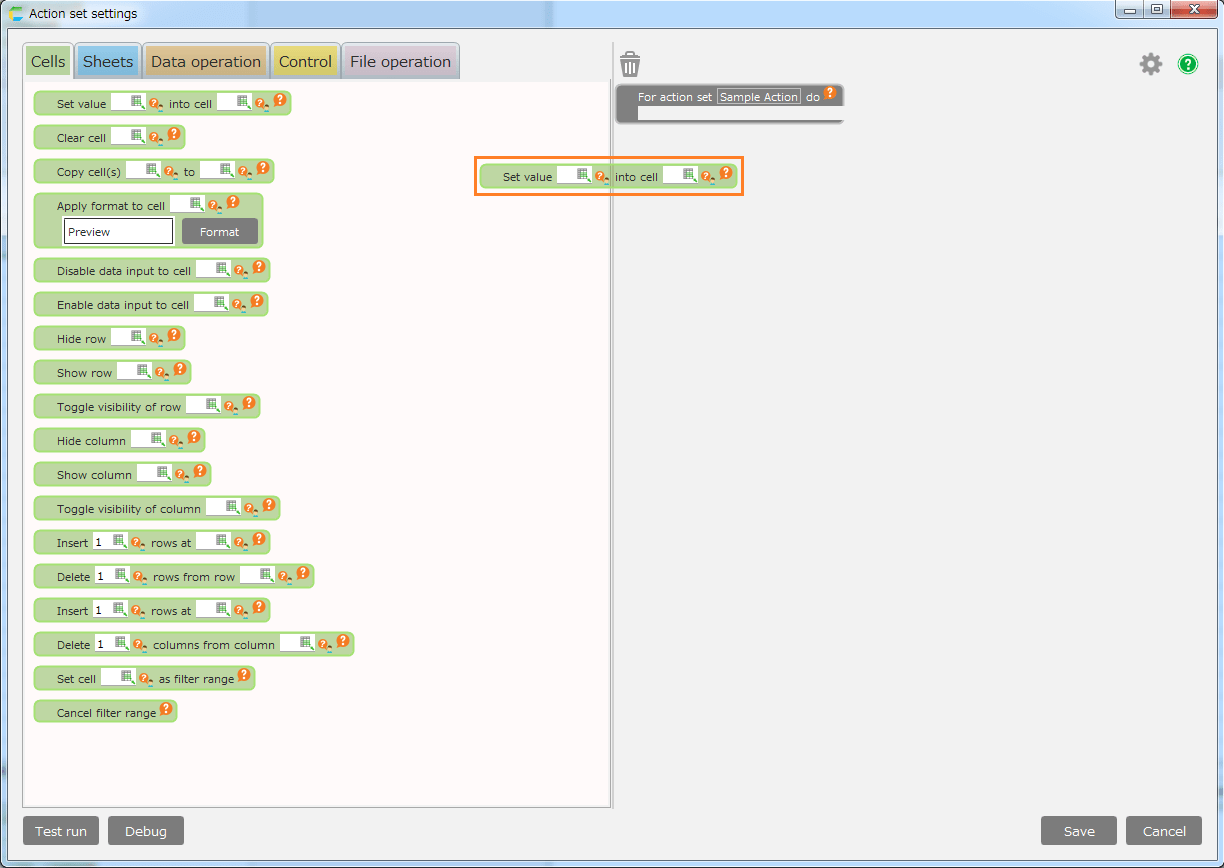
- Adjust the dragged action at the preferred place to assign in the edit area on the right side, then release the left click button to drop the action.
Hint
The back color will be orange in the edit area at the available action point.
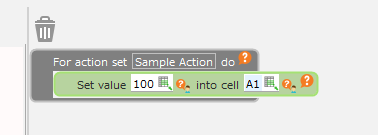
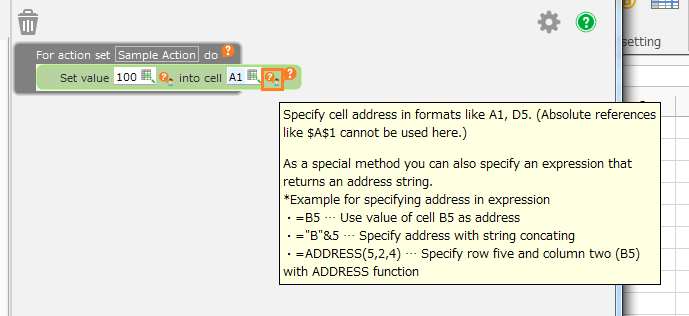
- Configure the assigned action.
Hint
Regarding each action setting, refer’Hint’icon displayed by the mouse-pointed cursor.
Tip
You can display a step number that indicates the position of each action on the left edge of the edit area.
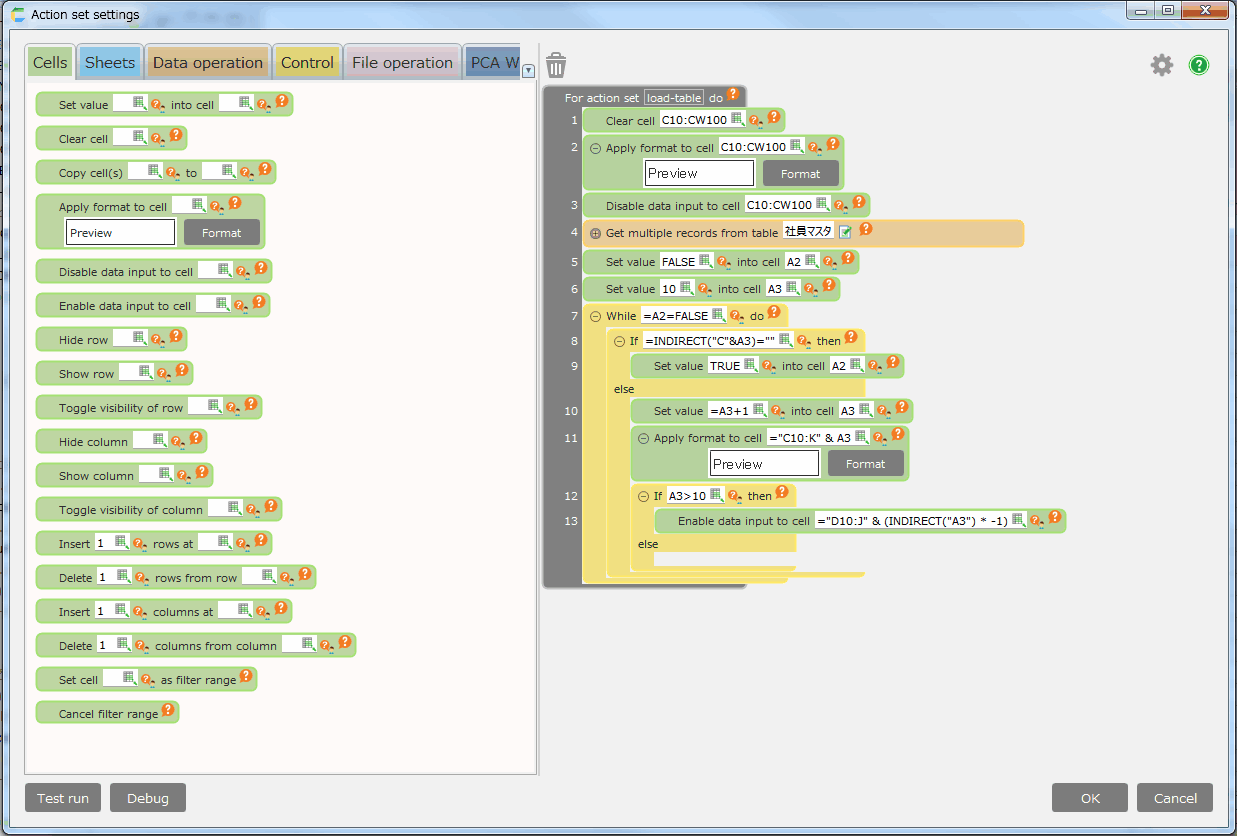
For instructions on how to set it, see Show step numbers .
Move action
- Select the action you want to move and drag.
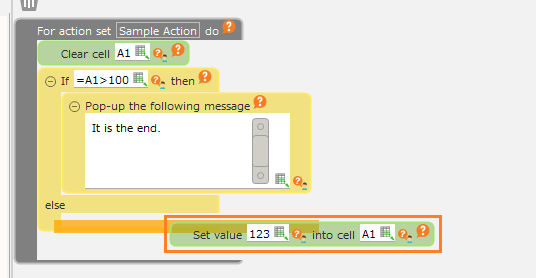
- Release the left mouse button according to the place to place and drop the action.
Hint
- The back color will be orange in the edit area at the available action point.
- The multiple actions can be moved by selecting and dragging them. Select multiple actions while pressing’Ctrl' key to be selected at the same time.
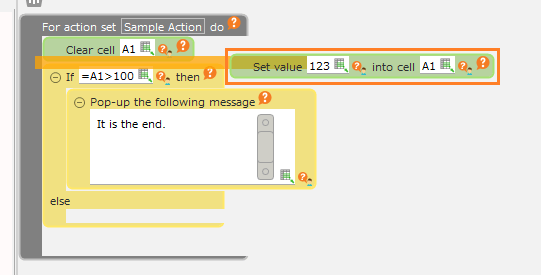
Copy action
- Select the action to copy, then drag it while pressing 'Ctrl' key.
- Release the left mouse button according to the place to place and drop the action.
Hint
- The back color will be orange in the edit area at the available action point.
- The multiple actions can be copied by choosing and dragging the multiple actions. To choose the multiple actions, select the actions while pressing 'Ctrl' key.
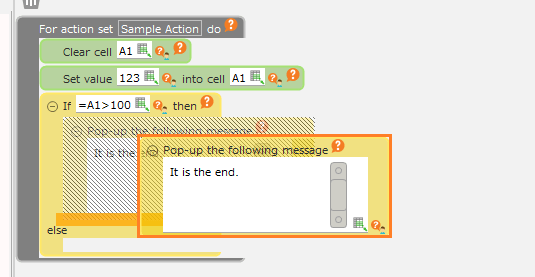
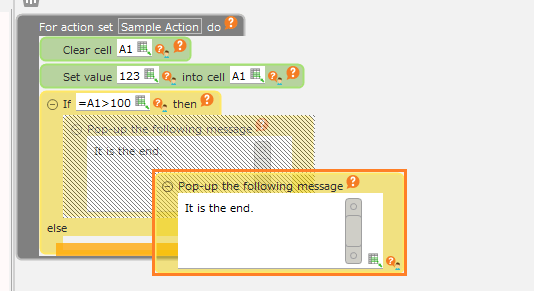
Remove action
- Choose the action to remove, and then drag it.
- Move the action and adjust to’Recycle Bin' icon, then drop it.
Hint
The multiple actions can be deleted by selecting and dragging the multiple actions. Select the multiple actions while pressing 'Ctrl' key to choose the multiple actions.
See also
Regarding each action assembling, refer 'Hint' icon displayed by the movie file.


Create connectivity with action set
This part will show to configure the assembled action set with what timing or what trigger to be executed. This is the sample how to configure as the created button.
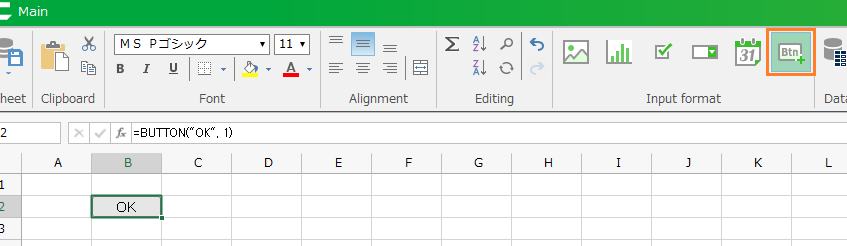
- From the ribbon menu, create the button by clicking’Button’button with the input format.
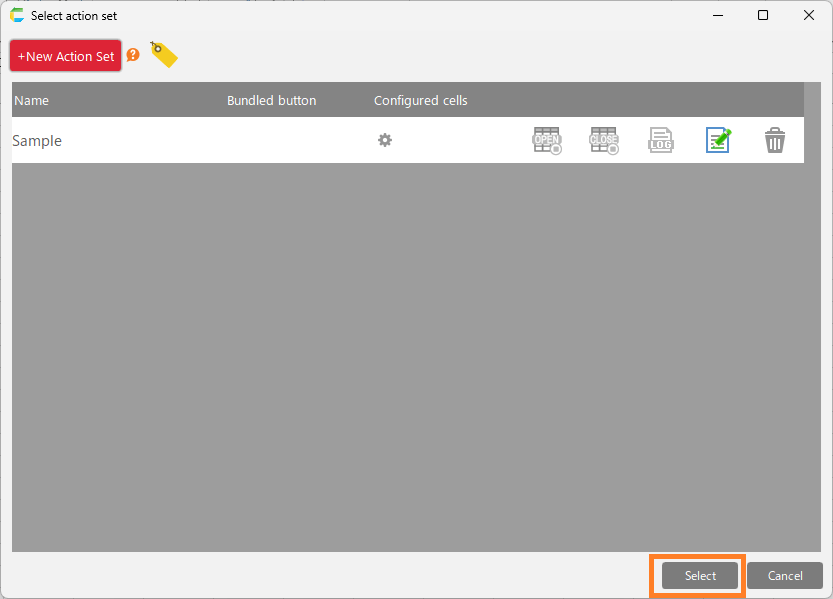
- Click the created button, then 'Action set' dialog is opened.'
- Choose the action to run, then click 'Select' button.
Tip
You can choose the timing to execute the action set from 4 cases to configure below.
- when the button is clicked
- when the sheet is displayed
- when the sheet is closed
- when the value in the cell is changed
For the case 'when the sheet is displayed', 'when the sheet is closed', or 'when the value in the cell is changed', please refer to Specify action to run when displaying sheet , Specify action to run when closing sheet or Run Action Set When Cell Value Changed (Basic), respectively.
Related keywords
Excel