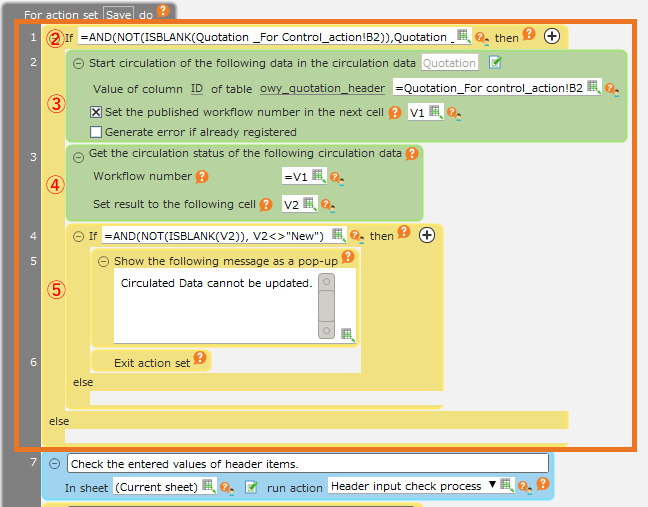
[Old version] Add email sending function to single screen
Tip
App types that correspond to the explanations on this page are shown below.
- Report Type (Single Form Type)
See also
See "Check App type" for more information on app types.
Attention
This document describes how to set up CELF 3.6.1 and earlier.
For CELF 4.0.0 and later versions, see Add email sending function.
Put 'TO' email address on the sheet.
- Login to CELF and click the "Manage"button to open the Management screen.
Tip
The "Manage" button appears when you are logged in as anadministrator.
- Double-click the app you want to customize.
- Double-click the main sheet.
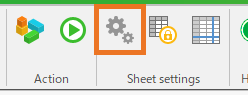
- Click the
 button in the sheet setting category.
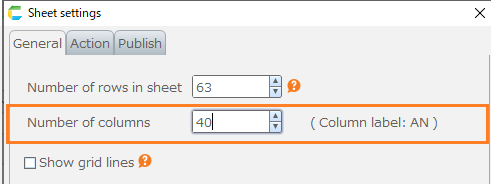
- Add one more column of sheet.

Tip
The number of columns displayed on the sheet is increased by one.
- Enter the email address to be sent to in the first line of the rightmost column of the sheet.
Hint
If you have more than one email address to send to, separate the addresses with a semicolon ( ; ).

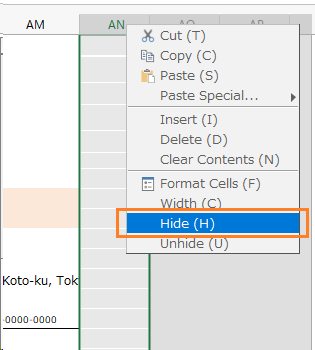
- Click on the column heading in the rightmost column of the sheet.
- Click Hide from the menu.

Tip
The column will be hidden.
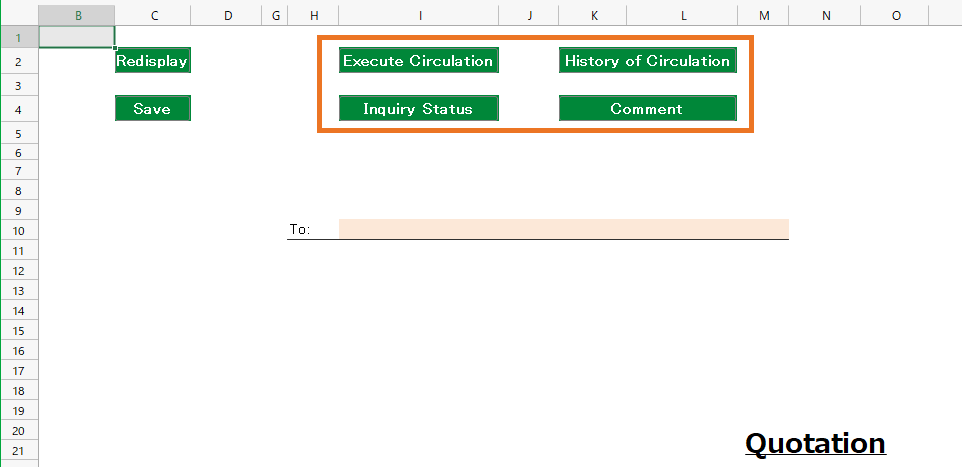
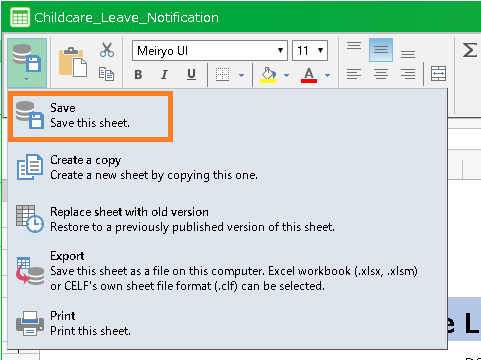
- Save the sheet. Click the
 button in the sheet category.

- Click "Save".
Hint
You can also press the following shortcut keys to save the sheet.
- Ctrl key + S key
Add email sending function to app
Tip
Open the "Save" action on the target input form screen
- Login to CELF and click the "Manage"button to open the Management screen.
Tip
The "Manage" button appears when you are logged in as anadministrator.
- Double-click the app you want to customize.
- Double-click the main sheet.
- Click the
 button.

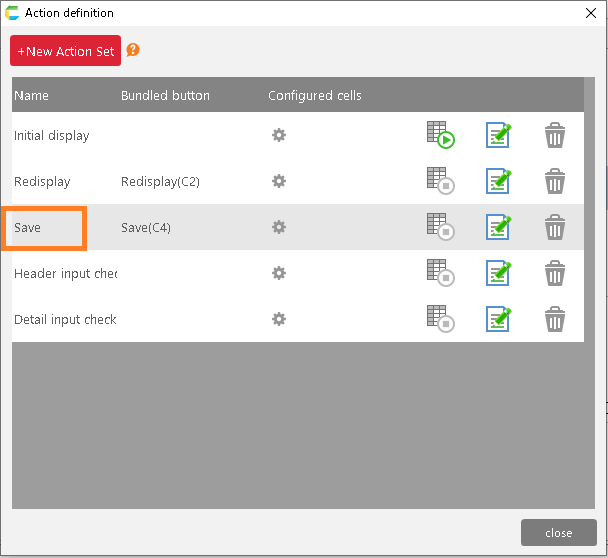
- Double-click on the "Save" action set.
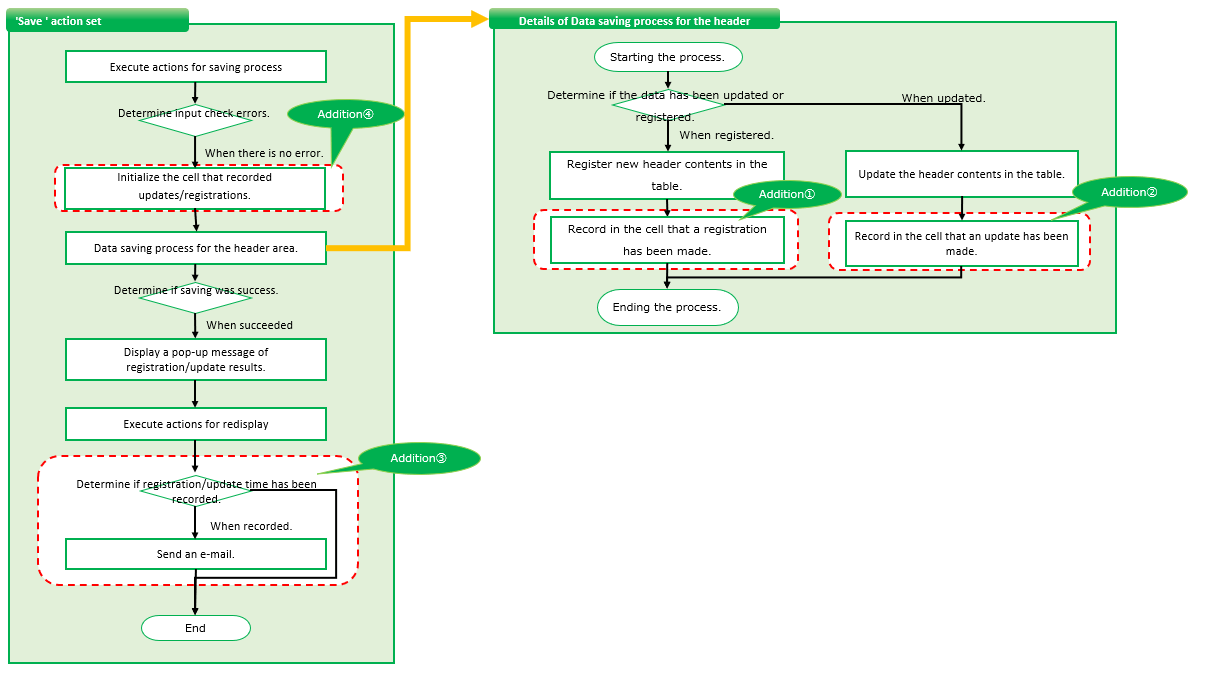
Customize the action when you register the data
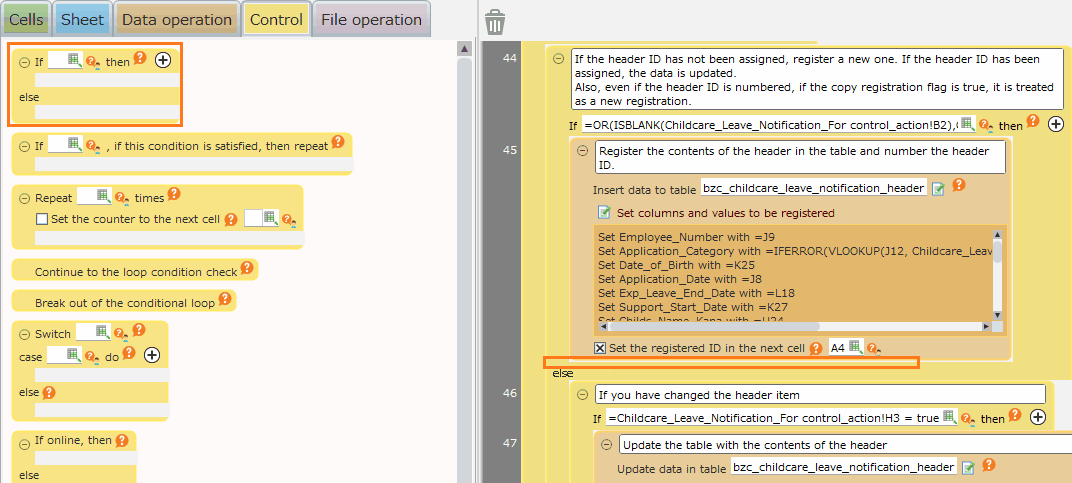
- Add the "Determine condition" action from the "Control" tab by dragging and dropping it under the "Register data in table" action.
Hint
Look for an action that comments, "Register the contents of the header in the table and number the header ID. "
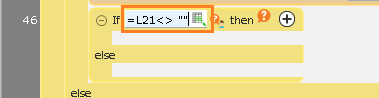
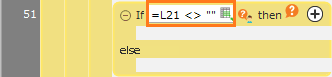
- Enter '=[Item Address] <> ""' as a branching condition for the "Determine condition" action you added.
Hint
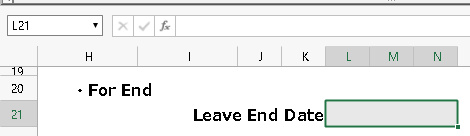
In the example, set the cell address for the "End date of holiday" entry field in the [Item Address] field.
Hint
This formula determines whether or not a value is entered in the "End date of holidau" entry field.
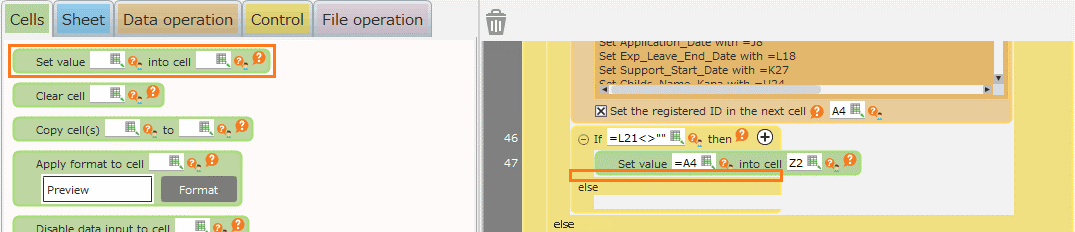
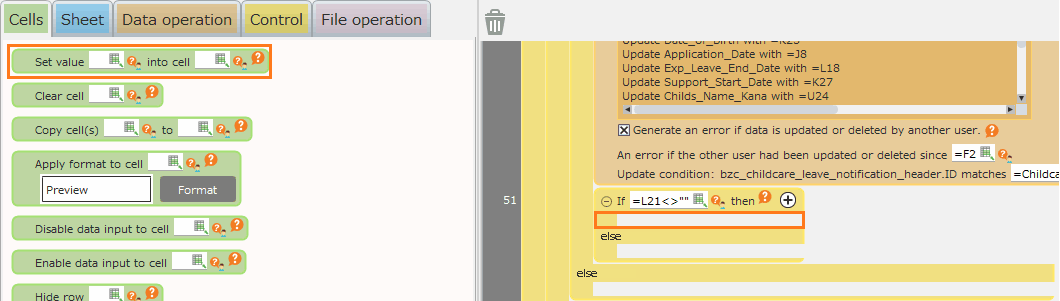
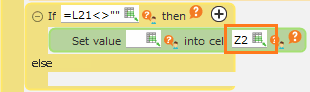
- Select the "Set value into cell" action from the "Cells" tab and drag and drop it onto the "If ~ then" part of the "Determine condition" action you added.
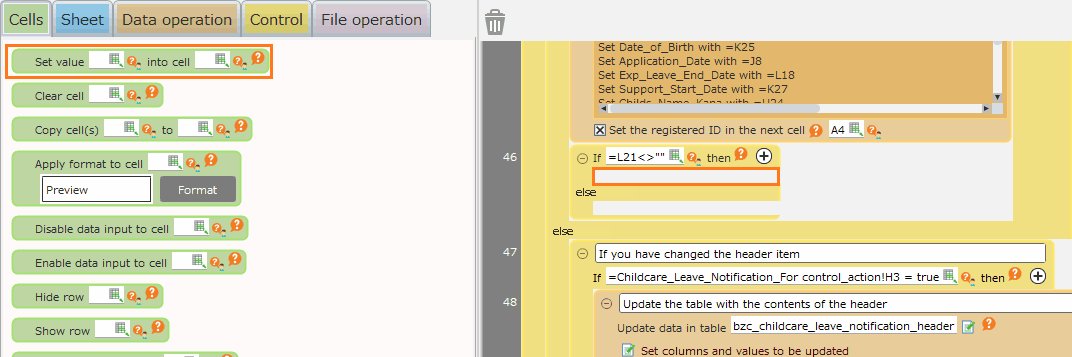
- Set the cell address of the added "Set value to cell" action to the second row of the column with the email address in the 'Put 'TO' email address on the sheet.' column.

Hint
Here, it’s the "Z" column that we’ve added and the cell in "Z1" that contains the email address.
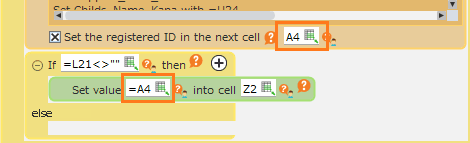
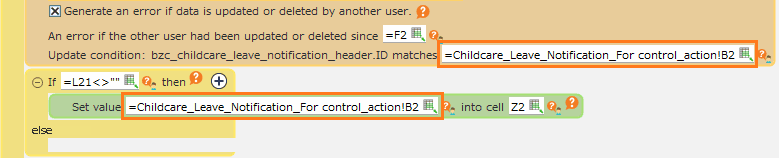
- Set the "Registration ID output cell address" of the previous "Register data in table" action in the cell input field of the added "Set value to cell" action.
- Select the "Set value into cell" action from the "Cells" tab and drag and drop it under the action you added in step 3 to add it.
- Set the cell address of the added "Set value into cell" action to the third row of the column with the email address in the Put 'TO' email address on the sheet. column.
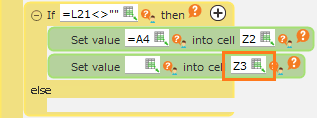
Hint
Here, it’s the "Z" column that we’ve added and the cell in "Z1" that contains the email address.
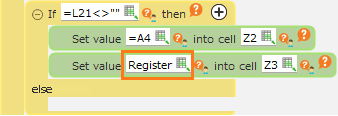
- Set "Register" in the value entry field of the added "Set value into cell" action.
Customize the action when the data is updated
- Add the "Determine condition" action from the "Control" tab by dragging and dropping it under the "Update table data" action.
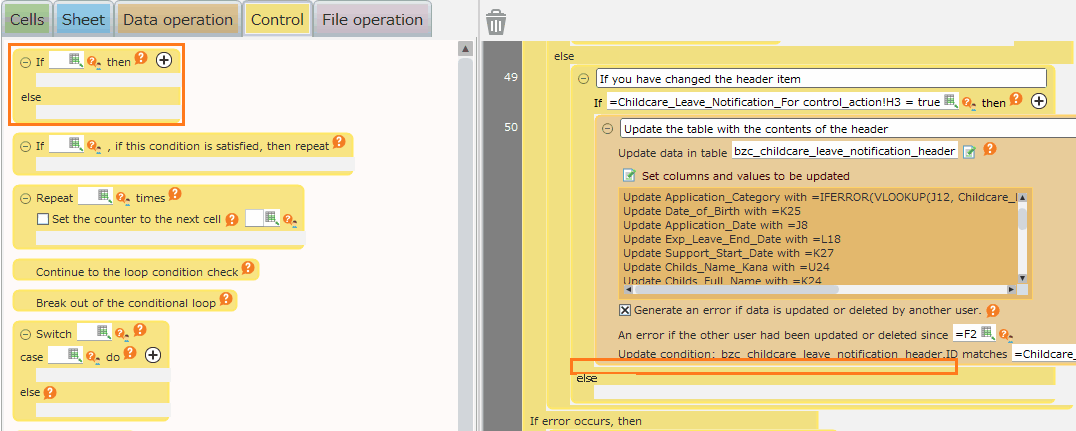
Hint
Look for the action commented as "Update the table with the contents of the header".
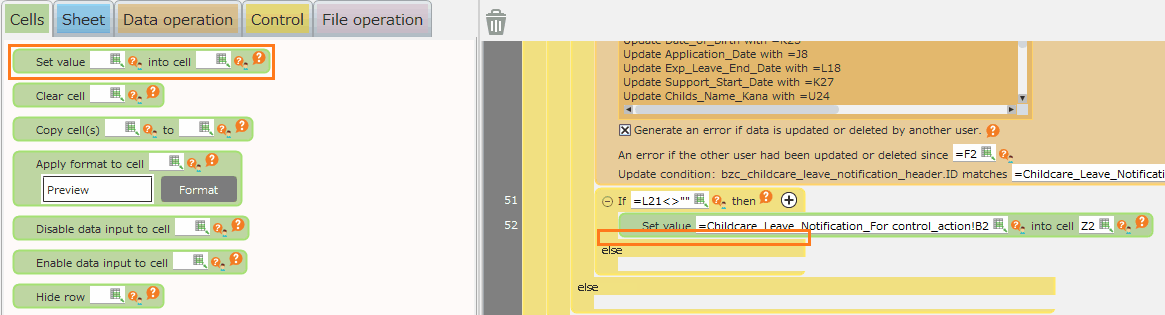
- Enter '=[Item Address] <> ""' as a branching condition for the "Determine condition" action you added.
Hint
In the example, set the cell address for the "End date of holiday" entry field in the [Item Address] field.
Hint
This formula determines whether or not a value is entered in the "End date of holidau" entry field.
- Select the "Set value into cell" action from the "Cells" tab and drag and drop it onto the "If ~ then" part of the "Determine condition" action you added.
- Set the cell address of the added "Set value to cell" action to the second row of the column with the email address in the 'Put 'TO' email address on the sheet.' column.
Hint
Here, it’s the "Z" column that we’ve added and the cell in "Z1" that contains the email address.
- Set the values to be set in the added "Set value into cell" action to the same formula as the update condition of the previous "Update tabledata" action.
- Select the "Set value into cell" action from the "Cells" tab and drag and drop it under the action you added in step 3 to add it.
- Set the cell address of the added "Set value into cell" action to the third row of the column with the email address in the Put 'TO' email address on the sheet. column.

Hint
Here, it’s the "Z" column that we’ve added and the cell in "Z1" that contains the email address.
- Set "Update" in the value entry field of the added "Set value into cell" action.

Add the "Send email" action.
- Select the "Determine condition" action from the "Control" tab and drag and drop it to the bottom of the action set to add it.
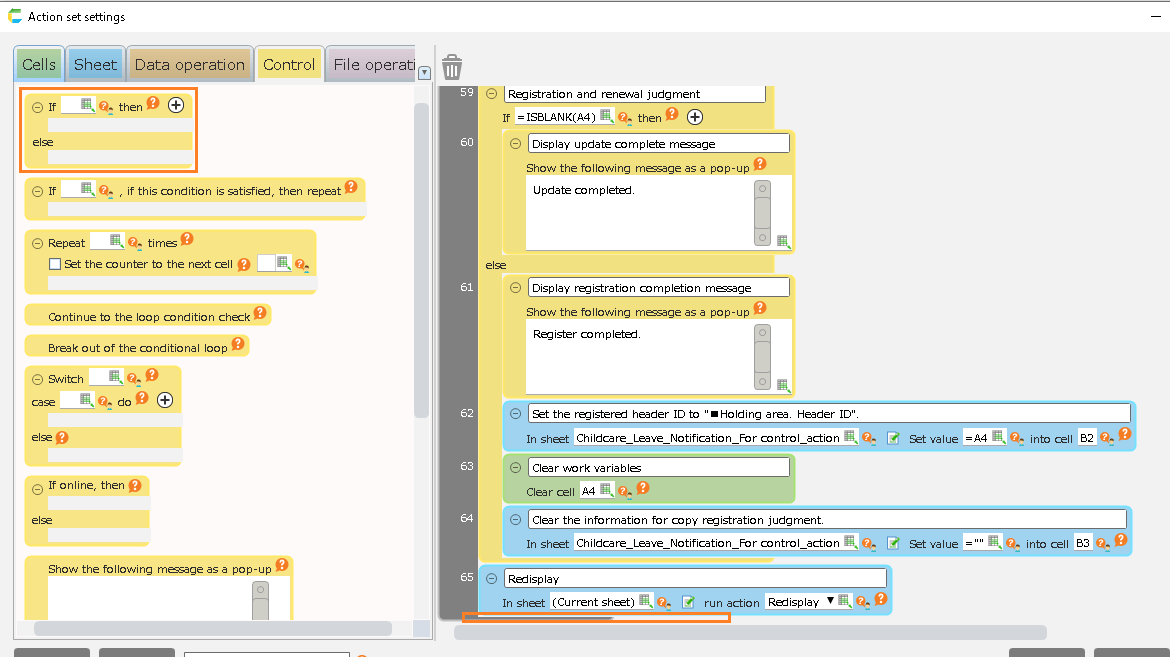
- Enter "=[Registration ID output cell address] <> """ as a branching condition for the "Determine conditino" action you added.
Hint
In our example, we would set [Registration ID output cell address] to the second row of the column containing the email address in the Put 'TO' email address on the sheet. column.
Hint
The formula in the figure determines if the current time is being output or not.
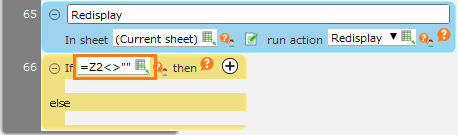
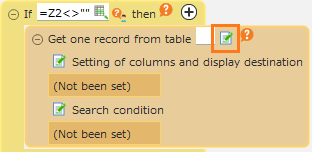
- From the "Data operation" tab, select the "Retrieve 1 case from the table" action and drag and drop it into the "If ~ then" part of the "Determine condition" action you added.
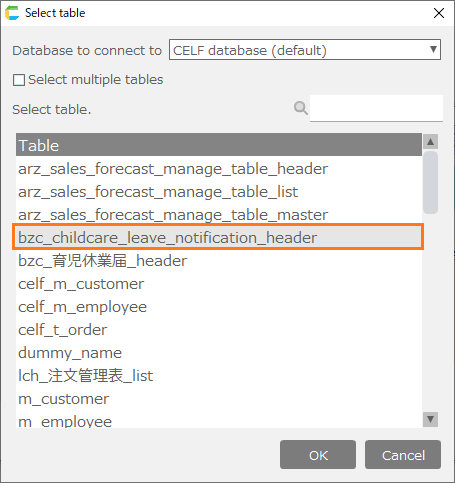
- Select the source table of the "Retrieve one item from the table" action. Click the
 button.
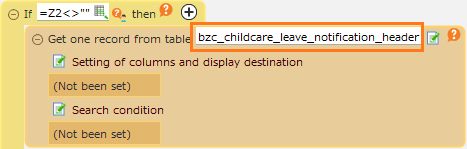
- Double-click the table you are using in the input form screen.
Hint
The name of the table you double-clicked will be displayed in the table from which you want to retrieve data for the "Retrieve one item from the table" action.
Hint
You can see the table you are using from the "Register data in table" action in the same action set.

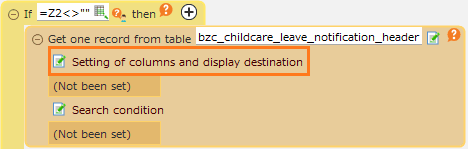
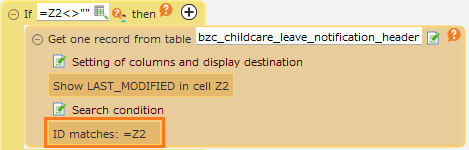
- Set the data to be retrieved and the data output destination for the "Retrieve one item from the table" action. Click on the "Setting of columns and display destination" link button.
- Click on the "(Select column)" part of the "Setting edit of columns and display destination" dialog, and then click on "[Table name used in the app].LAST_MODIFIED".
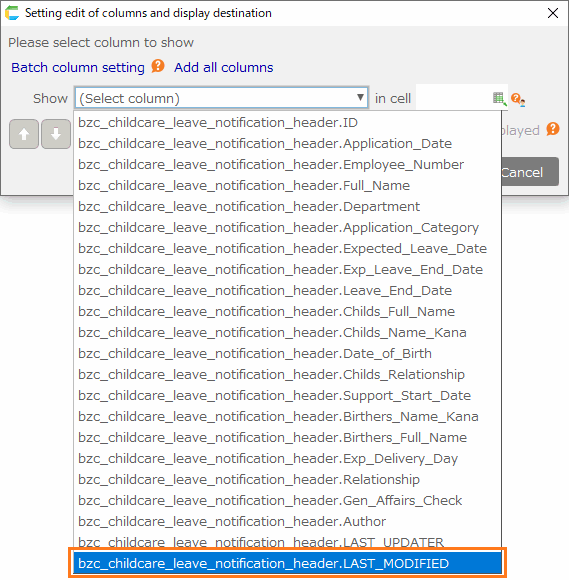
Hint
In the example, [table name used in the app] is "bzc_childcare_leave_notification_header".
Hint
"[Table name used in the app].LAST_MODIFIED" is the data of the data’s update date.
- Set the data output destination for the "Setting edit of columns and display destination" dialog to the second rowof the column with the email adress in Put 'TO' email address on the sheet. .
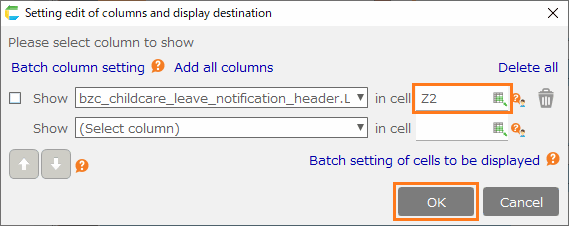
Hint
Here, it’s the "Z" column that we’ve added and the cell in "Z1" that contains the email address.
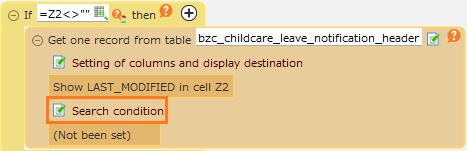
- Set the search condition of "Retrieve one item from the table" action. Click the "Search condition" link button.
- For the "XX" part of "XX matches YY" from the search condition setting screen, select "[Table name used by the app].ID".
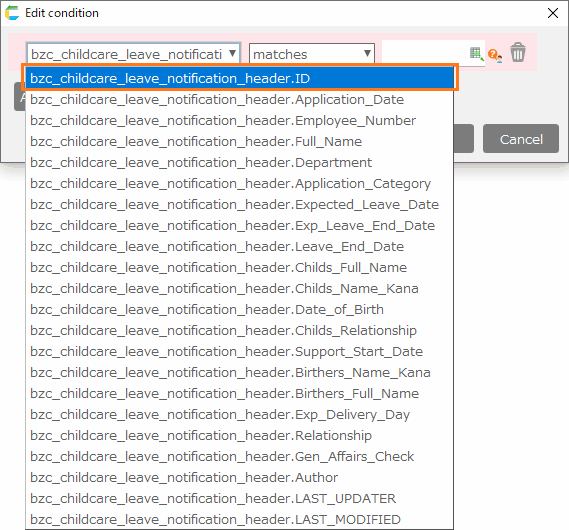
Hint
In the example, [table name used in the app] is "bzc_childcare_leave_notification_header".
- For the "XX" part of "XX matches YY" from the search condition setting screen, enter "= [The second row of the column containing the email adress in Put 'TO' email address on the sheet. ]".
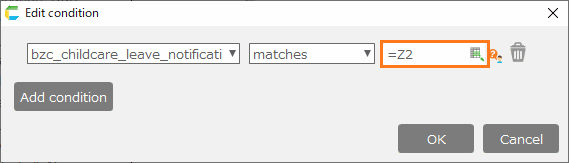
Hint
Here, it’s the "Z" column that we’ve added and the cell in "Z1" that contains the email address.
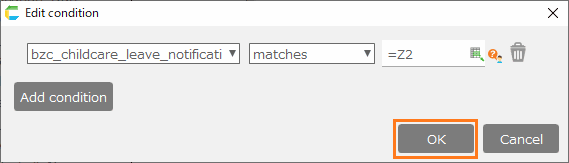
- Click the "OK" button.
Hint
The search condition is set for the action.
- From the "Data operation" tab, select the "Send email" action and drag and drop it under the "Retrieve one item from the table" action you’ve added.
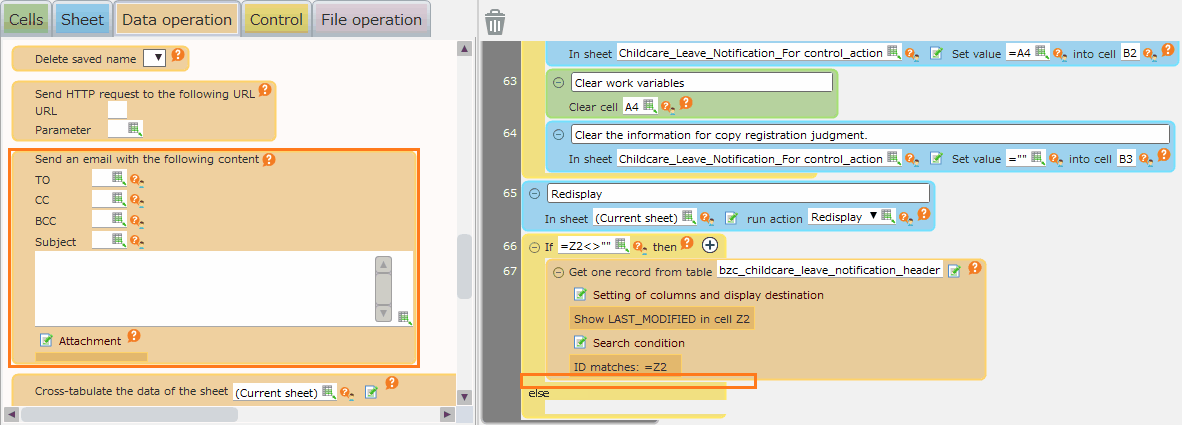
- Set a cell with an email address in 'Put 'TO' email address on the sheet.' to the destination of the "Send email" action you added.
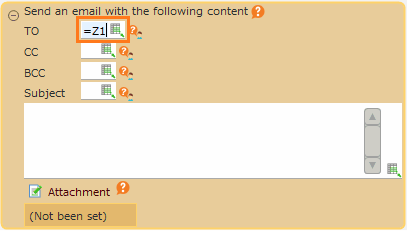
Hint
In the example, the email address is listed in the cell in "Z1".
- Set the subject line of the "Send email" action you added to "[App Name] & [Work Category] & "Saved transaction completion notification"".
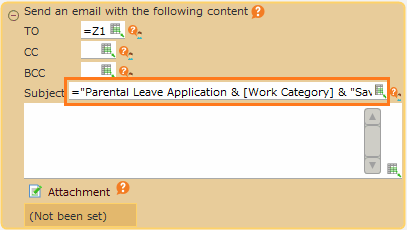
Hint
In our example, we will set "Parental Leave Application" in the [App Name].
Hint
In our example, we will set the third line of the column with the email address in Put 'TO' email address on the sheet. in the [Work Category].The Work Category will be displayed as "Update" or "Register".
- Set the body of the added "Send email" action to '"Updater:" & USER.ID() & "Update Date:" & [Updated date time output destination cell]'.
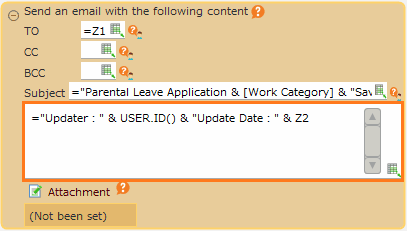
Hint
"USER.ID()" obtains the ID of the user currently logged in to CELF.
Hint
In our example, we will set [Updated date time output destination cell] to the second line of the column with the email address in Put 'TO' email address on the sheet. .
Tip
The body of this email will contain the following information
- ID of user who updated
- Last Updated
Initializing Data Update Information
- Select the "Clear cell" action from the "Cells" tab and drag and drop it onto the "Output error information" action to add it.
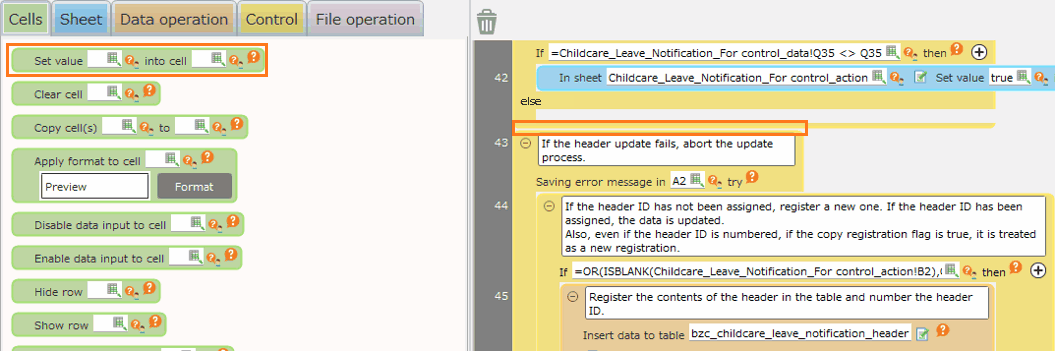
Hint
Look for the action commented "If the header update fails, abort the updateprocess".
- Set the second row of the column containing the email address in the cell entry field of the "Clear cell" action you added with Put 'TO' email address on the sheet. .
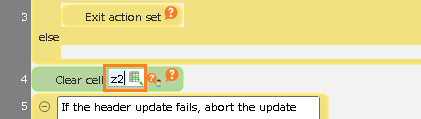
Hint
Here, it’s the "Z" column that we’ve added and the cell in "Z1" that contains the email address.
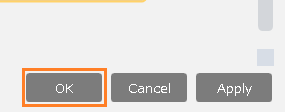
- Click the "OK" button.
Attention
If you don’t clear the cell, the second time you save it, the previous data will remain intact.Be sure to clear any cells that are temporarily used in an action, as leaving data intact can cause problems.